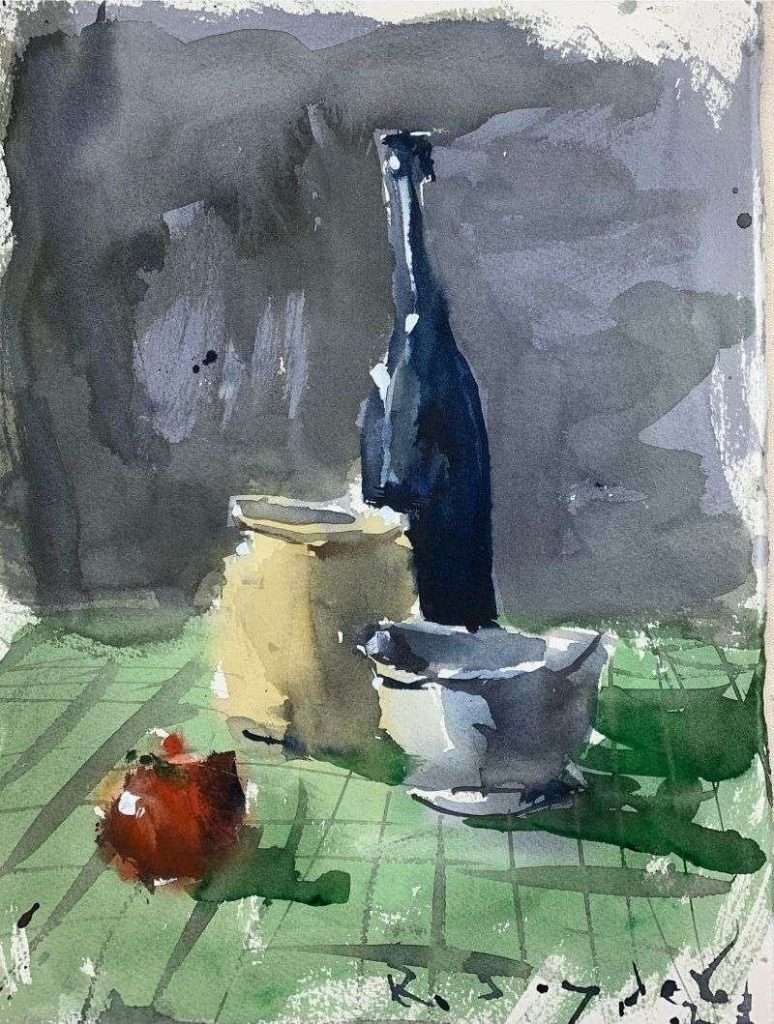
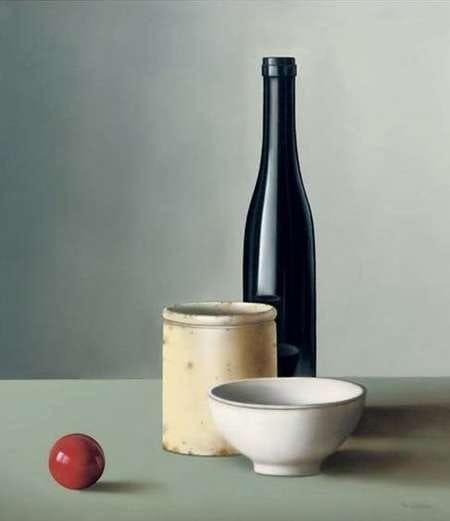
Step-by-Step Guide: Painting a Watercolor Still Life
Before teaching watercolor, I shucked scallops on a 100ft boat at 2am with roughnecks. Here's how those chaotic nights taught me everything about loose, confident painting techniques that actually work.

Before we dive into painting loose watercolor still life, here's something that might surprise you - did you know I used to commercial fish back in the day? Picture this: me the back deck of a 100ft scallop boat with a bunch of rough deckhands, being the only guy with a full set of teeth, shucking scallops at 2am in the middle of nowhere. Man, how things have changed... from handling rough seas to handling watercolor washes!
Want the full roadmap? Visit the Watercolor Hub for free courses, techniques, washes, and more step-by-step skill paths.
But here's the thing - those nights on that rocking boat actually taught me everything I know about painting loose, intuitive watercolors. When you're working in conditions where you can't control anything, you learn to work WITH what's happening instead of fighting it.
The Power of Painting Back-to-Back Studies
One technique I love is creating multiple versions of the same still life setup, moving from tight to loose. It's like doing the same fishing route twice - the first time you're learning the waters, the second time you can really let loose and work with confidence.
When you've just finished a more controlled version, you're already familiar with the subject. You know what to expect, so you can focus on something completely different - like letting the paint dance and flow naturally.

Starting with the Background: Go with the Flow
I begin with a neutral tint background - usually whatever's already mixed on my palette. You know, working on that scallop boat taught me something crucial about going with the flow. When you're on a rocking boat at 2am, you can't fight the motion - you have to work WITH it. Same principle applies to watercolor backgrounds.
If that first wash looks too dark, don't panic. Clean your brush, dip it in water, and blend it back into the wet paint. Those roughneck fishermen taught me that fighting the current never works - whether it's ocean waves or watercolor washes.

Embracing Wet-into-Wet Techniques
This is where the magic happens - dropping vivid greens for the tabletop while everything's still damp. I let the brush dance around more freely, less cautious than my tighter version.
After spending nights on a boat where anything could happen, being "less cautious" with watercolor feels pretty tame. Trust me, if I survived commercial fishing with all my teeth intact, you can survive a loose brushstroke!
When Paint Bleeds - Let It Happen
Here's where my scallop boat experience really kicks in. When I apply thick paint for the bottle and I know that background is still damp, it's going to bleed. And you know what? That's okay.
Those fishermen taught me to let things happen naturally. If a wave hit us wrong, we didn't fight it - we rode it out. Watercolor's the same way - when that yellow bleeds into the white bowl, when colors run into each other, sometimes you just have to let that paint do what it wants to do.
Working While Everything's Dry: Regaining Control
Once everything dries, you get control back. It's like when the sea calms down after a rough patch - suddenly you can work with precision again. Whatever you put down now will hold its shape better.
But here's the key - don't paint over all those happy accidents. Those bleeding colors and soft edges are what give your painting life. The challenge is doing just enough negative space painting to give form to your objects without losing that beautiful, loose quality.
The Art of Knowing When to Stop
This is probably the hardest lesson, and it's one I learned the hard way on those scallop boats. There comes a point where you have to resist the urge to fuss and overwork things.
When I'm adding that cherry red to the apple, it might be too much, but I've learned to live with imperfection. On the boat, we had a saying: "Good enough to get the job done." In loose watercolor painting, imperfections are what make the piece work as a whole.
Switching Tools and Staying Loose
Just like switching from shucking scallops to sorting them (different tools for different jobs), I switch from my liner brush to a pointed round for the final shadows and details. But I keep those brushstrokes loose and interesting - not trying to copy everything exactly.
At this point, I'm not even looking at the reference photo anymore. I'm reacting to what's happening on the paper, just like I learned to react to changing conditions on the boat.
Adding Final Touches with Confidence
Those final blue stripes I add? Pure intuition. Sometimes a painting needs a little extra movement, a little more interest. It's like when you're working through the night and you add a little coffee grounds to your mouth for that extra energy boost (yes, that's a real thing from my fishing days - don't ask!).
The titanium white reflections give those final touches of light, bringing everything together.
The Beauty of Imperfection
Looking at the finished piece, I love the imperfections. Things aren't perfectly rendered, but they're cohesive. They work together as a whole - kind of like that misfit crew I worked with on the scallop boat. We weren't perfect individually, but we got the job done together.
Your Turn to Let Loose
The next time you're painting a still life, remember: don't fight the medium. Work with it. Let it bleed, let it flow, let it surprise you. And if you start getting too tight or worried about perfection, just think about me at 2am on a rocking boat, trying to keep my balance while shucking scallops.
If I can handle that and still keep all my teeth, you can definitely handle a little unpredictable watercolor!
Ready to try this loose approach? Set up a simple still life and give it a go. And hey, if you want to hear more stories about how commercial fishing prepared me for an art career, let me know - I've got plenty more where that came from!
Continue Learning
👉 Next stop: check out my Free Watercolor Painting Course or browse the Watercolor Tutorials Hub to keep building your skills.
👉 Follow me on Pinterest for daily watercolor inspiration!
If you enjoy these kinds of raw insights and loose watercolor demos, you’ll feel right at home here. Subscribe to Crafted by Robert and follow along as I share painting inspiration, tips, and behind-the-scenes stories straight from my garage studio. 👉 Subscribe to Crafted by Robert
My Toolbox
Here are the materials I use all the time and have for decades. I only buy from Blick Art but feel free to shop where you prefer.
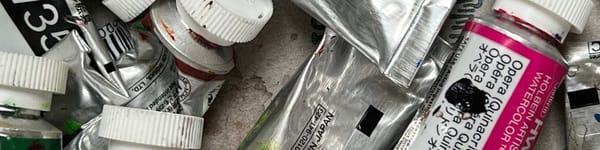
Recommended Watercolor Materials
-
Holbein Professional Watercolor Paints – 8 Essential Hues
Yellow Ochre, Cadmium Lemon Yellow, Ultramarine Blue, Cerulean Blue, Alizarin Crimson, Cadmium Red Light, Neutral Tint, Burnt Sienna -
Fabriano Artistico Watercolor Paper – 140lb Cold Press
Buy full sheets and cut into quarter sheets for best value -
Silver Jumbo Wash Brush
Great coverage, excellent quality for the price -
Princeton Neptune Point Rounds (No. 12 & 6)
Reliable and affordable detail & wash brushes -
Princeton Neptune Dagger (1/2")
Versatile size for lines, edges, and detail work -
Masterson Aqua Pro Palette
Durable, with deep wells for generous mixing space -
Gator Board
Lightweight, long-lasting painting support board -
Holbein White Gouache
Optional for highlights and fine details - Miscellaneous: plastic water containers, paper towels, masking tape
This post contains affiliate links. If you make a purchase through these links, I may earn a commission at no extra cost to you.