Urban Cityscapes in Acrylic & Collage
Discover how I create vibrant urban cityscapes using acrylic and collage, from the first loose sketch to the final textured painting.


Urban-inspired collage and mixed media painting tutorial, built with my go-to fixer-upper secret. Few things are more exciting than starting with zero ideas… until I remember I’ve got a drawer full of golden rejects. The possibilities are endless.
I used to be embarrassed and defeated by those “inferior” paintings. Now I celebrate them. When I pull one out, I think: “Yes! Another fail that’s about to become a collage and mixed media winner.”
Urban scenes have a rhythm all their own—cars, streets, figures walking and signage transform into patterns that naturally push toward abstraction. In this lesson, I’ll take you behind the scenes of my process, from loose sketches to final acrylic and collage layers.
Want to go deeper with collage & mixed media?
👉 Explore the Mixed Media Hub
👉 Browse Collage Painting Ideas
👉 Dive into the Garage Collage Barrage
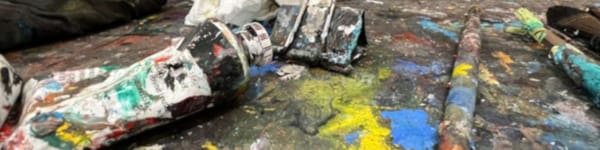
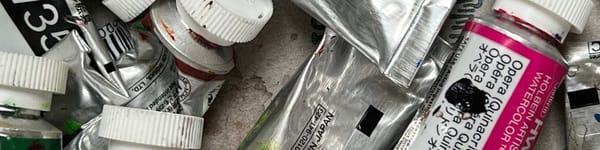
Supplies I Use All the Time
These are my preferred materials for almost every mixed media project I create. Do I add new ingredients occasionally? You betcha! But these are the go-to materials I rely on most. I know how they behave, how they layer, and how to get the best results from them.
- Acrylic Paints – I only buy heavy body for their thick texture and thin them with water for fluid glazing and washes. See my favorite set →
- Watercolors Paints – Great for transparent layers and unexpected color effects. Exact colors are below. Shop my watercolor picks →
- Acrylic Inks - Excellent way to add transparent layers to mixed media artwork. Mixes well with everything! See the inks →
- Synthetic Acrylic Brushes - You need a variety and I have listed my go-to's below. I use Princeton brands, very dependable! See the brushes →
- Watercolor Brushes - Get a decent grade but avoid all-natural as synthetic blends have come a long way. Shop my picks →
- Collage Papers – A mix of pattered, and printed paper you see me use is from Hobby Lobby, and it's usually found in the scrapbook section. Browse paper packs →
- Palette Knives – Good to have around for scooping paint and smearing techniques. See what I use →
- Blick Super Value Canvas Packs - Comes in many small and medium sizes up to 20x16". Love em'. Best bulk stretched canvas →
- Mixed Media Paper – Sturdy enough to handle wet and dry techniques. Strathmore is the way to go! Best paper for mixed media →
- Watercolor Paper - Top choice is 140 lb. cold press by Fabriano Artistico. Cost effective and crispy white. Best watercolor paper →
- Caran d'Ache Water-Soluble Crayons – Perfect for adding scribbles and linear interest to mixed media art. Check them out →
- Gator Board - Best firm boards you can find! Buy a large sheet and cut out down. These are used as backing for my paper when I paint. Check it out →
- Mod Podge - Reliable and affordable adhesive for paper, thick and thin. And get the Matte! View the glue →
My hues; Cadmium Yellow, Yellow Ochre, Alizarin Crimson, Cadmium Red Light (or Medium), Ultramarine Blue, Cobalt Blue, Burnt Sienna, Titanium White
My acrylic brushes; #12 Large round, 2x Medium rounds, 2x Detail, or liner brushes, Large and medium fan brush, a few medium size bristles and old, small house painting brush for glue.