My Take: Teacher Attempts 1-Minute Car Challenge
I took my own 1-minute car drawing challenge - same rules, same pressure, same timer. Here are my honest results: which cars worked, which ones had me scrambling, and what I learned about the foundation method under pressure. Real teaching means showing the struggles, not just the successes.


Alright, time to put my money where my mouth is.
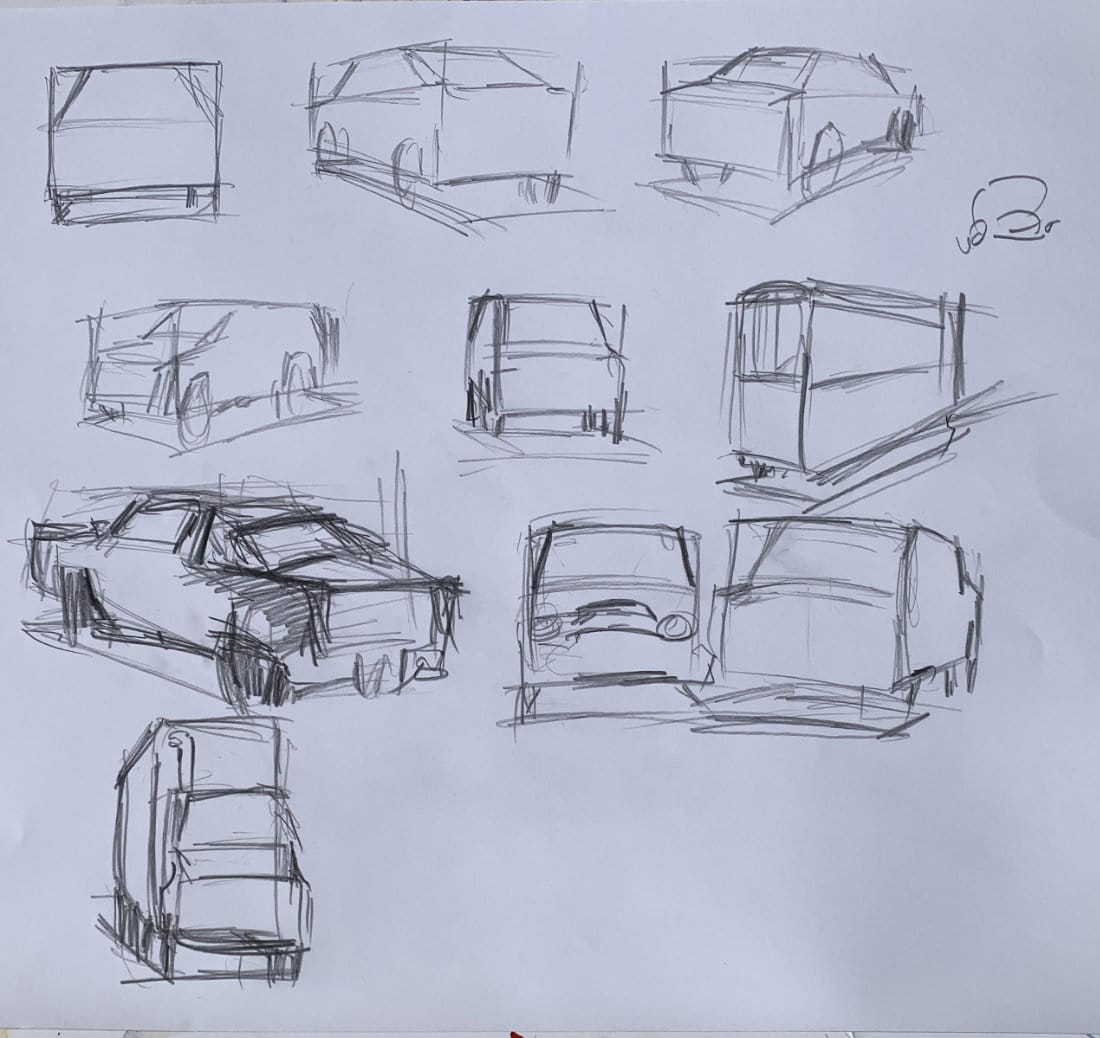
You just got the assignment - 10 cars, 1 minute each, car drawing foundation method only. Now it's my turn to face the same timer, the same pressure, and honestly, the same occasional panic when things aren't going as planned.
I recorded myself doing this exact challenge with these same car images. No cheating, no do-overs, and definitely no editing out the parts where I'm talking too much and running out of time.
More drawing lessons? Visit the Free Drawing Tutorials & Courses hub →
Watch video: hit play and see how I approached the drawing car assignment.
Here's what actually happened...
Car #1: The "Easy" Start
This one's basically flat-on, so no tricky perspective. Just a rectangle that's wider than it's tall, shadow underneath, wheels dropping down about halfway.
Pretty straightforward, right? Set the tone, build some confidence.
Reality check: Even the "easy" ones require you to see that basic box structure first. No jumping to details.
Car #2: First Real Perspective Test
Now we're talking - this corner is definitely closer to me. Got my angles going this way and that way, levels off at the top.
Here's where I started getting into the rhythm of the method. Find that closest corner, establish the angles, shadow underneath. Then start chiseling out where the hood meets the windshield.
Confession: I totally cheated a little here and took extra time. Hey, I'm human.
Car #3: Talking Too Much, Losing Time
This is where reality hit. I'm explaining my process while drawing, and suddenly I'm behind. Had to speed up, focus on just the essentials.
Corner closest, going away, halfway marks for the cab, shadow underneath. Boom, done.
Lesson learned: When you're under pressure, stop narrating and just draw. The method works, but only if you trust it.
Car #4: Long Front, Different Challenge
This angle showed way more of the front than the side. Long front section, rounded back, tires where they should be.
Starting to feel the flow now. The box method was helping me see these different perspectives without getting confused.
Car #5: Almost Square, But Not Quite
Looked nearly square from this angle, but that front corner was still slightly closer. Small angle, not much side showing, rounded back section.
Key insight: Even when it looks "flat," there's usually still some perspective happening. Trust what you see, not what you assume.
Car #6: The Curve Ball
Taller vehicle - this one threw me off! Much taller than the others, different proportions, barely any tire detail visible.
This is where the challenge gets real. Not every car is a sedan. Trucks, SUVs, different vehicle types all use the same principles but different proportions.
Honestly? I'd like to go back and do this one again. It felt rushed.
Car #7: The "Super Cool" One
Long, sleek car. That closest corner, angles moving away, had to complete my box to really see the structure.
Got the basic volume down, shadow underneath, but didn't quite get the length right the first time. Made some adjustments as I went.
Real talk: Sometimes you realize partway through that your initial proportions were off. Adjust if you have time, but don't start over.
Car #8: Straight-On Beast
Big, beefy front view. Almost like a wall coming at you. Just a big box with shadow underneath, start chiseling out the windows, hood, grill area.
When cars face you directly, it's more about vertical proportions and less about perspective angles.
Car #9: The Tricky One
This corner barely closer to us, running away at a sharp angle. Could barely see that front tire, back tire heading off into the distance.
This was genuinely challenging. Extreme perspective, minimal visual information, had to really trust the box method to make sense of it.
Car #10: The Tall Finale
Another tall one, but this time with serious perspective. Really going back in space, shadow way underneath, cab about two-thirds up.
Big wheels, some kind of pipe or equipment up top. Different from a regular car, but same basic approach.
What I Learned About Myself
I talk too much when I'm nervous. Those first few cars, I'm explaining everything instead of just drawing. Under real pressure, you need to shut up and focus.
The method actually works under pressure. Even when rushing, that box-first approach kept me grounded. I wasn't guessing about where things should go.
Some cars are just harder. Car #6 and #9 gave me real trouble. Not because the method failed, but because the proportions and angles were genuinely challenging.
Speed reveals your true skill level. When you can't fix mistakes or think too hard about each line, you see what you actually know versus what you think you know.
The Real Point Here
Look, I didn't create perfect car drawings in these 60-second bursts. That wasn't the goal.
What I did was prove to myself (and hopefully to you) that the foundation method works even when you're rushed, even when you're talking, even when you hit challenging angles.
Here's the thing most people don't realize: In actual art - paintings, illustrations, whatever - cars are usually small parts of bigger compositions. They're sitting in cityscapes, they're background elements, they're details in larger scenes.
You're not trying to create car show portraits here. You're building the foundation so that when you need a believable car in your watercolor cityscape, you can drop one in without it looking like a confused rectangle.
Loose, gestural, minimal detail - but believable. That's what we're after.
My Honest Assessment
Cars 1, 2, 4, 7, and 8: Felt good about these. Method worked, proportions made sense, would fit well in a larger composition.
Cars 3 and 10: Rushed but adequate. Got the main idea down even if they're not beautiful.
Cars 5 and 6: Okay, but could be stronger. Different proportions threw me off slightly.
Car 9: This was my struggle car. Extreme perspective is just hard, period.
Overall: 7 out of 10 feel solid, 2 are adequate, 1 was genuinely challenging. That's actually not bad for rapid-fire sketches under pressure.
What's Next
You've seen the method, you've gotten the challenge, now you've watched me work through it with all the real struggles included. Links are below in case you mixed the other vids in series.
Complete Car Drawing Series:
- How to Draw Cars: The Foundation Every Artist Needs - Learn the systematic box method
- The 1-Minute Car Drawing Challenge - Put your skills to the test
- My Take: Teacher Attempts 1-Minute Car Challenge ← You are here
- Student Results & Common Mistakes
- Tracking Lines - Students struggled with this common issue, here's how to fix it
The goal isn't perfection. It's building that visual vocabulary so complex subjects become approachable instead of overwhelming.
Your Turn
If you haven't done the challenge yet, now's the time. Don't wait until you feel "ready" - part of the learning comes from the pressure and the mistakes.
And if you've already completed it, how did your results compare to mine? Which car was your struggle car? I'm betting it was either #6 or #9 - those seem to trip up everyone.
Remember: this is foundation building, not performance art. Every sketch that helps you see structure more clearly is a win, even if it doesn't look like a magazine illustration.
Continue Learning
If you enjoyed this hand drawing course, explore even more lessons on our Free Drawing Tutorials & Courses Hub — including the complete How to Draw – Beginner’s Course.
Want new tutorials delivered to your inbox? Subscribe here and get free lessons, tips, and inspiration sent directly to you.
Which car in my attempt surprised you most? And more importantly - how did YOUR 1-minute challenge go? Drop a comment and let me know which ones felt natural and which ones had you scrambling when that timer went off!