Student Head Drawing Critiques and How to Fix Them
You did the assignment. Now see what tripped other students up - and how to fix it. Common mistakes include wrong neck angles, missing skull volume, ear placement errors, and getting lost in details instead of structure.

You did the assignment. You watched my demo. Now let's look at what tripped people up.
These aren't about perfection. They're about understanding if you're actually grasping the forms - or if you're still drawing contours and getting lost in details.
Did you know? This lesson is part of a complete step-by-step head drawing course. If you haven't watched from the beginning I highly recommend you do so to get the most out of this lesson.
Watch the full critique video to see detailed corrections:
The Most Common Mistake: Missing the Big Picture
Before pencil touches paper, spend 10-15 seconds asking:
- Which way is the head tilting?
- Which way is the neck moving?
- What am I seeing more of - top of head, bottom of chin, side of face?
Get that right first. Everything else builds on it.
If your neck angle is wrong, the entire drawing falls apart. No amount of perfect eyes and noses will save it.
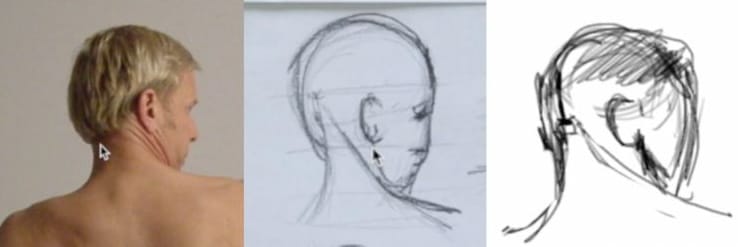
Mistake #1: Ear Placement on Tilted Heads
When a head tilts down (you're looking at the top), ears get pushed higher on the skull.
When a head tilts up (you're looking underneath), ears drop lower.
Most people keep ears at eye level regardless of angle. That destroys the three-dimensional feeling.

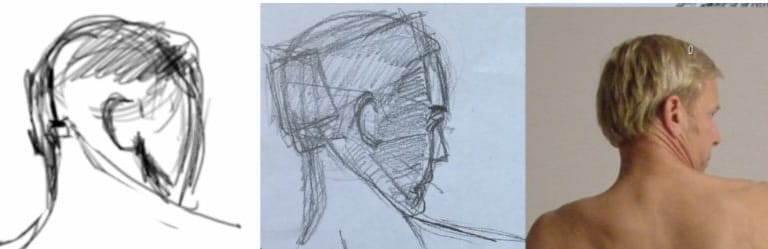
Mistake #2: Chopping Off the Skull
The skull doesn't stop at the ear. It goes behind and above the ear.
Common error: Drawing the head as a ball that ends where the ear starts. Reality: The skull wraps all the way around. Give it volume.
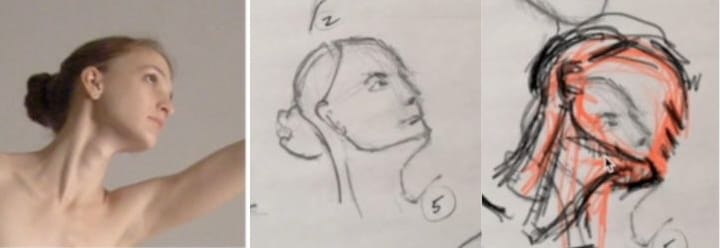
Mistake #3: Wrong Neck Direction
The neck in the reference is angling up and to the right. Your neck is angling up and to the left.
You just drew the opposite pose.
Fix: Think of the neck as a tube. Which way is that tube leaning? Match that angle before you do anything else.
Mistake #4: Ignoring Overlapping Forms
Top views require overlapping:
- Forehead overlaps nose
- Nose overlaps mouth
- Mouth overlaps chin
- Jaw wraps underneath
If you're not showing those layers, the drawing feels flat.

Mistake #5: Getting Lost in Details Too Early
Eyelashes. Perfect lips. Rendered hair.
All useless if the skull structure is wrong.
Stop drawing eyes. Start drawing volumes.
Think egg shapes, tubes, boxes. Get those right. Then add features.
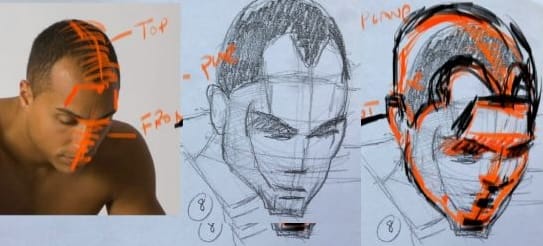
Mistake #6: Missing the Top Plane
Looking down on a head? You should see way more top-of-skull than face.
Most people draw it 50/50. Should be closer to 70% skull, 30% face.
The mask of the face gets foreshortened. The top of the head dominates.

How to Improve
- Simplify everything - Break heads into eggs, necks into tubes, ignore all details
- Get angles right first - Spend more time on the initial setup, less time rendering
- Check overlapping - Does the jaw wrap under the lip? Does the skull wrap behind the ear?
- Understand what you're seeing - Top view? Bottom view? Three-quarter? Adjust accordingly
- Stop hiding behind rendering - Drawing skills reveal weaknesses. That's the point. Fix them.
Your drawings show exactly how much you understand about structure. Use that feedback. Don't fight it.
That wraps Module 1!
You've learned skull construction, box method, master analysis, and tackled timed assignments. Module 2 will dive deeper into features, expressions, and advanced construction.
Keep drawing. Keep simplifying. Keep thinking in volumes.
Continue Learning
If you enjoyed this hand drawing course, explore even more lessons on our Free Drawing Tutorials & Courses Hub — including the complete How to Draw – Beginner’s Course.
Want new tutorials delivered to your inbox? Subscribe here and get free lessons, tips, and inspiration sent directly to you.


