The Pencil Test: Measuring Lean and Tilt on Any Pose
Your pencil isn't just for drawing. It's a measuring tool. Here's how to use it to find the exact lean and tilt of any pose, then refine that structure into organic, flowing gesture.

Your pencil isn't just for drawing. It's a measuring tool.
Here's how to use it to find the exact lean and tilt of any pose.
This lesson is part of the Figure Drawing Course - a complete free course teaching you to draw the human body from scratch.
Watch the full lesson: hit play and discover how a pencil can improve your figure drawing skills.
Why Your Pencil Works
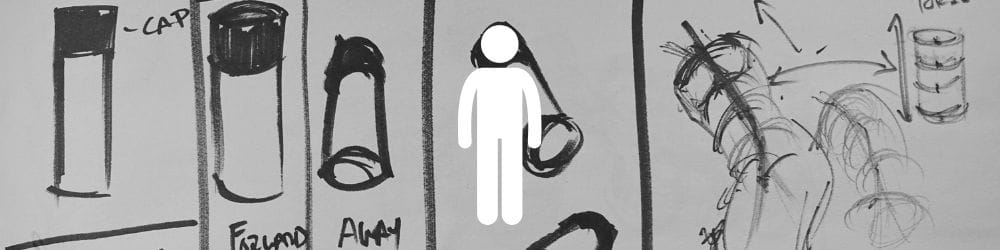
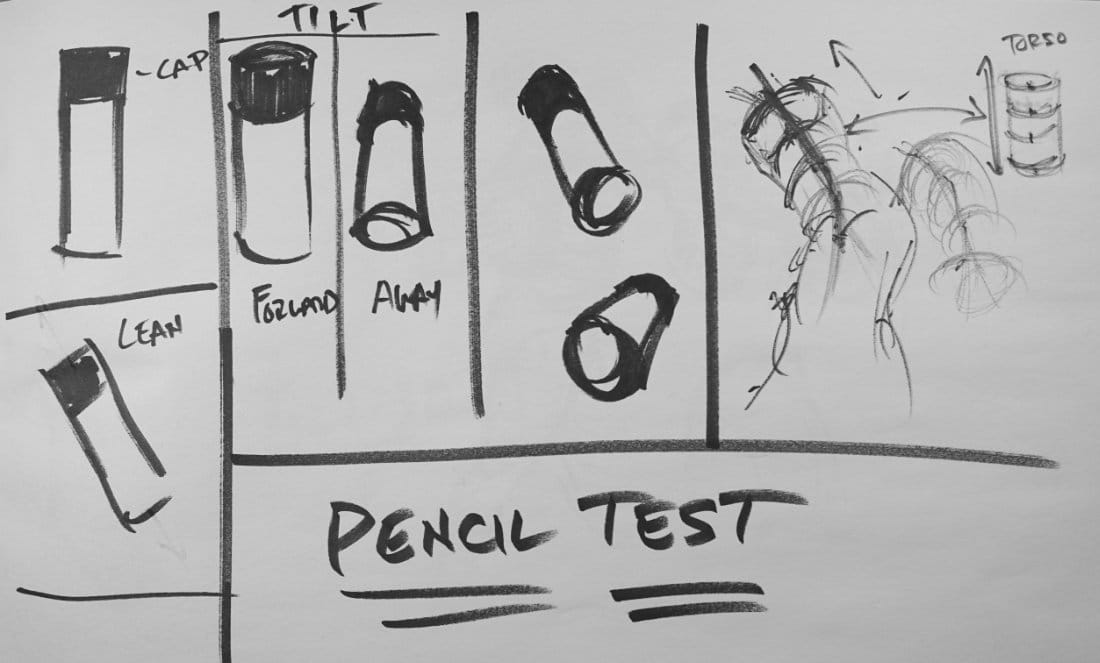
Look at your pencil. It probably has an eraser cap, a band, or some marking that wraps around it.
That band is a built-in measuring guide.
Hold it flat at eye level - the band looks straight. Tilt it toward you - the band curves. That curve tells you EXACTLY how much tilt you're seeing.
No band on your pencil? Wrap a piece of tape around it. As long as there's contrast, it works.
Lean vs Tilt (Again)
Lean = Left or right
Tilt = Toward you or away from you
Your pencil can measure both.
Hold it vertically and rotate it left or right - that's lean. Angle the top toward or away from you - that's tilt. Combine them? You're measuring complex angles.
How to Actually Use It
The technique:
- Close one eye (left eye if you're right-handed)
- Hold pencil over your shoulder (right shoulder for righties)
- Look down your arm at the pencil
- Match the angle to the model's torso (or limb)
- Transfer that angle directly to your paper
You're sighting down your arm like aiming a rifle. Find the angle on the model, hold it, bring it straight down to your paper.
Finding the Torso Angle
Say the model is leaning left. Hold your pencil vertically, then rotate it until it matches the torso's center line.
Got it? Transfer to paper - that's your axis line.
Now add the tilt. Is the torso leaning away from you? Those "over the form" lines curve more. Coming toward you? Different curve.
You're measuring structure, then adding gesture.
Landmarks Refine the Curve
Start with a straight axis line from the pencil test. Then refine it by finding landmarks:
Torso landmarks:
- Notch at top of ribcage (sternal notch)
- Bottom of ribcage (xiphoid process)
- Navel
- Pubic bone
Measure the angle between each landmark pair. The angle changes as you move down the torso.
Top to ribcage? One angle. Ribcage to navel? Different angle. Suddenly that straight line becomes a CURVE.
Structure gives you the rough angle. Gesture refines it into organic flow.
From Stiff to Alive
The pencil test gives you structure - corners and angles. That's your starting point.
But don't stop there. Use landmarks to find where the angle shifts. Connect those points with curves, not straight lines.
You go from stiff stick figure to flowing, organic form.
Practice This
Grab your pencil right now:
- Hold it flat - see the straight band
- Tilt toward you - watch the curve
- Lean it left - see the angle
- Combine lean + tilt - complex angle
Now apply that to a reference photo. Find the torso angle, transfer it to paper, refine with landmarks.
The pencil test works. Use it.
Course Navigation
Part of: Figure Drawing Course > Module 1: Foundation
← Previous Lesson: Simple & Characteristic
Next Lesson → Facing, Leaning, Tilting & Rotating
Continue Learning
If you enjoyed this hand drawing course, explore even more lessons on our Free Drawing Tutorials & Courses Hub — including the complete How to Draw – Beginner’s Course.
Want new tutorials delivered to your inbox? Subscribe here and get free lessons, tips, and inspiration sent directly to you.


