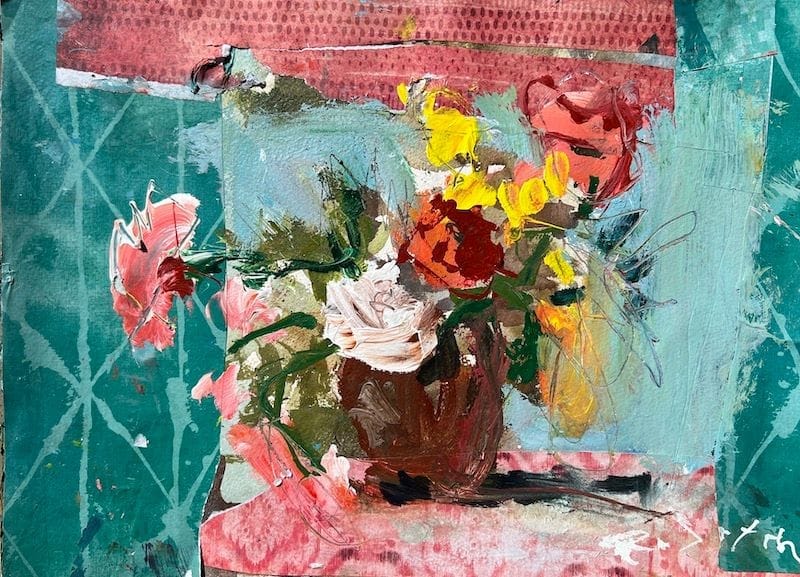
Mixed Media Flower Painting with Collage Borders
Paint your flowers in the center. Build the magic around the edges. How I discovered that putting collage around a painting instead of inside it creates instant depth and draws the eye exactly where you want it to go.

Using collage borders, and yes, mix and match the paper please, to your flower paintings adds an extra level of magic around the edges. How I discovered that putting collage on the outside, so around a painting instead of inside it creates instant depth and draws the eye exactly where you want it to go.
Check out the Mixed Media Hub for more great collage and mixed media ideas.
Most artists think collage belongs mixed into their paintings. I flip that approach completely—keep the painted subject clean in the center, then build collage elements around the outer edges. The result looks sophisticated instead of cluttered, and it's actually easier to pull off.
Watch: Flower painting with collage border step-by-step
Collage border video demo with flowers
This technique transforms a simple flower painting into layered mixed media art without the guesswork of integrating collage into painted areas. You're creating a frame that's part of the composition.
Why Collage Borders Work
- Visual flow: The border elements guide the eye inward toward your main subject
- Easy integration: No fighting to blend collage with wet paint—they occupy different zones
- Great way to up-cycle inferior art: Got rejects? Add a collage border and see the instant transformation
- Forgiving process: If border elements don't work, you can adjust without affecting the painted center, and/or continue to layer other mediums
Materials for This Project
- Surface: 140 lb. cold press watercolor paper or canvas (I'm using paper which is also a watercolor reject)
- Paint: Acrylics in your flower colors plus background tones
- Collage papers: Use either store bought scrapbook paper or handmade papers (from old sketches/paintings), newspapers, or decorative papers
- Adhesive: Matte gel medium or Mod Podge
- Brushes: An old house brush for adhesive, and whatever else you prefer or the actual painting. Probably good to have a variety of sizes.
- Tools: X-acto knife, scissors and paper towels.

Step-by-Step Process
1. Applying the Collage Border
- Start with applying glue to the outer edges of the surface, then place collage border paper in place
- Flip it over and give it a good smash to remove air bubbles
- Dry it in the sun, or with a hair dryer
2. Paint the Flowers
- This is the time to chunky it in! Start with big shapes
- Use confident brushwork, put it down and leave it alone, don't get fussy
- Add medium shapes and be sure to add subtle various to colors, avoid using the same red tome, change it up
- At this stage it's very raw, don't judge
3. Develop Other Areas
Start with smaller flowers, stems and leaves:
- Add the green hues to suggest leaves and stems
- Leave some holes on the green areas so it doesn't become too heavy
- Remember you are still chunking things in at this stage
- Look for opportunities to add smaller flowers, but not too many
4. Evaluate the Progress
- Take a few steps back and look at the painting
- Ask yourself, does this work? If yes, then proceed to the next step.
- If no, then ask yourself again, what is one thing I can do to make this better?
- Do it and back away again...if you see the one thing, do it!
- If you can't answer that questions, stop! Pin it up somewhere so that you can see it. One day it will speak to you. But don't push it! Overpainting and painting without purpose will lead to frustration.
5. Add Background and Details
- Assuming you were happy with stage 4 then start suggesting details, subtle light & shadows that will bring it to life.
- Add a pop of pure, fresh saturated color where light is bouncing off a key area of the flowers.
- Try adding some graphite scribbles to loosen up tight edges, or suggest form where things seem too loose, or shapeless.
- Step back frequently to assess the overall balance
The Border Building Strategy
- Try it on Reject Art: This is a perfect opportunity to recycle bad art. Just placing collage border paper around the edges immediately change the art.
- Vary the width: Use skinny and wide borders, they don't have to be the same, actually it's best if they aren't
- Mix various patterns: The collage borders do not need to match! Mix it up some to create variety and spontaneity.
- Trust the process: Borders breathe life into stagnant studio routines. Changing it up is where growth happens.
Troubleshooting Common Issues
- Overthinking it: Beauty is in the imperfections. Step back often to see how the painting is developing.
- Composition feels disconnected: Connect shapes through values. Shapes and objects need to connect and using values is a great way to do this.
- Too much contrast or intensity: Contrast is good so long as it's not everywhere. Intensity is the same way. A painting shouldn't shout at the viewer, there should be quiet spaces to balance the expressive qualities.

The Garage Artist Approach
This technique came from necessity—I had flower paintings that felt unfinished but didn't know how to push them further without overworking. Adding borders gave me a way to enhance without risking the painted areas.
The key is thinking of borders as part of the design from the start, not an afterthought. When you plan the flower placement with borders in mind, the whole composition feels intentional.
Variations to Try
- Seasonal borders: Use papers with seasonal colors around flower paintings
- Handmade papers: Build borders entirely with leftover drawings with layers of leftover paint
- Jagged edges: Think sharks teeth! Or a mountain top.
- Color story: Use different border colors to shift the mood of the central painting. You can lay paper over the painting before committing to glue.
Where This Fits in Your Mixed Media Journey
This tutorial demonstrates the collage border method from my Guide to Collaging the Garage Artist Way. It's Method 1 in that system because it's approachable for beginners but sophisticated in results.
Next steps:
- Use a reject as a starting point
- Try this technique with landscape subjects
- Experiment with different border styles around the same painting
- Combine with other collaging methods for more complex work
Related techniques:
- Recycling Failed Paintings with Mixed Media Urban Artwork
- Experimenting with Landscapes and Bold Patterns
- Collage Still Life Painting Tutorial
The goal isn't perfect integration—it's creating mixed media work that feels alive and layered, like it came from an artist's studio where experimenting is part of the daily process.
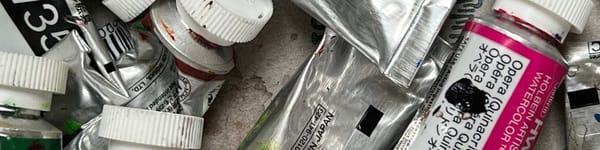
Recommended Acrylic Painting Materials
-
Princeton Catalyst Brushes – Flats (#6, #12), Rounds (#4, #8), Fan (#4), Liner Brush
Durable synthetic bristles for versatile acrylic techniques -
Liquitex Heavy Body Acrylic Paint – Essential Colors
Cadmium Yellow, Yellow Ochre, Alizarin Crimson, Cadmium Red Light, Ultramarine Blue, Cobalt Blue, Burnt Sienna, Titanium White -
Winsor & Newton Cotton Canvas
Reliable stretched canvas for studio and plein air work -
Strathmore 400 Series Mixed Media Paper
Heavyweight, acid-free paper for acrylic and mixed media -
Fabriano Artistico 140lb Cold Press Paper
Excellent for acrylic, mixed media, and textured effects -
Blick Multi-Colored Painting Knife Set
Variety of shapes for texture, scraping, and bold strokes - Miscellaneous: Two pint-sized water containers, paper towels (from Home Depot or Walmart)
- Note: I use canvas or sturdy cardboard as my palette — no store-bought palettes needed.