Master’s Nose Study – Planes, Light, and Layering
Study how master artists used tone and layering to show nose structure, light, and form. Learn to see planes through subtle shading.

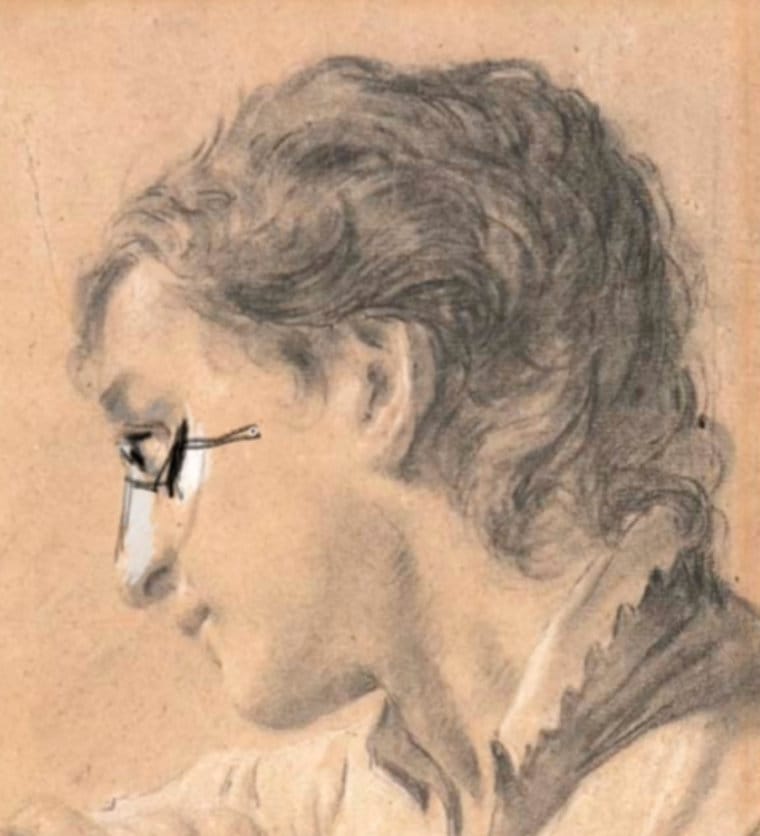
In this Master’s Study, we’ll examine how classic artists handled the planes and lighting of the nose. Using examples from Renaissance drawings, I’ll show how subtle tonal shifts and layering create convincing form without heavy outlines.
This lesson is part of the Head Drawing Course.
Understanding the Planes of the Nose
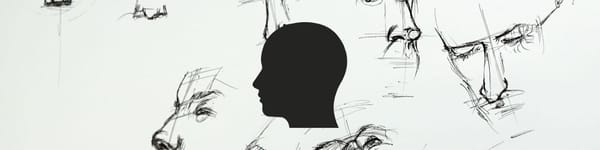
Even though master drawings often appear soft and minimal, construction is always there beneath the surface. The nose begins as a wedge—broad at the base and narrowing toward the bridge. Look for small tonal changes that separate:
- The top plane catching light
- The side planes fading to halftone
- The under plane rolling into shadow
These subtle transitions define form better than harsh contour lines.
Ball of the Nose and Under Plane
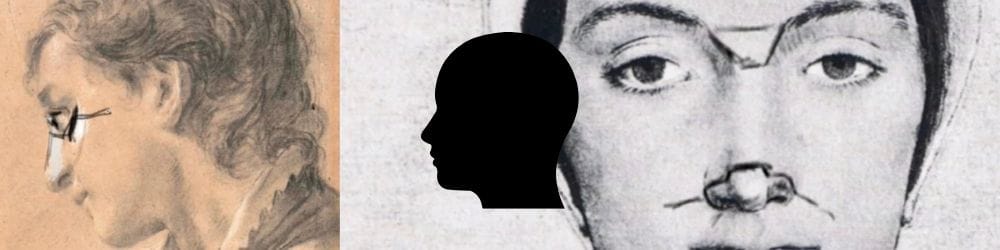
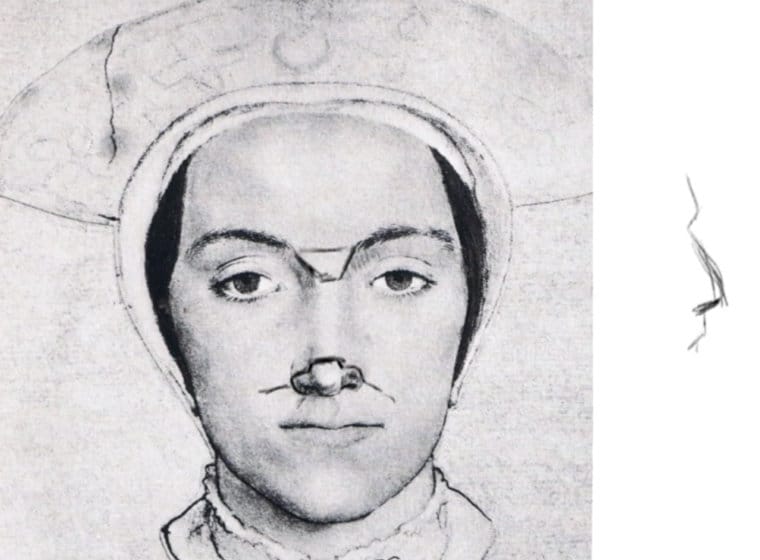
In both studies, you can see how the ball of the nose connects smoothly to the wings and underneath plane. The masters didn’t outline this area—they modeled it through tone. Even a faint shadow under the nostril suggests depth.
Notice how the nostril openings are set inside the form, not pasted onto the surface. There’s always a small strip of skin separating the edge of the nostril from the outer contour, giving thickness and realism.
Light and Layering
The key takeaway is layering—how planes overlap to create spatial hierarchy.
- The nose sits behind the eye sockets, which in turn sit behind the cheeks.
- Each feature overlaps the next to create depth and “stage space.”
- Highlights indicate which form is forward: the cheek highlight sits in front of the eye plane, which sits in front of the nose plane.
Understanding this order helps you draw faces that feel dimensional rather than flat.
Lost Edges and Light Falloff
The masters often used lost edges to unify light shapes—especially around the tip and side of the nose. Letting these edges fade softly into the mid-tone helps the structure feel rounded and natural.
As light rolls off, think of each plane as part of a larger surface turning away from the light, not a separate piece.
Practice Challenge
Try recreating one of these nose studies using only two tones:
- Lay in your shadow shapes with a soft pencil or brush.
- Add a lighter tone for the top and front planes.
- Let the edges blend naturally instead of outlining every border.
You’ll quickly see how tone alone can express structure and depth.
Course Navigation
Previous Lesson: How to Draw the Nose in Different Angles
Next Lesson: Master’s Nose Study – Tonal Planes and Shading (Part 2)
Visit the Head Drawing Hub to view all lessons
Continue Learning
If you enjoyed this hand drawing course, explore even more lessons on our Free Drawing Tutorials & Courses Hub — including the complete How to Draw – Beginner’s Course.
Want new tutorials delivered to your inbox? Subscribe here and get free lessons, tips, and inspiration sent directly to you.