Master’s Mouth Analysis Part 1 – Holbein and Bronzino Studies
A closer look at how Holbein and Bronzino built believable mouth forms with quiet shading and rhythm — perfect examples of subtle portrait structure.


In this master study, I break down two classic drawings of Holbein and Bronzino to show how great artists handled subtlety, structure, and rhythm in the mouth. These pieces are quiet but powerful examples of how to simplify lips, understand volume, and play with value to get believable form.
This lesson is part of How to Draw the Head Course.
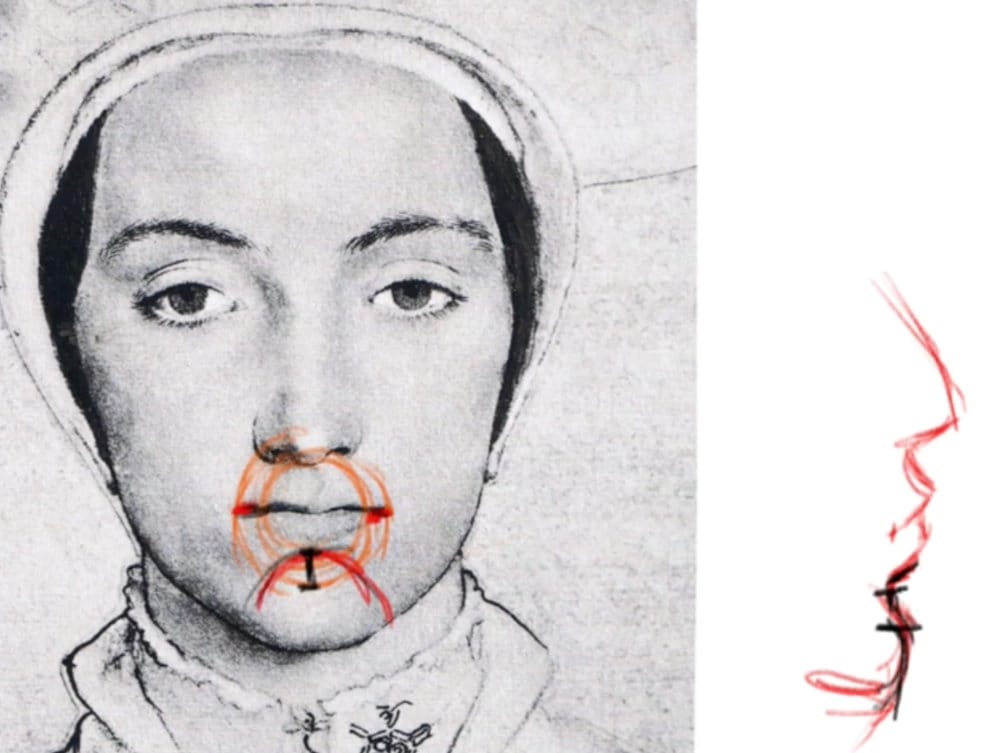
Holbein – Quiet Sophistication
Holbein’s mouth drawing is all about restraint. The W-shape of the upper lip is flattened, giving the mouth a reserved, delicate look.
Corners are played down, and there’s almost no outlining, just soft transitions that suggest form without ever shouting.
You’ll notice the muzzle shape beneath the lips subtly rolls forward before cutting back into the chin. Small touches of value under the bottom lip hint at that pouty area where light fades away.
Everything about this piece feels refined and controlled, a great reminder that less is often more when it comes to portrait drawing.
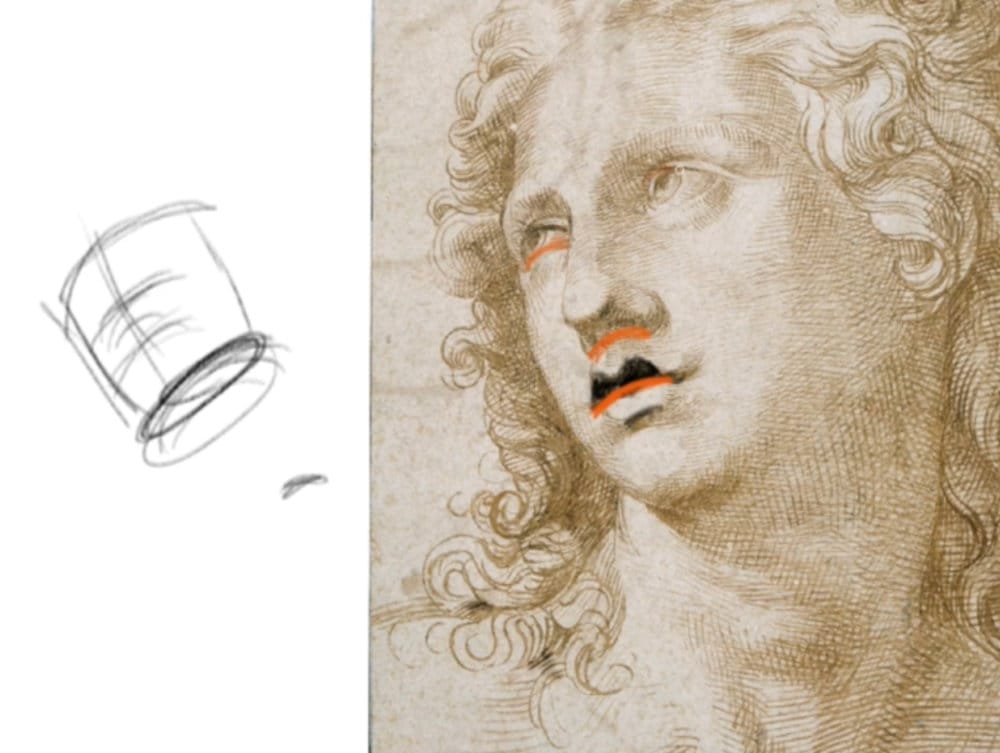
Bronzino – Flow and Rhythm
Bronzino’s approach contrasts sharply with Holbein’s. Here, the “M” shape of the upper lip is more pronounced and rounded, adding softness and femininity.
The forms flow beautifully across the face, tracking along curved construction lines that show we’re viewing the mouth slightly from below.
Notice how the philtrum above the upper lip catches subtle light, while the lower lip rounds forward before tucking sharply into shadow. This creates that believable “pillow” volume we discussed earlier.
There’s a graceful rhythm throughout, every contour flows, no hard stops, and no outlines locking the form.
Key Takeaways
- Keep upper lip “M” shapes soft and natural.
- Avoid heavy outlines and let shading describe the edges.
- Observe how the lips roll around the muzzle and taper back into the chin.
- Study light transitions more than lines — that’s where the realism lives.
Course Navigation
Previous: Upper & Lower Lips Part 2
Next: Master’s Mouth Analysis Part 2
More Head Drawing Lessons: View Full Head Drawing Course Hub
Continue Learning
If you enjoyed this hand drawing course, explore even more lessons on our Free Drawing Tutorials & Courses Hub — including the complete How to Draw – Beginner’s Course.
Want new tutorials delivered to your inbox? Subscribe here and get free lessons, tips, and inspiration sent directly to you.


