How to Paint Trees with Sky Holes – Step By Step Demo
A short acrylic demo showing how to paint trees with believable sky holes and light effects. Learn how to simplify shapes and capture depth fast.


Painting trees can feel overwhelming at first — all those shapes, colors, and little details fighting for attention. But one of the best tricks I’ve ever learned is to paint the sky holes, not the leaves.
In this quick acrylic demo, I walk through a small study that focuses on simplifying the tree form and using sky holes to build realism without overworking it.
This lesson is part of the Acrylic Landscape Painting Fundamentals Course
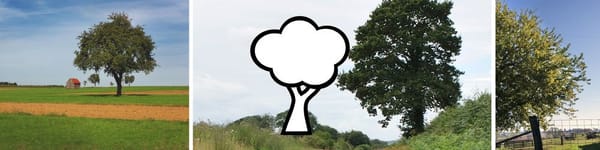
Step 1 – Start with Simple Shapes
I block in the main tree mass using a mix of deep greens and neutral tones. The goal isn’t to paint individual leaves — it’s to find the big silhouette first. Once the main form feels solid, you can start carving out the lighter areas.
Sky holes aren’t random; they follow the structure of the tree. Think of them like breaks in the canopy where light peeks through.
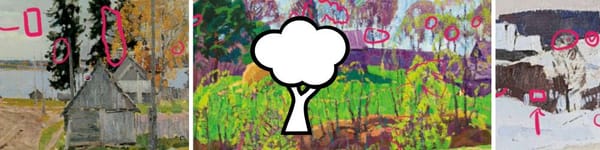
Step 2 – Paint the Sky Holes Early
Instead of waiting until the end, I start placing my sky holes right away using sky color from my palette — a soft mix of blue, titanium white, and just a hint of warm gray.
These cutouts help define the branches and instantly add dimension. It’s like sculpting with paint — removing shapes rather than adding them.
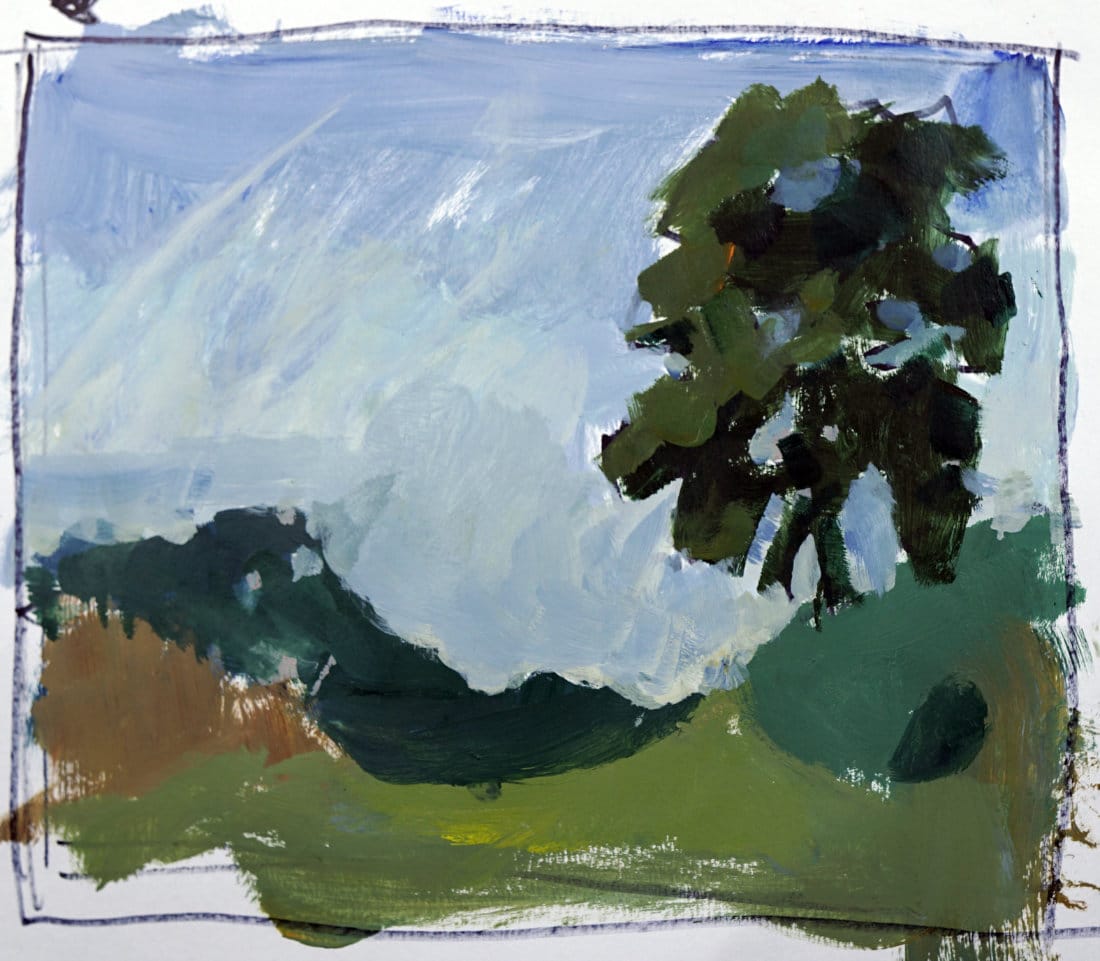
Step 3 – Add Depth with Layered Darks
After carving out the light, I go back in with a few darker accents to separate tree masses and suggest inner shadow areas. This alternating rhythm — darks, then lights, then darks again — keeps the painting loose and lively.
Notice how those small shifts in value and edge softness give the illusion of branches without having to paint every one.
Step 4 – Keep the Foreground Simple
In the bottom area, I keep my brushwork loose — just enough to suggest grass and distant shapes. The goal of this study isn’t detail; it’s clarity. When the values and edges feel balanced, stop.
That’s where the painting breathes.
Materials Used
- Acrylics on mixed media paper
- Large flat brush (1”) and small round for details
- Basic limited palette: ultramarine blue, yellow ochre, burnt sienna, titanium white, phthalo green
See my entire acrylic toolbox below.
Final Thoughts
Sky holes are one of those small but powerful techniques that separate “flat” tree paintings from expressive, believable ones. You’ll notice once you get comfortable with them, everything else starts to click — composition, edges, and even atmosphere.
Course Navigation
How to Paint Trees for Beginners – Part 1
How to Paint Trees with Sky Holes – Part 2
How to Paint Trees with Sky Holes – Part 3
Previous Lesson: Tree Painting Assignment – Practice What You Learned
Landscape Painting Hub: View all landscape painting course resources
Congrats! You have completed the How to Paint Trees or Beginners Module. Next up is How to Paint Clouds & Skies Module...coming soon.
Learn & Improve Your Acrylic Skills
- Acrylic Hub– Your go-to guide for tutorials, tips, and resources.
- Ultimate Beginner Acrylic Course - Start painting with confidence.
- Subscribe for More Great Content - Get tutorials, tips, and updates straight to your inbox.
- Follow Me on Pinterest - Daily inspiration, tips, and fresh ideas.
Recommended Acrylic Painting Materials
-
Princeton Catalyst Brushes – Flats (#6, #12), Rounds (#4, #8), Fan (#4), Liner Brush
Durable synthetic bristles for versatile acrylic techniques -
Liquitex Heavy Body Acrylic Paint – Essential Colors
Cadmium Yellow, Yellow Ochre, Alizarin Crimson, Cadmium Red Light, Ultramarine Blue, Cobalt Blue, Burnt Sienna, Titanium White -
Winsor & Newton Cotton Canvas
Reliable stretched canvas for studio and plein air work -
Strathmore 400 Series Mixed Media Paper
Heavyweight, acid-free paper for acrylic and mixed media -
Fabriano Artistico 140lb Cold Press Paper
Excellent for acrylic, mixed media, and textured effects -
Blick Multi-Colored Painting Knife Set
Variety of shapes for texture, scraping, and bold strokes - Miscellaneous: Two pint-sized water containers, paper towels (from Home Depot or Walmart)
- Note: I use canvas or sturdy cardboard as my palette — no store-bought palettes needed.