How to Paint Trees for Beginners – Part 3
Learn how to paint trees for beginners with a focus on sky holes and refraction. Discover how light, color, and edges make acrylic trees feel real.

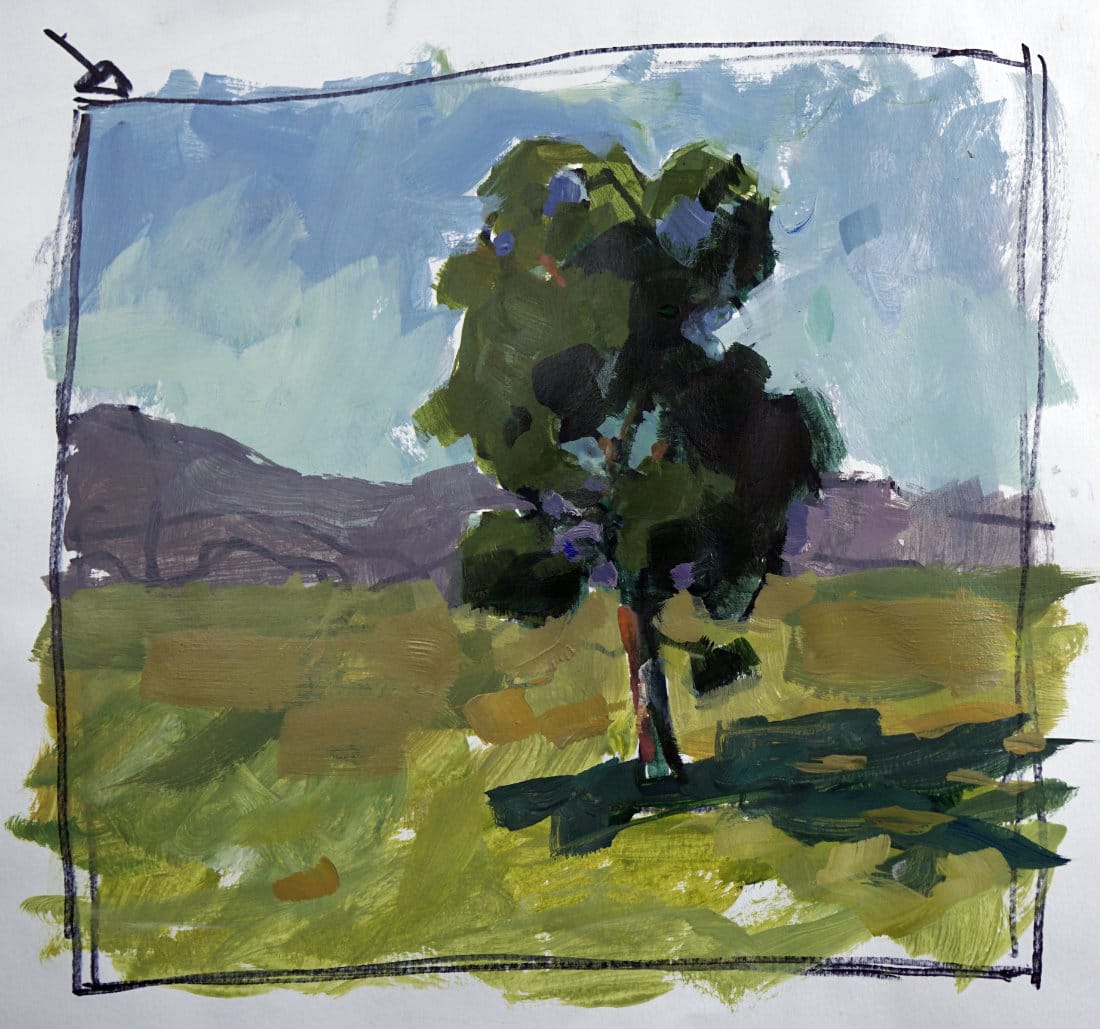
In this lesson, we’ll dive deeper into one of the trickiest details when painting trees — sky holes and how refractionaffects them. This is where your tree starts to look believable, not pasted on top of the background.
If you’ve followed along from Parts 1 and 2, you already have your tree blocked in, the sky established, and the ground plane simplified. Now, let’s refine the painting and make those transitions feel natural.
This lesson is part of the Acrylic Landscape Painting Fundamentals Course
Understanding Sky Holes and Refraction
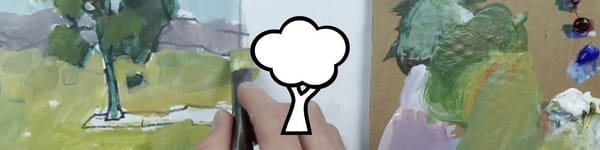
When learning how to paint trees for beginners, most painters make their sky holes too clean and too bright.
Here’s the problem: in nature, the light sky sits behind the dark mass of the tree. That darker mass slightly darkens the color of those sky holes — an optical effect called refraction.
So, if your sky is a bright blue, the blue inside the tree’s sky holes should actually be a little darker and softer. That small adjustment makes a huge difference in how your tree “sits” in the landscape.
Adjusting the Sky Hole Colors
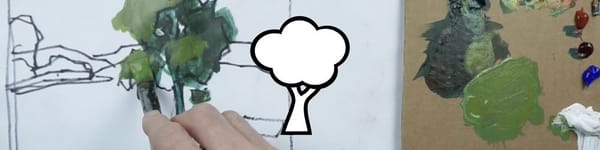
I start by mixing a similar sky color — a mix of Cobalt Blue and a touch of Viridian Green — but then push it slightly darker.
Here’s the trick:
- Large sky holes stay closer to the real sky color.
- Small sky holes get darker and slightly warmer.
This variation prevents that “cookie cutter” look where every hole is identical. Each shape should be different in size and edge quality.
Refining the Tree Edges
After darkening a few sky holes, I go back in with my tree darks — usually a mix of green, red, and a touch of blue — and soften the edges where the tree meets the sky.
That subtle blending helps merge the two masses so the tree feels integrated. I’ll also chisel out a few branches while I’m there, just enough to keep things organic.
Adding Light and Shadow Details
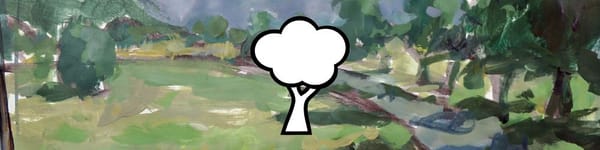
Next, I touch up the lights inside the tree canopy — where sunlight hits a branch or peeks through a gap. These lighter notes should still respect the same rule of refraction: if light is filtering through a dark mass, it will appear slightly darker and more muted than the open sky.
For the ground shadows, the same logic applies. Any patch of light that passes through the tree canopy and hits the ground will be darker than the surrounding sunlight. That’s refraction again, just playing out on a different plane.
Background Adjustments
The idea of refraction also applies to distant hills or backgrounds that show through your tree. If a blue hill is visible through a small gap in the leaves, that bit of blue will appear slightly darker than the rest of the hill — because the tree mass over it influences the perceived light.
A small brush and careful value control go a long way here. You don’t need to over-blend; just soften the transitions so everything feels cohesive.
Key Takeaways
- Vary sky hole size and shape — no cookie-cutter gaps
- Smaller sky holes = darker and more muted color
- Use refraction to make light and shadow believable
- Soften tree edges to integrate with the background
- Apply the same logic to hills, shadows, and ground planes
Course Navigation
Next Lesson: Master's Analysis for Trees - coming soon
Previous Lesson: How to Paint Trees for Beginners Part 2
Continue the Course: Acrylic Landscape Painting for Beginners
Learn & Improve Your Acrylic Skills
- Acrylic Hub– Your go-to guide for tutorials, tips, and resources.
- Ultimate Beginner Acrylic Course - Start painting with confidence.
- Subscribe for More Great Content - Get tutorials, tips, and updates straight to your inbox.
- Follow Me on Pinterest - Daily inspiration, tips, and fresh ideas.
Recommended Acrylic Painting Materials
-
Princeton Catalyst Brushes – Flats (#6, #12), Rounds (#4, #8), Fan (#4), Liner Brush
Durable synthetic bristles for versatile acrylic techniques -
Liquitex Heavy Body Acrylic Paint – Essential Colors
Cadmium Yellow, Yellow Ochre, Alizarin Crimson, Cadmium Red Light, Ultramarine Blue, Cobalt Blue, Burnt Sienna, Titanium White -
Winsor & Newton Cotton Canvas
Reliable stretched canvas for studio and plein air work -
Strathmore 400 Series Mixed Media Paper
Heavyweight, acid-free paper for acrylic and mixed media -
Fabriano Artistico 140lb Cold Press Paper
Excellent for acrylic, mixed media, and textured effects -
Blick Multi-Colored Painting Knife Set
Variety of shapes for texture, scraping, and bold strokes - Miscellaneous: Two pint-sized water containers, paper towels (from Home Depot or Walmart)
- Note: I use canvas or sturdy cardboard as my palette — no store-bought palettes needed.