How to Paint Clouds and Sky with Linear Perspective
Discover easy tips for adding depth and atmosphere to your landscape paintings using linear perspective.

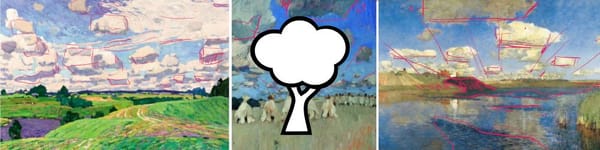
Painting realistic clouds starts with understanding perspective — not just for buildings or roads, but for the sky itself. This lesson shows how to use simple vanishing points to make your clouds sit naturally in space, giving your landscapes more atmosphere and depth.
This lesson is part of the Acrylic Landscape Painting Fundamentals Course
Understanding Linear Perspective in Skies
Perspective is simply the illusion of depth on a flat surface. Even in a sky, this principle applies — clouds closer to you appear larger, with more visible undersides, while those farther away get smaller and thinner. Using perspective lines that converge toward a horizon point helps organize these cloud shapes naturally.
Cumulus vs Cirrus Clouds
Cumulus clouds are the big, boxy ones — the type that often carry rain or shadow the land dramatically. They sit low in the sky, around 2,000 feet, and typically share a flat base. Cirrus clouds, on the other hand, are high and wispy at around 30,000 feet. Combining both in a painting adds visual depth and realism.
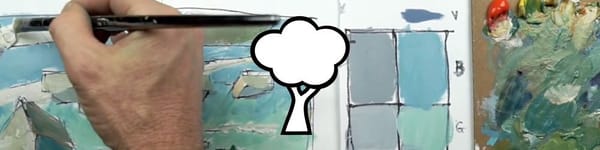
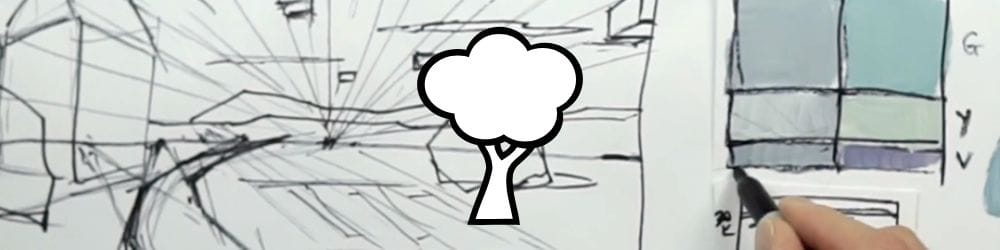
Using Boxes to Simplify Cloud Shapes
Think of clouds like boxes in perspective. As they move back into the distance, they shrink and reveal less of their underside. This geometric thinking helps when blocking in cloud masses before softening edges with paint. Overlapping shapes creates even more convincing depth.
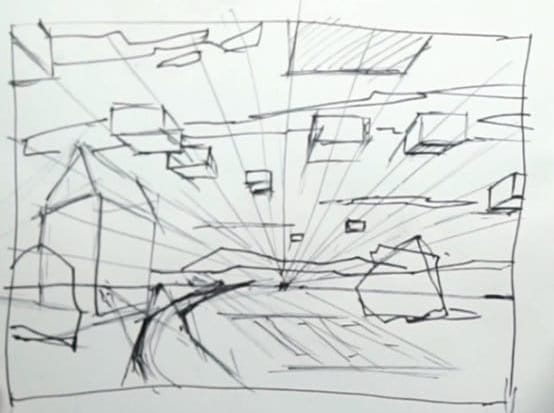
Building the Landscape Framework
Adding simple man-made elements — a barn, a path, or a plowed field — reinforces the same perspective grid that controls the sky. Rows of crops, fences, or roads should angle toward the vanishing point just like the clouds above them. It all ties the scene together.
Course Navigation
Next Lesson: Ground and Mountain Planes
Previous Lesson: Develop Sky General Model
Landscape Hub: View All Acrylic Landscape Lessons
Learn & Improve Your Acrylic Skills
- Acrylic Hub– Your go-to guide for tutorials, tips, and resources.
- Ultimate Beginner Acrylic Course - Start painting with confidence.
- Subscribe for More Great Content - Get tutorials, tips, and updates straight to your inbox.
- Follow Me on Pinterest - Daily inspiration, tips, and fresh ideas.
Recommended Acrylic Painting Materials
-
Princeton Catalyst Brushes – Flats (#6, #12), Rounds (#4, #8), Fan (#4), Liner Brush
Durable synthetic bristles for versatile acrylic techniques -
Liquitex Heavy Body Acrylic Paint – Essential Colors
Cadmium Yellow, Yellow Ochre, Alizarin Crimson, Cadmium Red Light, Ultramarine Blue, Cobalt Blue, Burnt Sienna, Titanium White -
Winsor & Newton Cotton Canvas
Reliable stretched canvas for studio and plein air work -
Strathmore 400 Series Mixed Media Paper
Heavyweight, acid-free paper for acrylic and mixed media -
Fabriano Artistico 140lb Cold Press Paper
Excellent for acrylic, mixed media, and textured effects -
Blick Multi-Colored Painting Knife Set
Variety of shapes for texture, scraping, and bold strokes - Miscellaneous: Two pint-sized water containers, paper towels (from Home Depot or Walmart)
- Note: I use canvas or sturdy cardboard as my palette — no store-bought palettes needed.