How to Draw a Tube of Paint | Beginner Drawing Lesson with Forms & Shading
Learn how to draw a tube of paint step by step in this beginner-friendly project. Build it with simple forms, then add folds and shading for three-dimensional study.


In this beginner drawing lesson, you’ll learn how to draw a tube of paint step by step. We’ll start with simple forms, refine proportions, add folds and details, and then finish with shading to make the tube look three-dimensional.
Note: Using household or studio objects as subjects lets you practice drawing from life. It’s one of the best ways to grow your drawing skills — the objects are accessible, simple, and within your range. Plus, you control the setup: move the object, change the angle, or adjust the light to create the mood you want.
This project builds on the fundamentals taught in the Free Beginner Drawing Course and is a great way to practice forms, perspective, and shading.
Step 1 – Block In the Basic Shapes
Start with a vertical axis line and light guidelines. Use a rectangle for the body and ellipses for the top and bottom. Mark the overall height and width, then break the tube into proportional segments (about 5 widths tall in this demo).
👉 Benefit: Simplifying into basic forms gives you a reliable structure before adding detail.
Step 2 – Add the Tube Opening
At the top, draw an ellipse for the lid opening, then flare the edges slightly. Use stacked ovals to show the rim, and taper into the nozzle. Place the bend in the tube just before the halfway point.
👉 Benefit: Practicing ellipses and flares improves perspective drawing and helps you capture objects that “turn” in space.
Step 3 – Shape the Body & Folds
Draw the body of the tube with slight irregularities. Add creases and dents where the paint has been squeezed, especially toward the flattened bottom. Use curved contour lines to suggest volume and bending.
👉 Benefit: Adding imperfections makes your sketch look real, not mechanical.
Step 4 – Indicate Labels & Rings
Sketch horizontal rings where the label bands sit. Curve the writing along those ovals so it follows the form of the tube. Don’t overdo detail — suggest text and symbols with light lines.
👉 Benefit: Learning to curve details around a form reinforces your sense of perspective.
Step 5 – Build the Nozzle
Draw the nozzle as a short cylinder with ridges for threads. Use concentric ellipses to show depth. Keep it aligned with the axis so it looks centered.
👉 Benefit: Connecting cylinders to other forms prepares you for drawing bottles, jars, and mechanical parts.
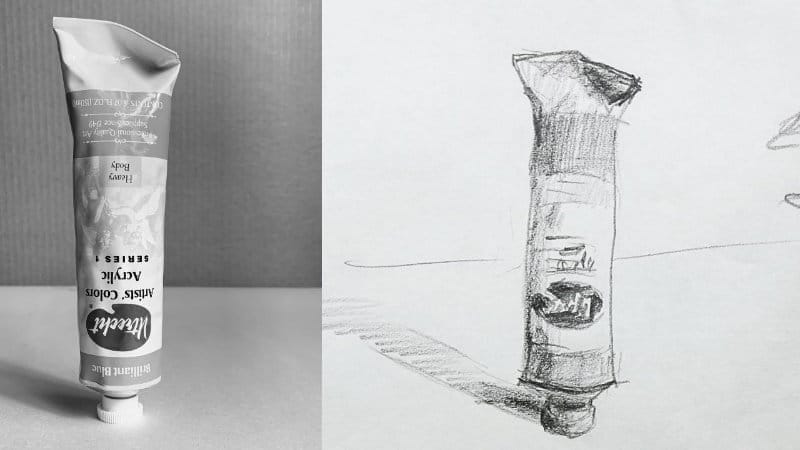
Step 6 – Shading the Tube
Identify the darkest darks (creases, under folds, side of the tube), midtone bands (labels, dents), and lightest lights(highlights along the tube and cap).
- Shade the body with smooth gradation
- Keep highlight bands clean for shine
- Use directional strokes that follow the form
- Add a cast shadow that fades outward
👉 Benefit: Shading gives depth and realism, turning flat forms into a convincing 3D object.
Why This Tube of Paint Project Matters
This project combines construction, perspective, and shading in one subject. By finishing it, you’ll:
- Practice cylinders and ellipses in perspective
- Add folds and irregularities for realism
- Curve labels and details around forms
- Shade a metallic + soft surface combination
Motivational Reminder
A squeezed paint tube isn’t perfect — and neither is your drawing the first time around. Every dent and crease adds character, just like every attempt adds skill. Stick with it, pause the video, and draw along. Little by little, you’ll squeeze more confidence from your sketches.
Next Steps
Keep practicing with these beginner-friendly projects:
👉 How to Draw a Coffee Cup →
👉 How to Draw a Hammer →
👉 Or return to the Free Beginner Drawing Course