How to Draw the Ear for Beginners
Learn how to draw the ear by breaking it into simple shapes and understanding its placement, tilt, and structure on the head.

The ear looks complex, but when you break it down into a few simple shapes, it becomes surprisingly approachable. In this lesson, I’ll show you how to understand its basic structure, placement, and angle so you can draw ears that look natural and connected to the head.
This lesson is part of How to Draw the Head Course.
Understanding Ear Placement
The ear sits behind the jaw, not on top of it. If it were attached to the moving jaw, it would shift up and down every time you talked—which obviously doesn’t happen. So always remember: the mandible is in front, and the ear stays stationary behind it.
When dividing the head into thirds from top to bottom, the ear generally fits right in the middle section—roughly between the brow line and the base of the nose. It’s one of those reliable landmarks that helps you check proportions as the head turns.
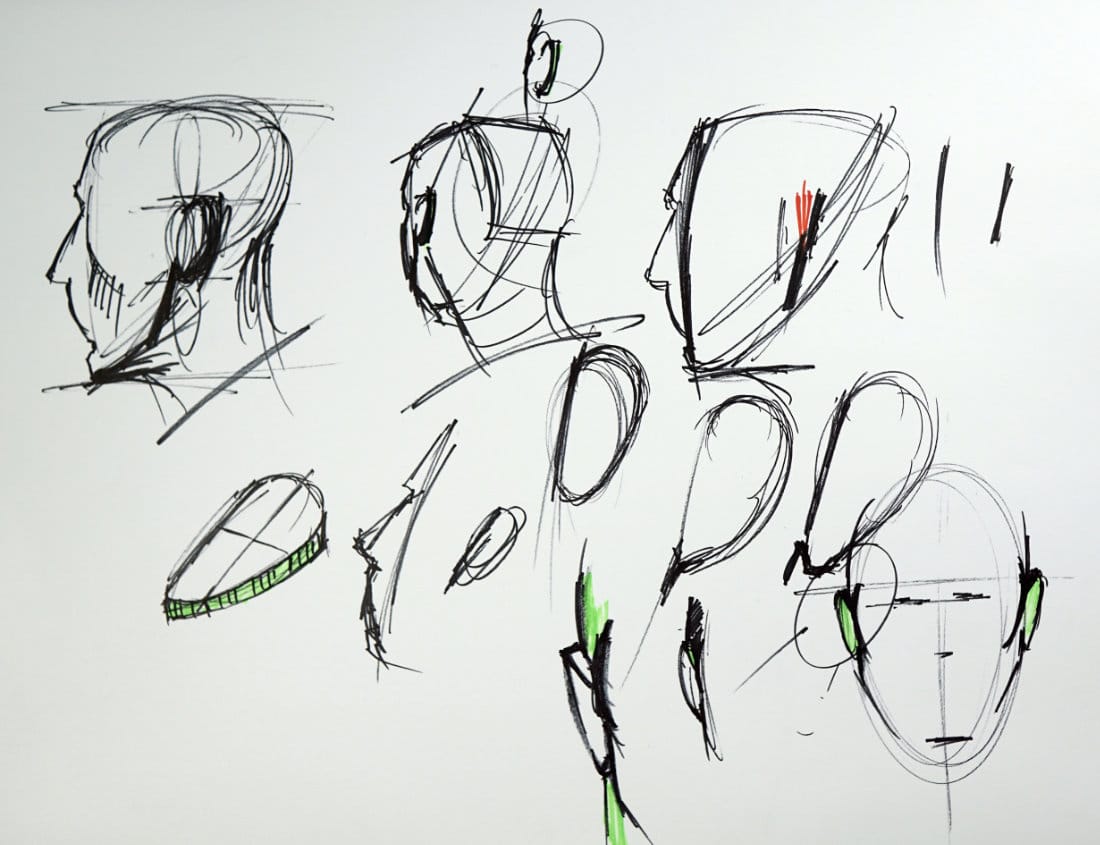
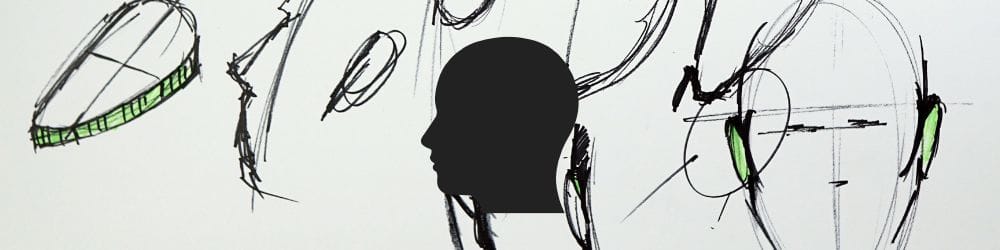
Simplifying the Form
A great starting point is to think of the ear as an egg shape or an oval tilted slightly backward. The front plane of the face has its own angle, and the ear typically follows a similar—but not identical—tilt. Avoid drawing it perfectly vertical; instead, give it a subtle lean that matches the rhythm of the skull.
The top part of the ear tends to be slightly more prominent, while the lower portion often narrows toward the lobe. You can exaggerate this in early sketches to help visualize the form.
The Ear’s Role in Head Rotation
The ear also gives you major clues about which way the head is turning. As the head rotates, the ear moves closer to the front edge of the face or slides further back depending on the angle. Paying attention to this helps you anchor your drawings with believable perspective and depth.
Adding Thickness
Ears aren’t flat—they have noticeable thickness. From a front or three-quarter view, you’ll often see a thin ridge or sliver of form overlapping the side plane of the head. This helps the ear look attached instead of pasted on. The lobe can either hang freely or blend seamlessly into the cheek, depending on the individual.
When sketching, lightly show this edge thickness—it’s a small touch that adds big realism.
Practice Tip
Try sketching several quick profiles using just an oval for the head and a simple ear shape behind the jaw. Play with different angles, head tilts, and ear positions. The more you practice, the easier it becomes to visualize where the ear belongs on the skull.
Course Navigation
Previous Lesson: My Mouth Drawing Assignment
Next Lesson: Ear Drawing Part 2 – Inner Structure Breakdown
Head Drawing Hub: Complete Head Drawing Course
Continue Learning
If you enjoyed this hand drawing course, explore even more lessons on our Free Drawing Tutorials & Courses Hub — including the complete How to Draw – Beginner’s Course.
Want new tutorials delivered to your inbox? Subscribe here and get free lessons, tips, and inspiration sent directly to you.