How to Draw Hands – Free Step-by-Step Course
The workers at the local dump knew me by name. Every week, there I was, digging through cardboard while my mortified children waited in the truck. But this ridiculous routine taught me something profound about learning to draw hands


For years, I avoided how to drawing hands the same way I avoided buying proper shipping boxes for my art business. Instead of investing in the right materials, I'd hit up the local dumpster behind businesses, asking permission to dig through their cardboard. The workers got so used to seeing me that they'd just nod and point toward the dumpsters - no questions asked anymore.
I'll never forget my kids sliding down in their seats, mortified as Dad reached into yet another dumpster while they waited in the truck. But hey, why spend hundreds on boxes when free ones were right there, right?
The thing is, just like my shipping situation, I was "dumpster diving" through hand drawings too. I'd avoid them, work around them, or rush through them hoping nobody would notice. I was essentially digging through scraps of technique instead of learning the fundamentals properly.
Eventually, I realized that cutting down random cardboard and making special trips was actually more time-consuming than just ordering the right boxes. And you know what? The same applies to drawing hands.
Hands are one of the most expressive and challenging parts of the human figure. In this free how to draw hands course, you'll learn exactly how to break them down into simple shapes, capture natural gestures, and add believable details. Whether you're a complete beginner or looking to refine your skills, this step-by-step guide will help you draw hands with confidence.
No more "dumpster diving" through hand drawings. No more embarrassing your artistic pride. It's time to invest in the proper approach - and the best part? This one won't cost you hundreds of dollars, just a couple hours of your time.
Note: Timestamps are below along with demo studies.
Explore more lessons on our Free Drawing Tutorials & Courses Hub.
[And yes, my kids can finally ride with their heads up when we drive past dumpsters.]
How to draw hands video
We’ll start with the very basics — shapes, proportions, and connections — then move into anatomy, details, and movement. Along the way, you’ll see demonstrations, examples from master artists, and practical assignments you can try at home.
Lesson 1 – How to Draw Hands for Beginners: Gesture and Structure (0:00)
Two key concepts form the foundation of hand drawing: structure and gesture.
- Structure is the arrangement of the hand’s parts, both in 2D and 3D. For example:
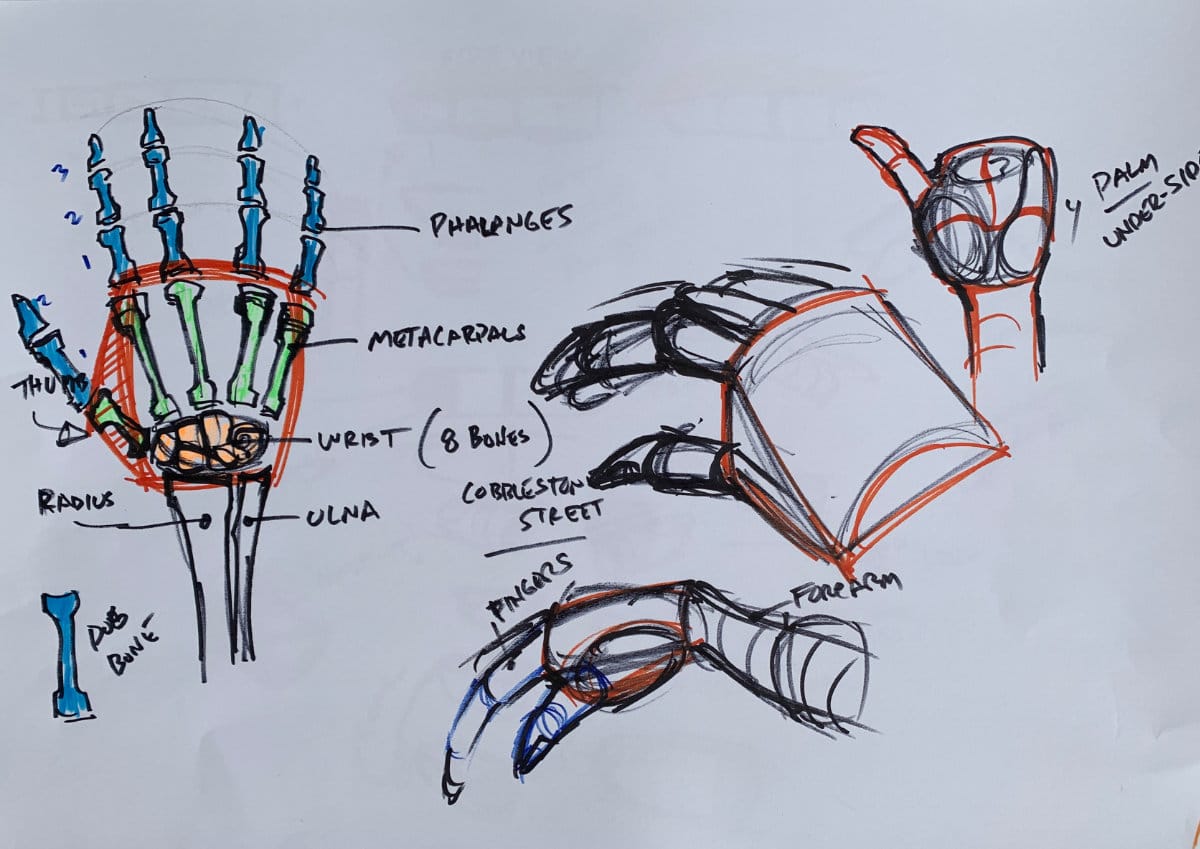
- Wrist to knuckles = the base of the hand.
- Knuckles to fingertips = the fingers.
- Wrist downward = the forearm connection.
Each finger can be further divided into three segments (phalanxes), helping you keep proportions correct.
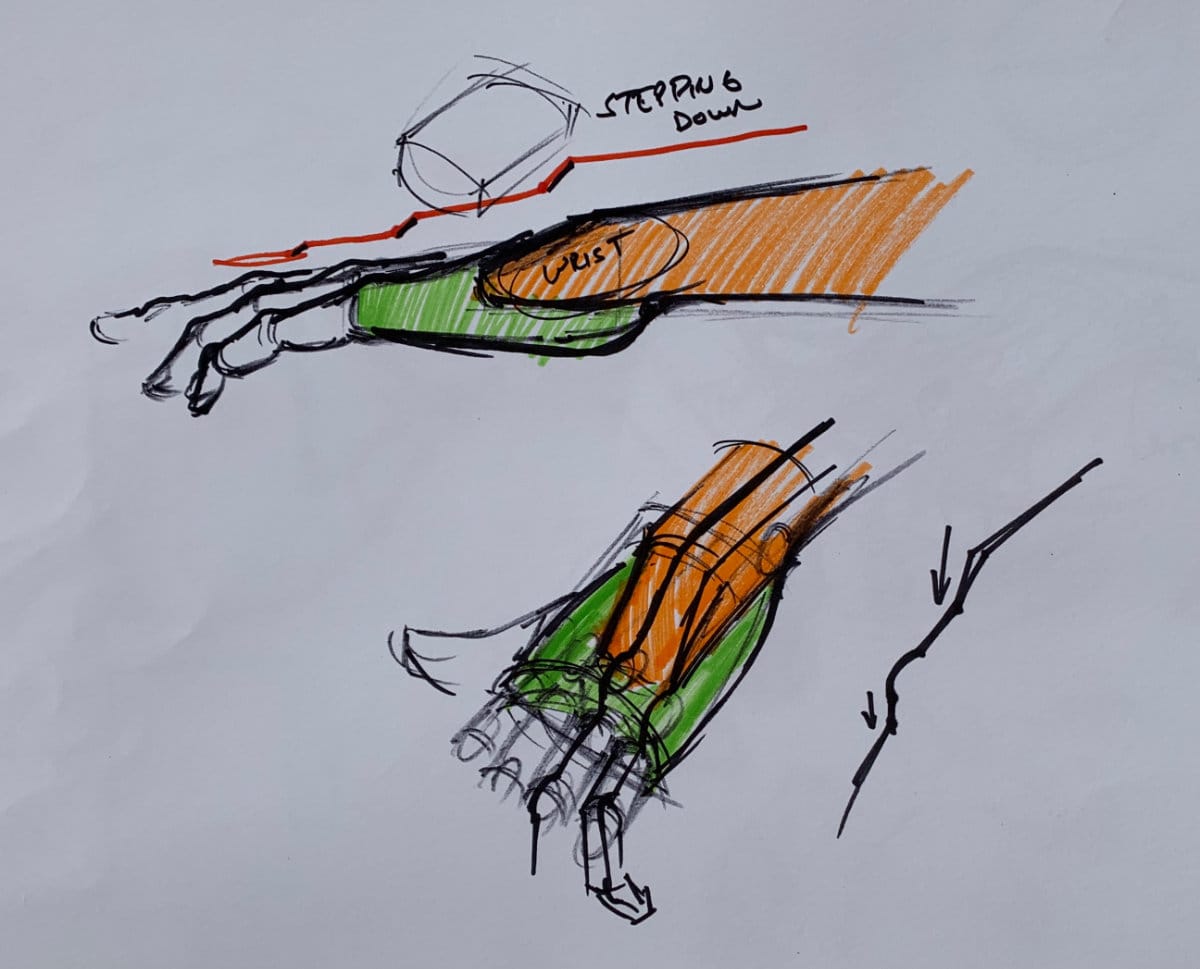
- Gesture is the longest, flowing curve of the pose — often running along the outside of a bend. Understanding gesture prevents stiff, lifeless hands and makes your drawings more dynamic.
Lesson 2 – Connecting the Wrist, Forearm, and Hand (15:49)
You can’t draw a convincing hand without acknowledging how it connects to the arm. The radius and ulna bones in the forearm define how the wrist rotates. Use a single long gesture line to position all elements: forearm → wrist → hand → fingers. This keeps the drawing unified and flowing.
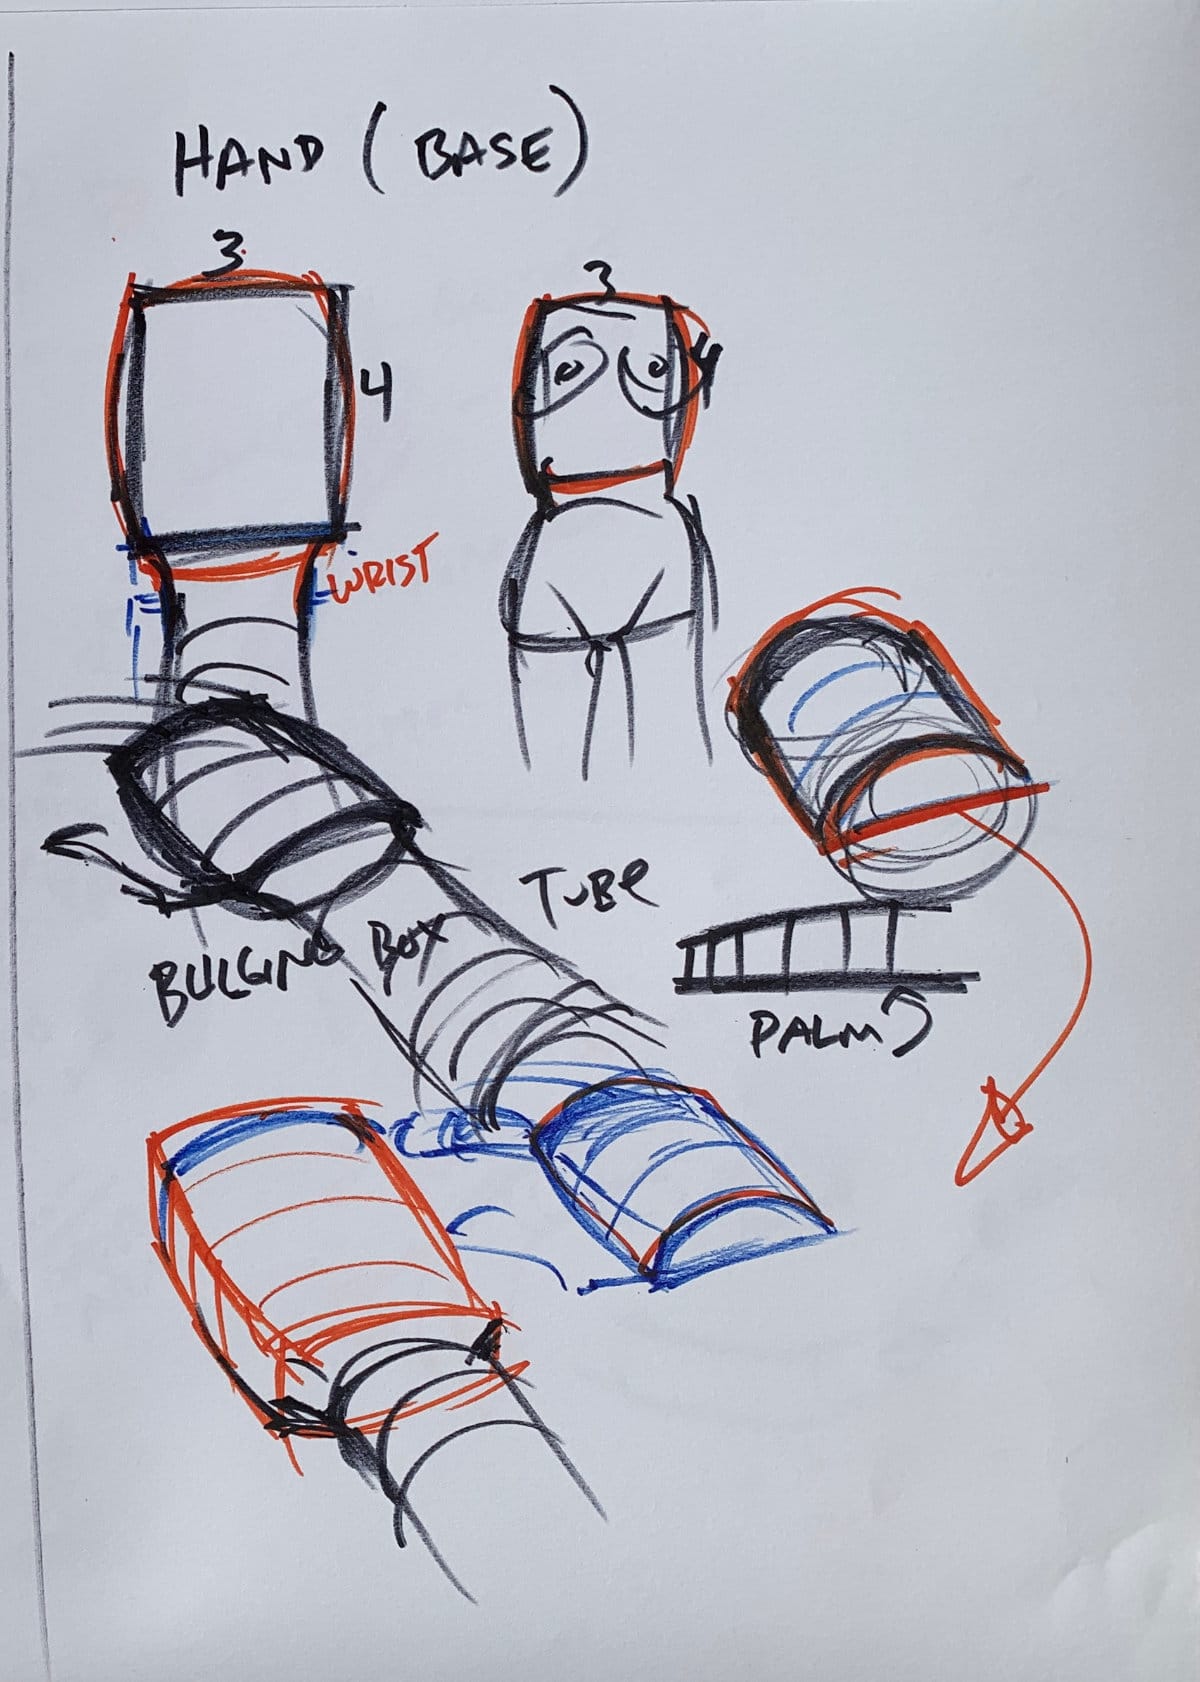
Lesson 3 – Simplifying the Palm When Learning How to Draw Hands (19:38)
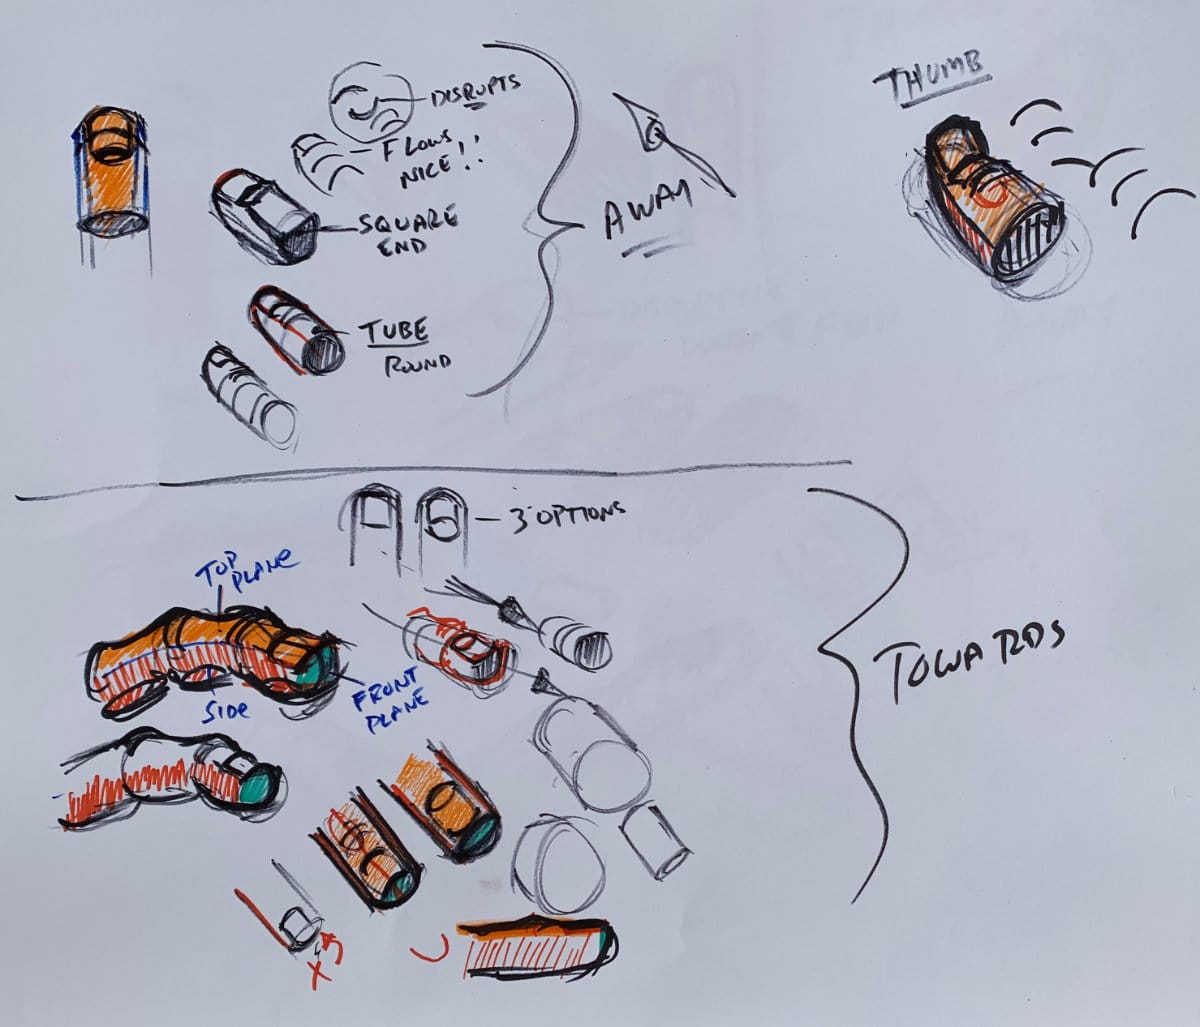
Think of the hand’s palm area as a 3x4 bulging box — slightly wider at the knuckles and thicker in the middle. This simple form helps you maintain perspective and proportion no matter the pose. It also makes it easier to attach fingers and thumb accurately.
Lesson 4 – How to Sketch a Hand: Drawing the Thumb (35:36)
The thumb is unique in its mobility and shape. Start with the triangular webbing between the thumb and index finger, then add the thumb as either a tapered tube or a box form depending on the pose. In some views, a hybrid of both shapes works best.
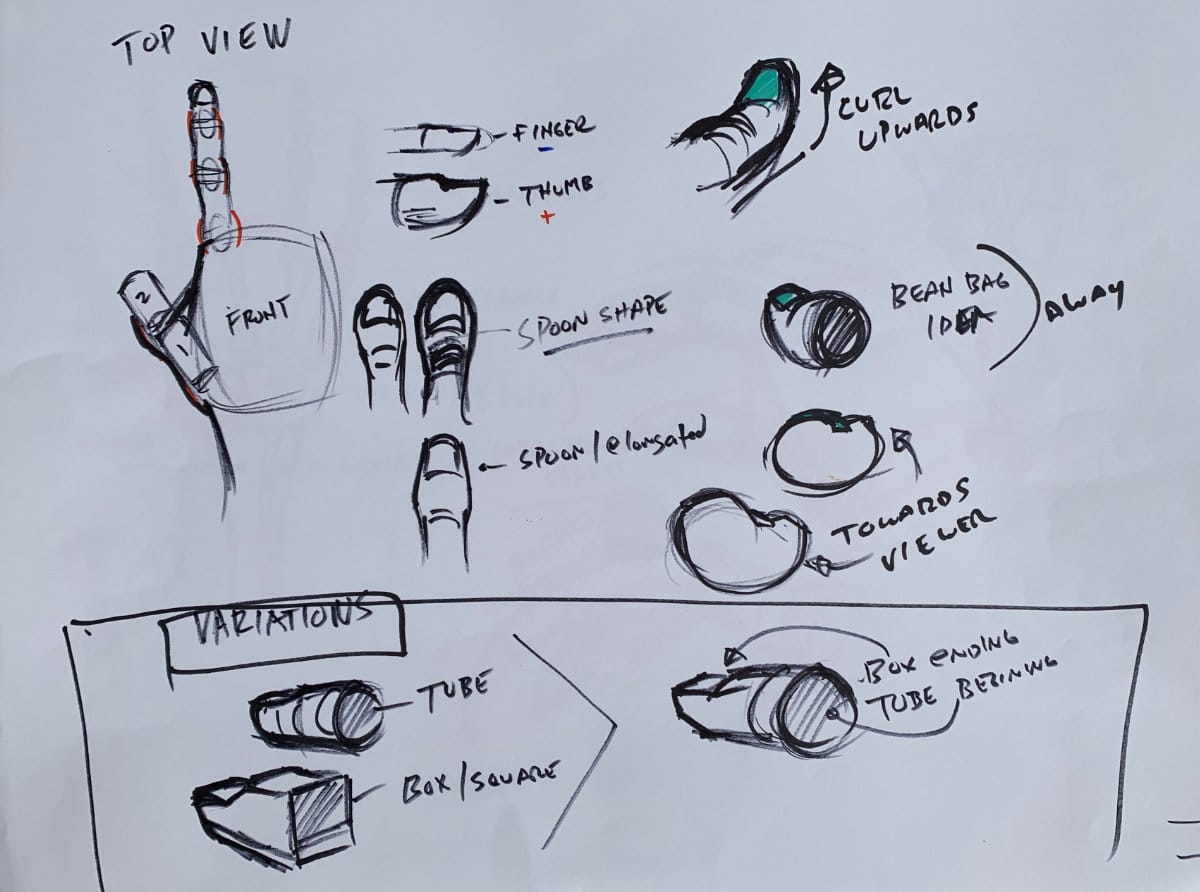
Lesson 5 – Fingers, Fingertips, and Nails in Hand Drawing (43:55)
Fingers taper slightly toward the tips and are divided into three segments by joints. Fingertips are padded and rounded. When drawing nails, follow the contour of the fingertip — nails should wrap naturally, not appear “stuck on.”
Lesson 6 – Practice Projects & Master Studies for Drawing Hands (2:19:48)
- Do gesture-only sketches of hands to build confidence.
- Study drawings from master artists to understand how they simplify complex forms.
- Break down photos into structure and gesture before adding details.
FAQ – How to Draw Hands
Q: What is the easiest way to start drawing hands?
A: Begin with simple shapes as explained in the video above — a box for the palm and tapered cylinders for the fingers. Add gesture lines first to keep the pose natural, then refine details.
Q: How do you draw hands for beginners?
A: Focus on proportion and gesture before details. Practice open palms, closed fists, and basic side views. Avoid starting with fingernails or wrinkles too early — keep it simple.
Q: What’s the best way to draw realistic fingers?
A: Break each finger into three segments using light construction lines. Notice the taper toward the fingertip and how fingers curve slightly toward the middle.
Q: How can I improve my hand drawing fast?
A: Do short, timed gesture sketches of hands every day. Use photo references and your own hand in a mirror to understand form and movement. These's a link below to a great site for reference photos.
Q: What tools are best for drawing hands?
A: Any medium works, but pencils (2B–4B) are great for control and shading. Digital artists can use pressure-sensitive brushes for a similar effect.
Continue Learning
If you enjoyed this hand drawing course, explore even more lessons on our Free Drawing Tutorials & Courses Hub — including the complete How to Draw – Beginner’s Course.
Want new tutorials delivered to your inbox? Subscribe here and get free lessons, tips, and inspiration sent directly to you.
For additional anatomical references check out Line of Action for more hand images.
Study some The Morgan Library & Museum drawings from the Master's