Robert's Practice Reel: My Results from the 4-Pose Assignment
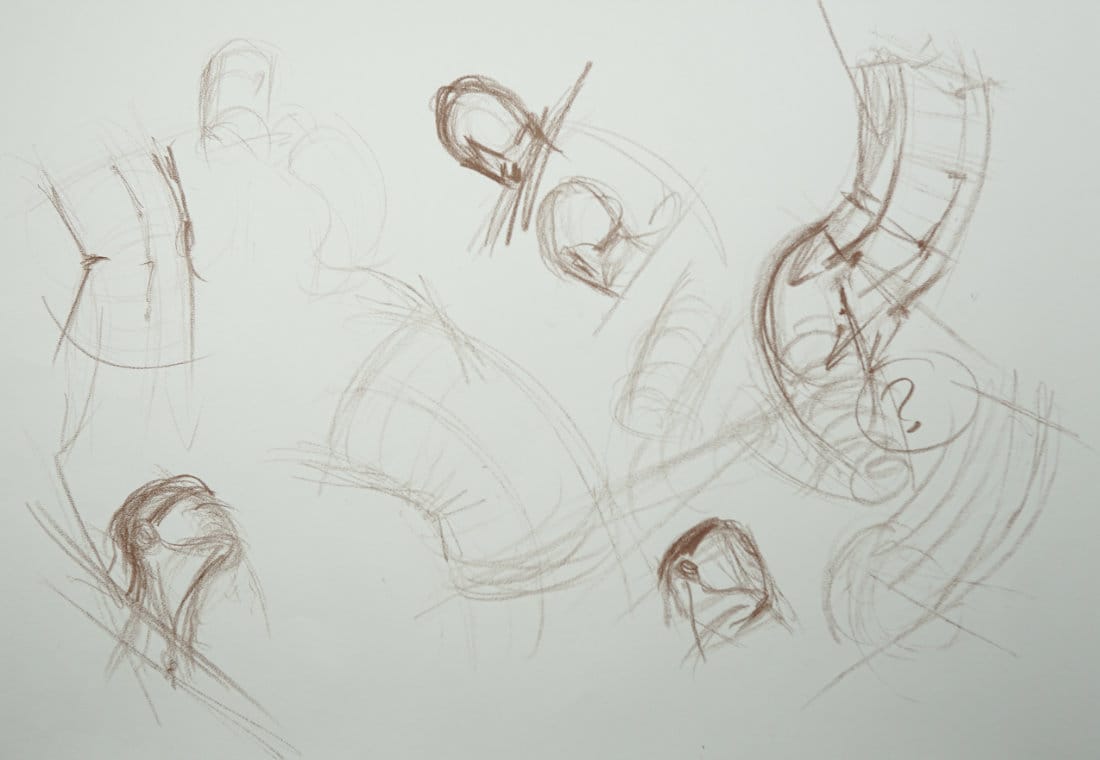
Here are my results from the same assignment. Same time limits, same constraints. Watch my complete process including mistakes, multiple attempts, and exploration across all 4 poses.

Here are my results from the same assignment you just completed.
This lesson is part of the Figure Drawing Course - a complete free course teaching you to draw the human body from scratch.
Same Rules, Same Constraints
4 poses, 4 minutes each. No finished figure studies. Just exploring structure, gesture, and process.
This is what practice looks like - incomplete drawings, multiple attempts, exploring different methods.
Reference Images: Website Only
Due to YouTube policies, reference images are whited out in the video.
Full references available on this page below. Watch here for the complete educational experience, or visit the link in the YouTube description if watching there.

Pose 1: Female Front Facing with Lean
Arms behind head, weight shifted, subtle lean
My Approach
Started where I always recommend: the longest sustained curve.
Went to the outside of the body, used my pencil to figure out that lean angle. Drew the line.
Building the Structure
Next: pelvis lean and shoulder angle. Shoulders have a slight lean. Drew past those corners - you can always correct later.
Looked at the other side to figure out width. First attempt might be wrong. That's fine. Come back and adjust.
Don't know where lines will end yet. They're just something to get started.
Center Line
Once I had the top of shoulders established, moved to the center line.
Center line favoring the right side. Important: didn't look at the shoulders for this. Looked down near the waist, then ran that line straight up.
Added flesh to both sides. Good start.
Tube Direction
Which way is the tube moving?
At the bottom: moving away. Leveling off. Then moving back away.
At the top: moving away because head leaning over, arms raised. Body coming down this way. Tube bulging slightly toward center.
Spine Curve
Looked at the center spine curve. How does it flow?
Pit of neck → ribcage → navel → pubic bone.
Seeing the tangents, the breakdown sections.
The Pinch
Pinch is just above belly button. Very subtle, but it's there.
Got that angle. Then the nice stretch going across the opposite side.
Head (Last Minute)
Had a little time left, explored the head.
Used tube method with gesture line down the middle. Tube wraps around, ear on the side.
Time's up. Moving on.
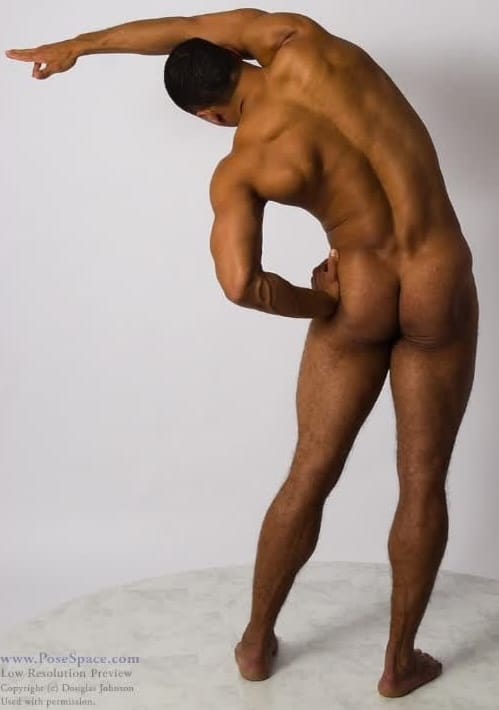
Pose 2: Athletic Male Back Pose
Bent forward, muscular, side view
Started with the Head
Different approach this time: head first.
Slight egg shape. Seeing left side of face and ear. Athletic looking male - thick neck coming down.
Shoulders tucked, coming up in that area. Center line coming down the skull.
Not Satisfied - Tried Again
Got the egg down. Head wraps around. Ear needs to be just a sliver.
Noticed a pinch in the neck. Head is stretched on that side because shoulder and arm pulling everything over.
Moved ear down slightly. Worked with hairline.
Moving to Torso
Figured out shoulder axis first.
Then that really long sustained curve. Trying to capture that big bulky male feeling - very muscular.
Big sweep. Looks pretty even, but left side has slightly less space.
Tube Direction
Tube running this way, then running away from us slightly.
Figured out the pinch angle, down toward waist.
Hip pulled up a bit because of that stretch through upper body. Shoulder girdle really wrapping around.
The Arm
Looking at arm as tube coming toward me.
Very muscular. How do I represent that muscular tube feeling?
Where's the longest sustained curve? Found it.
Worked with forearm - which direction? Where's the longest sustained curve? Which way is that tube moving?
Bouncing around the entire sheet. Using the whole page for exploration.
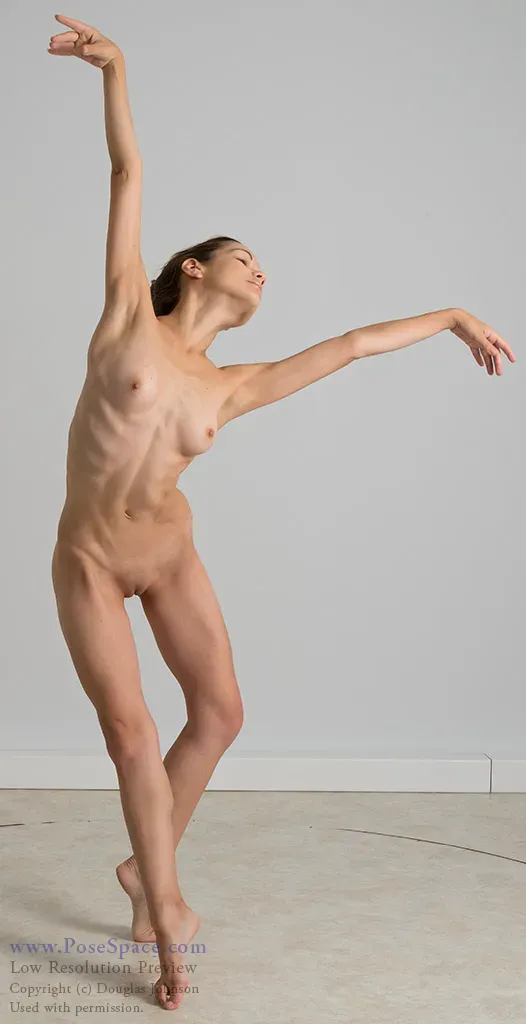
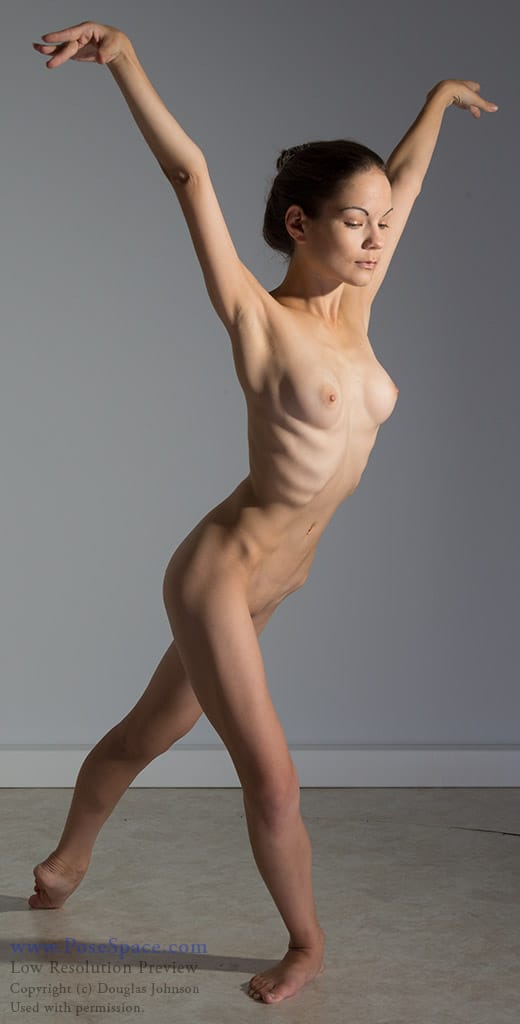
Pose 3: Female Ballet Pose - Side View
Arms extended, head angled down, challenging perspective
Heavy Focus on the Head
This was a very challenging angle.
Wanted to work on face construction for this one.
Tube Method for Face
Used tube idea. That mask of the face moving down.
Very short tube - because of perspective, that head is moving away from us. Made sure tube is characteristic of what I'm seeing.
Neck pulling down from it. On one side, joining way up high because of perspective. Ear toward top of head.
Skull really cropped off there.
Mapping the Features
Started mapping underneath the chin. That sternocleidomastoid muscle coming down toward pit of neck.
Seeing the angle of arm going up, shoulders going this way.
Moved ear up a bit more. Got curved lines over the tube representing underneath skull, underneath chin.
Got hairline in. Starting to take shape.
Still Not Satisfied - Box Method
Decided I didn't like that approach.
Tried the longest gesture line with box construction instead.
Mask of the face. Clearly seeing under that box. Box runs back. Everything parallel.
Found curves on top of that. Chin right there. Started mapping neck.
Ran Out of Time
Focus was entirely on capturing that head angle.
Very challenging. Something I might need to practice more.
Pose 4: Female Front 3/4 View with Arms Raised
Weight shifted, strong angles, arms up
Box Construction Approach
Decided to try box idea. Organic looking box coming down.
Can see the side of the body clearly.
Should Have Started Different
Realized mid-drawing: probably should have started with longest sustained curve.
Got the top of box angle. Corner tangents tough to find.
Lean Model Characteristic
This model is nice and lean. Got the outside established.
For the interior, looked at hip bone - that could be interior line of the box.
Center Line First
Actually, before finishing box, came over to find center line.
Belly button way over on one side. Used that all the way up.
Don't know exact length yet. Belly button might not be there when I'm done - could be higher or lower.
Working in a certain area, then working my way to it.
Shoulder and Box Sides
Shoulders almost straight.
Side of box coming down - decided it comes down to that bone right there.
Drew lines bending with the box. Compared one bone to opposite side bone - getting that angle.
Finding Landmarks
If that's where the angle is, then belly button is roughly up here.
Go up: find bottom of ribcage. Come up: find pit of neck.
From pit of neck, can map out head, neck, other features - all building off that box.
Strong Angle
Once down near belly button, followed it all the way down. Big stretch to pubic area.
Got top of ribcage, bottom of ribcage coming to belly button. Then moving back at really strong angle.
That bend needs to be more prominent - you can really see that thrust back.
Volume Lines
Used that idea of drawing lines over the form. Seeing the hips, those bony marks.
Where I'm seeing the crease, drew oval/egg shape.
This is my bone where hip line is - the belt line.
Leg building off that, bringing it down toward us.
Exploring Different Methods
Maybe I like that approach, want to work more.
Or maybe try X-shape of the hip, then build box off it.
Working with different ideas. All in the name of same thing - exploring shapes and ideas.
Other leg moving way back, away from us.
What You Should Notice About My Process
I Redid Things Constantly
Pose 2: tried head construction twice before moving on
Pose 3: switched from tube to box method mid-drawing
Pose 4: realized better starting point after already working
This is normal. Even with experience, exploration reveals better approaches.
I Bounced Around the Page
Never finished one area completely before moving to another.
Why? Because everything informs everything else.
Head position helps find shoulders. Shoulders help find pinch. Pinch helps locate connections.
I Used Every Tool We've Covered
- Longest sustained curve
- Tubes and boxes
- Eggs and characteristic shapes
- Center lines and landmarks
- Pinch and stretch
- Multiple light lines
- Shooting past corners
- Comparing spaces and angles
Nothing fancy. Just the fundamentals applied.
I Ran Out of Time
Several drawings incomplete. That's the assignment.
Not about finishing. About practicing the process under time pressure.
The Real Takeaway
This is what practice actually looks like.
Not perfect. Not beautiful. Exploratory.
Sometimes wrong. Always learning. Never finished.
What To Do Now
Go back and do it again.
Work on different body parts each time. Try different starting points. Refine what you have.
Review lessons you've forgotten. Notice new things each attempt.
That's how you improve.
Module 1 Complete 🎉
You now have everything:
Core Concepts:
- Structure vs gesture
- 3D forms and perspective
- Tubes and characteristic shapes
- Measurement tools
- Pinch and stretch
- Connecting line
- Longest sustained curve
Demonstrations:
- Three complete figure drawings
- Master's analysis
- My practice results
Your Assignment:
- 4 timed poses to practice
- Reference images to study
- Process to repeat weekly
Everything else is repetition and refinement.
The foundation is complete. Now you practice.
Keep drawing. Keep exploring. Keep getting your hands dirty with the work.
Reference Images for All 4 Poses
Educational Context: This figure drawing course uses professional art reference photographs containing artistic nudity. These images are presented solely for educational purposes to teach human anatomy, gesture, and structure to artists.
Copyright: All reference images © Douglas Johnson / PoseSpace.com - Used with permission for educational purposes.
Course Navigation
Part of: Figure Drawing Course > Module 1: Foundation
← Previous Lesson: Practice Assignment
🎉 CONGRATULATIONS! MODULE 1 COMPLETE!
You've learned everything you need to start drawing figures with confidence.
What's Next?
Keep practicing this assignment weekly. Same format, different references each time.
Track your progress. Notice what gets easier. Identify what needs more work.
Additional modules coming soon:
- Advanced gesture and movement
- Anatomy deep dive
- Hands and feet
- Portraits and expressions
- Clothed figures
- Dynamic poses
Keep Drawing
The foundation is built. Now comes the fun part: making it yours through practice.
See you in the next module!
— Robert
Continue Learning
If you enjoyed this hand drawing course, explore even more lessons on our Free Drawing Tutorials & Courses Hub — including the complete How to Draw – Beginner’s Course.
Want new tutorials delivered to your inbox? Subscribe here and get free lessons, tips, and inspiration sent directly to you.


