Figure Drawing Demo Two: Front Pose and Drawing with Empathy
This isn't just about technique. It's about feeling what the model feels. Learn to draw with empathy, using contra angles between shoulders and pelvis, and focusing on gesture before details.

This isn't just about technique. It's about feeling what the model feels.
This lesson is part of the Figure Drawing Course - a complete free course teaching you to draw the human body from scratch.
Watch the full demo: hit play and discover tips for drawing people in front view.
Be Empathetic to the Model
Don't copy what you see. Feel what the model is feeling.
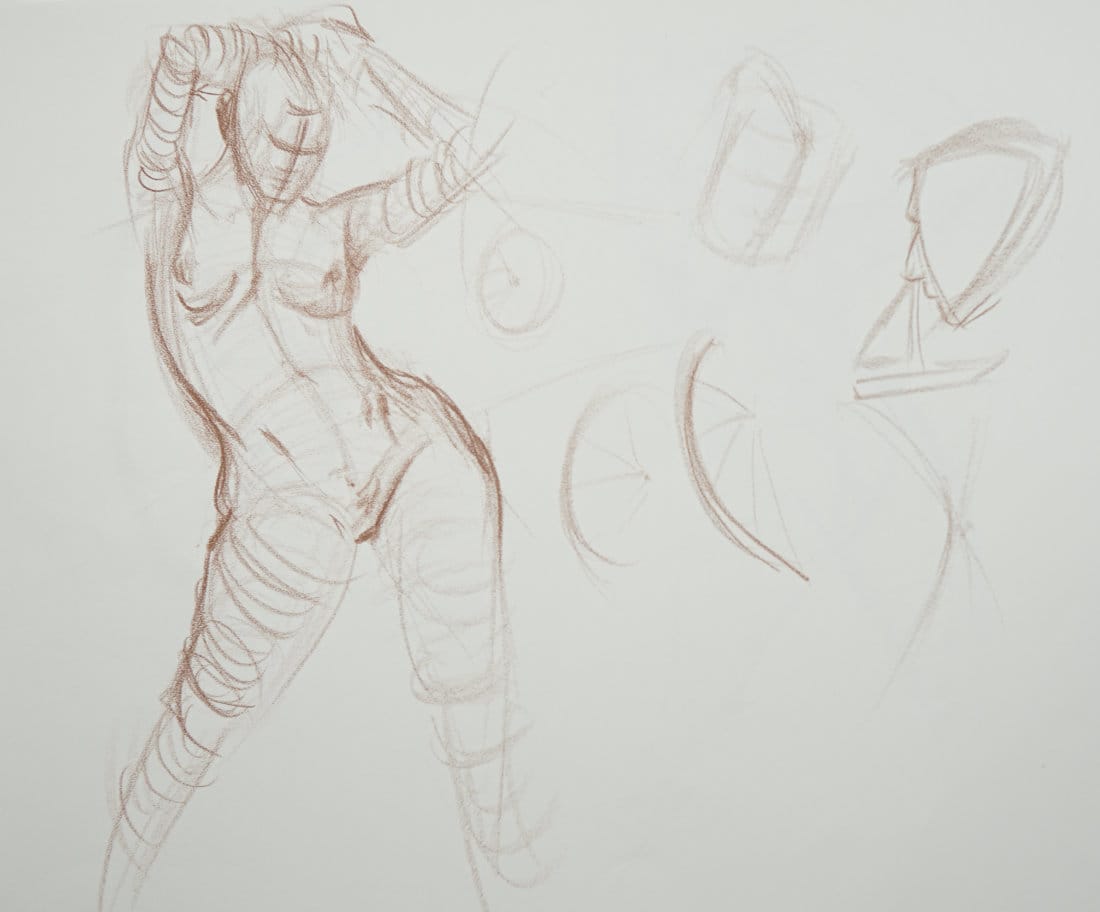
This pose: Weight pushed into left hip. Belly button, ribcage, shoulders pulling back slightly. Pelvis thrust forward. Upper body concaved. Arms wrapped overhead.
Feel that. Stand up and take the pose yourself. Push your hip out, straighten that left knee, pull your upper body back, tuck your chin, raise your arms.
Now you understand the pose. That's empathy. That's what you're drawing - the feeling, the energy, the moment. Not just shapes.
Error Toward Exaggeration
If you're going to make a mistake, make it too expressive, not too stiff.
Too much energy? Better than wooden and lifeless.
Exaggerated gesture? Better than timid and short.
Know which side you want to error on. Choose expressiveness over caution.
Find the Armpit Angle
Arms raised? Use the armpits to locate shoulder position.
There's a slight angle across those armpits. Find it. That gives you the top of your tube.
Then find the contour inside - but remember, that contour has flesh, shoulder girdle, structure underneath. You're finding the happy medium, not copying the edge.
Contra Angle: Shoulders vs Pelvis
Shoulders angle one way? Pelvis angles the opposite way.
This is natural body mechanics. When weight shifts to one hip, the pelvis tilts. Shoulders counter-balance by tilting opposite.
Use the iliac crest (those bony landmarks where a belt would sit) to find pelvis angle. Hold your pencil horizontally, see how those landmarks deviate.
Shoulders angle down right? Pelvis angles down left.
Avoid Symmetrical Curves
A perfect C-curve is boring.
Make curves interesting: Start dramatic on one end, elongate on the other. The center axis isn't evenly spaced from both sides.
Even when you see a symmetrical curve, find a way to make it asymmetrical. More interesting to look at. More dynamic.
Center Line Landmarks
Front torso gives you clear landmarks:
1. Suprasternal notch (pit of neck, top of ribcage)
2. Xiphoid process (base of sternum)
3. Navel (belly button)
4. Pubic bone (bottom of pelvis)
These points aren't perfectly vertical. Measure angle from landmark to landmark using your pencil.
This pose? Suprasternal notch slightly left. Comes down to xiphoid, then angles down to navel, then to pubic bone. The center line snakes.
Two Head Construction Methods
Method 1: Tube
- Center line down
- Curved lines wrapping around for features
- Works great for tucked chin poses
Method 2: Upside-Down Sail
- Forehead out, eye sockets in, nose out, lips out, chin
- Quick characteristic shape
- Mask of the face
Either works. Pick what feels right for the pose.
Overlap Your Corners
When edges meet, crisscross them slightly.
Don't try to make corners meet perfectly. Shoot past, then come back and refine.
This gives you flexibility. You can adjust, curve, modify. Perfect corners trap you.
Don't Go for Obvious Details
Breasts, muscles, obvious features? Ignore them at first.
If you map out details early, you lose the gesture.
Focus on:
- Tube construction
- Gesture flow
- Volume
- Direction (toward/away from you)
- Space and negative space
Details come AFTER structure is solid.
Volume Lines Show Direction
Wrap lines around the form. Belly button going around the waist shows you're seeing underneath.
Hips pushing out? Volume lines show that. Leg tube moving toward you then away? Lines show direction changes.
Think 3D constantly. Every tube has direction in space.
The Story Matters More Than Accuracy
Capture the feeling. The pull up through the torso. The weight shift. The energy.
That's more important than perfect proportions.
Get the empathy right, the construction will follow. Miss the empathy, and perfect measurements won't save you.
Course Navigation
Part of: Figure Drawing Course > Module 1: Foundation
← Previous Lesson: Demo One
Next Lesson → Demo Three
Continue Learning
If you enjoyed this hand drawing course, explore even more lessons on our Free Drawing Tutorials & Courses Hub — including the complete How to Draw – Beginner’s Course.
Want new tutorials delivered to your inbox? Subscribe here and get free lessons, tips, and inspiration sent directly to you.


