Figure Drawing Demo Three: Starting with the Head
You don't always start with the torso. Sometimes the head comes first. Learn a different entry point for figure drawing that locks in head position before building the rest of the body.

You don't always start with the torso. Sometimes the head comes first.
This lesson is part of the Figure Drawing Course - a complete free course teaching you to draw the human body from scratch.
Watch the full demo: hit play and learn how head-first approach will help your figure drawings.
Different Starting Points
Previous demos started with the torso tube. This one? We're starting with the head.
Why? Some poses demand it. When the head has a strong angle or interesting position, lock that in first. Everything else builds from there.
Don't limit yourself to one method. Different poses need different approaches.
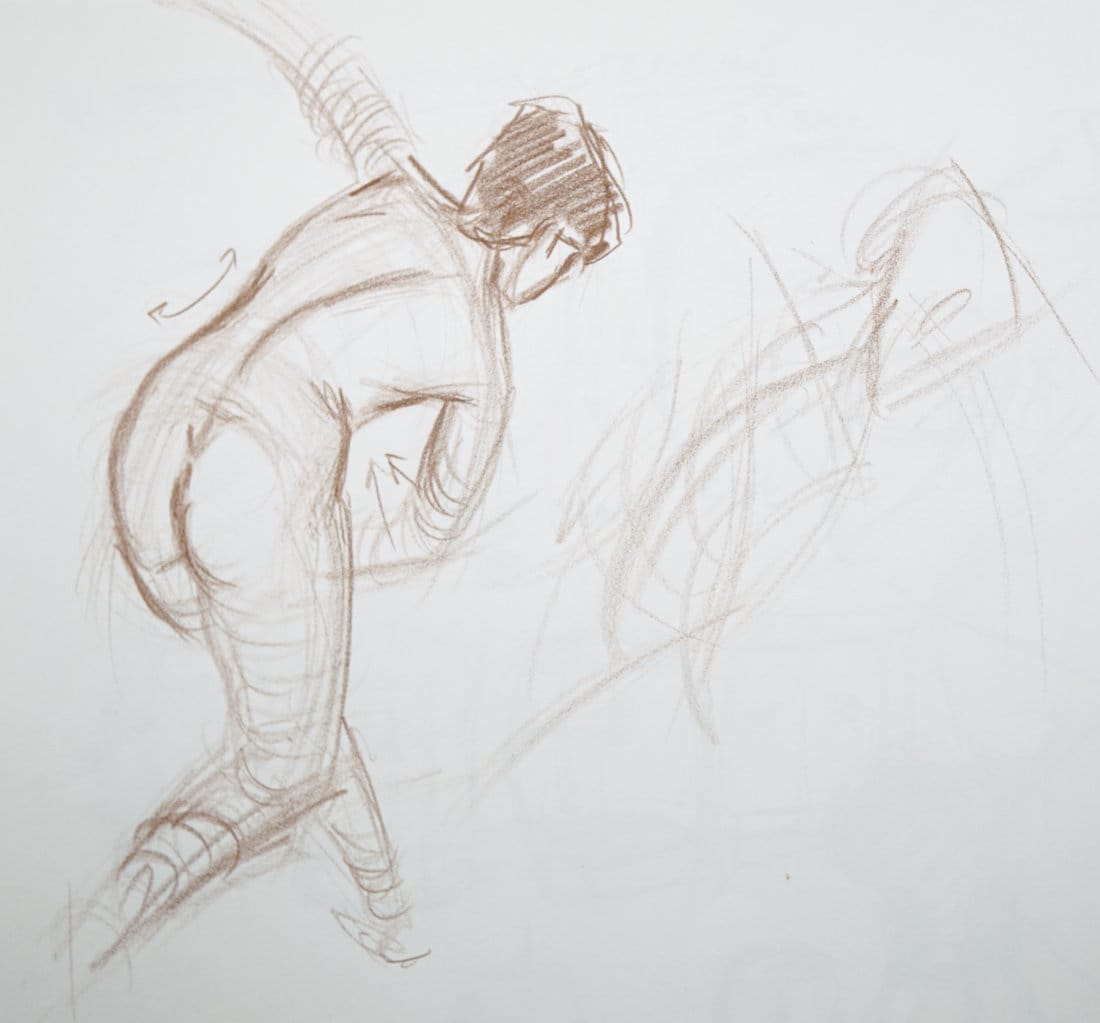
The Mask of the Face
Find that front plane angle. The "mask" where features sit.
Draw that angle first. Then add the top of the skull. Point down to the chin. Back of the skull curves around.
You're establishing the head's position in space immediately.
Ear placement, neck volume, digastric plane underneath - all of that comes after the basic head structure is locked in.
From Head to Longest Sustained Curve
Once the head is placed, find your main torso gesture.
Use your pencil as an axis. Find that longest sustained curve running down the back. Don't worry about where it ends yet - just get the flow.
Draw several light lines. Don't commit. Explore options.
Turn your pencil in the direction of the line (not perpendicular) for cleaner marks.
The Tube Bends
Right side shows the tube curving. It runs away from you initially, then changes direction at the waist and moves down.
Focus on the back area first. Get that tube established before worrying about limbs.
Center Line and Space
The center line favors one side - more space from center to left edge than center to right.
Stay parallel with your longest sustained curve. That simple tube is your foundation.
Bring it down into the pelvis area. That egg shape or circle for the glutes starts forming.
Don't Move Away Too Far
Here's a key concept: Don't stray too far from your anchor points.
You added detail to the face to help place the back's gesture. Once you have that information, use it.
Head position helps you find shoulder angles. Shoulder angles help you find the pinch. The pinch helps you locate where structures connect.
Everything informs everything else.
Pinch Side Gets Detailed Attention
This pose? Clear pinch on one side.
Shoulder line angle, shoulder girdle area, arm coming down and back toward body - all that detail work helps you find the pinch accurately.
Work lightly. You might not be happy with initial placement. Stay loose, stay exploratory.
Legs: Gesture Down
That beautiful curve of the leg moving down, then back. Follow it.
Stretch side shows clearly. Bottom of glutes visible. Give the leg volume as you work.
Decision point: Some intersections need corners, some need curves.
Corners vs Curves
Where direction changes sharply = corner.
Where change is subtle = curve.
Arm sweeping over then changing direction to move toward leg? Maybe a corner. Upper arm flowing into forearm into hand? Maybe one long curve.
You decide. There's no single right answer. Artist's choice based on what you see and what feels right.
Arms and Connections
Arms attach where clavicles connect at shoulder sockets.
That arm wrapping around? Tube with flesh on the outside, touching the gesture line, then curving.
The other arm? Long flowing tube gesture line extending out.
Simple tubes capture complex forms.
Trapezius Attaches High
Those trapezius muscles connect high on the back of the skull. They come up, attach, create that neck volume.
Ear, face, digastric plane, eye socket, hairline - once you add this info, things take shape quickly.
Work Step by Step
Don't get ahead of yourself. Take your time.
Find the gesture. Add structure. Check your work. Use your judgment.
Your eyes do heavy lifting. They're accurate if you trust them and use measuring tools to verify.
Simple Yet Characteristic
That's the goal every time.
Starting with the head shows you a different entry point. Same principles apply: gesture first, structure second, details last.
Lock in that head position, find your longest curve, establish tubes, add flesh.
The process works regardless of where you start.
Course Navigation
Part of: Figure Drawing Course > Module 1: Foundation
← Previous Lesson: Demo Two
Next Lesson → Timed Assignment Reel
Continue Learning
If you enjoyed this hand drawing course, explore even more lessons on our Free Drawing Tutorials & Courses Hub — including the complete How to Draw – Beginner’s Course.
Want new tutorials delivered to your inbox? Subscribe here and get free lessons, tips, and inspiration sent directly to you.


