Eye Socket Anatomy – How to Draw Eyes with Structure
Learn eye socket anatomy and how it shapes realistic eyes. Understand the skull’s structure so your drawings feel solid and believable.

In this lesson, I take a closer look at the skull to show how the eye socket supports and protects the eyeball. If you’ve ever struggled with how to draw eyes that sit naturally on the head, understanding the structure beneath is the key.
This lesson is part of the Head Drawing Course.
Understanding the Eye Socket
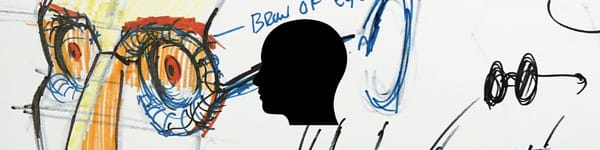
The eye sockets are surprisingly wide and sit right on the front of the skull. Because humans are predators, our eyes face forward, allowing both eyes to overlap in vision and give us depth perception.
Each socket holds the eyeball slightly back in the skull, protected by the brow ridge above and the cheekbone below. This structure is designed to shield the eyes from impact—an anatomical detail that also helps artists understand why the eyes appear recessed rather than flat.
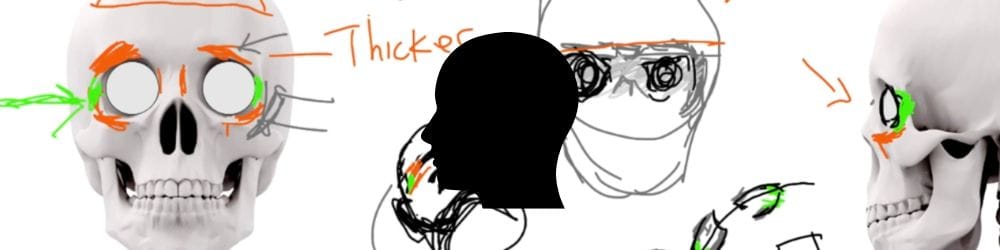
How Bone Shapes the Eye Region
The brow ridge is much thicker than the skull cap, and the cheeks flare outward to form the widest part of the face. Beneath the ridge, the bone slopes back toward the nose and side of the head, creating that characteristic “sunken” form around the eyes.
That mix of bulging and receding planes gives the face its rhythm. When you’re drawing, pay attention to those subtle transitions—especially when the head tilts or turns. Understanding how those forms wrap around the sphere of the head will make your portraits far more convincing.
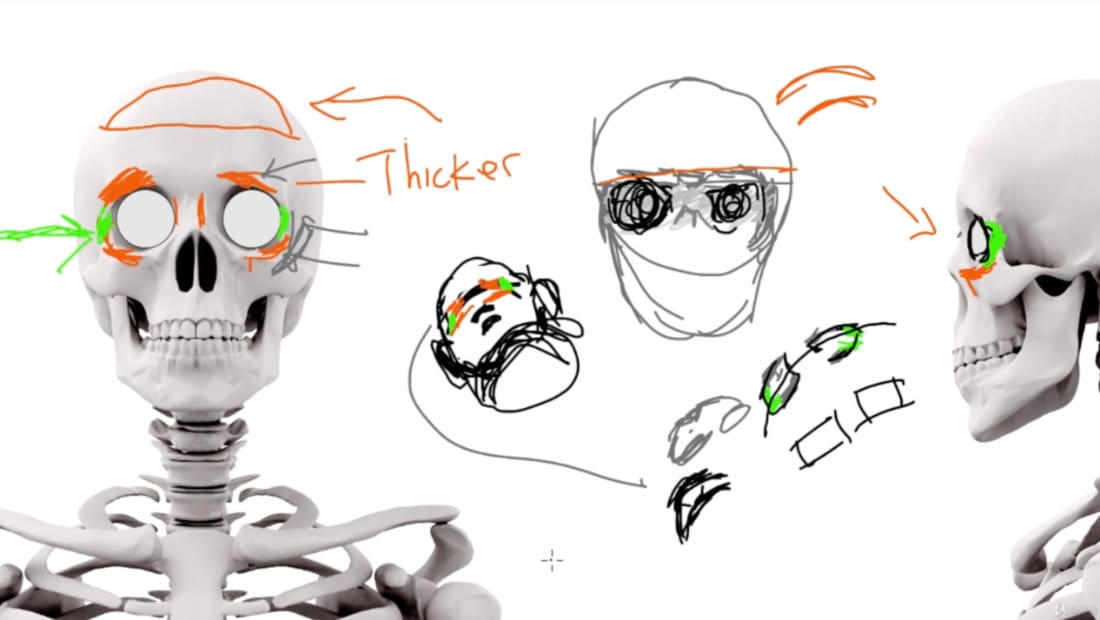
Dynamic Structure and Perspective
The eye sockets wrap around the curved surface of the skull, not a flat plane. As the head moves, those sockets shift in perspective, bulging at the brow and cheeks while tapering toward the sides.
That’s why when you draw a tilted or turned head, the far eye will often look narrower or more angled—it’s following that round structure. Keep that spherical rhythm in mind every time you sketch eyes from life or imagination.
Practice Tips
- Sketch the skull from different angles and mark where the eye sockets sit.
- Shade around the brow ridge and cheekbones to emphasize the form.
- Practice placing the eyeballs inside the sockets—avoid flattening them to the face.
Course Navigation
Previous Lesson: Eye Drawing Basics
Next Lesson: Socket Lecture
Visit the Head Drawing Hub
Continue Learning
If you enjoyed this hand drawing course, explore even more lessons on our Free Drawing Tutorials & Courses Hub — including the complete How to Draw – Beginner’s Course.
Want new tutorials delivered to your inbox? Subscribe here and get free lessons, tips, and inspiration sent directly to you.