Ear Drawing: Understanding Inner Ear Structure
Learn to draw the inner ear using the C and question-mark method. Build depth, volume, and form for realistic ear drawings.

In the last lesson, we looked at ear placement and basic angles. Now we’ll zoom in on the inner ear and break down the forms that make it look three-dimensional and believable.
This lesson is part of How to Draw the Head Course.
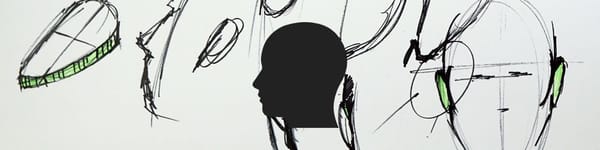
Simplifying the Ear into Basic Forms
The ear may look complicated, but most of its structure can be captured using a few simple ideas — a C-shape and a couple of question marks.
These shapes represent the outer rim and inner folds that make up the main design.
I like to think of the outer rim as a tube that loops around the ear — thicker at the top and thinning toward the lobe. Inside that, you’ll find a second tubular ridge that overlaps, curls, and funnels sound toward the center.
The key takeaway? The ear is not flat. It’s a system of rolling, organic forms that curve in and out like a small sculpture.
The C + Question Mark Formula
Start with a light “C” shape for the outer edge. Then layer a smaller “?” shape inside to describe that inner rim. These two lines will overlap, hook into one another, and help define the channel where shadows collect.
As you shade, remember that these inner folds aren’t symmetrical — some parts bulge outward while others tuck in. Try exaggerating the contrast a little so you can see how the form steps up and down in space.
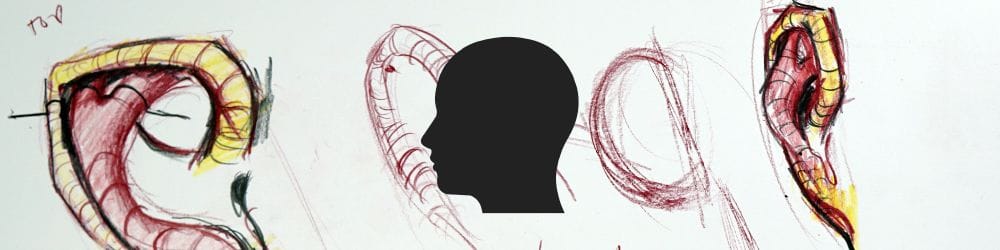
Tubular Volume and Flow
The upper ridge (helix) flows down and around like a bent tube, looping back and overlapping the inner edge (antihelix). Think of this as a small roller coaster that winds and dips before meeting the bowl-shaped inner area known as the concha.
Adding slight thickness to the outer and inner tubes gives the ear its roundness. You can even trace your finger along your own ear to feel how it rises, folds, and dives — those tactile clues will help your drawings feel more alive.
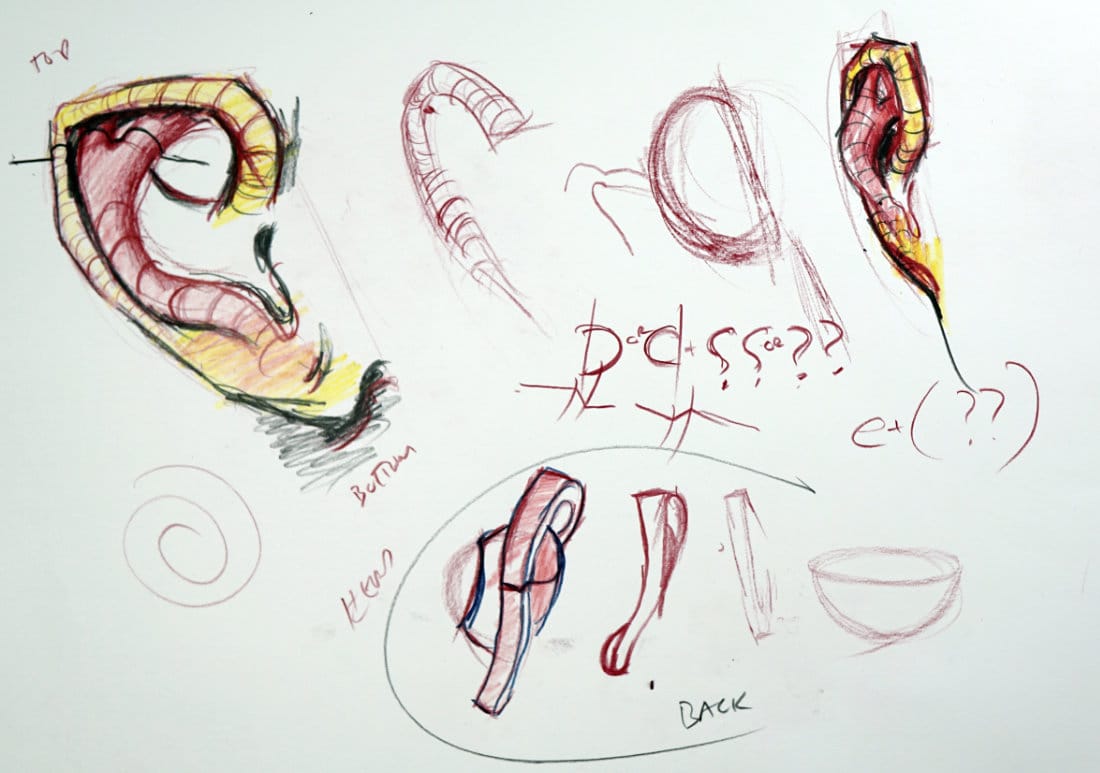
Adding Depth and Cast Shadows
Light plays a huge role in defining the ear’s depth. The overlapping ridges often cast small shadows onto the bowl area, and the lobe may create softer ones near the jawline.
Try shading the inner channels a little darker to emphasize the layering. This creates that “crawlable” feel — if an ant could walk along the surface, it would dip and rise continuously around the folds.
Practice Tip
Fill a sketchbook page with several large ears — some front-facing, some at an angle. Use just two pencils: one for clean lines and one for volume and shadow. Don’t chase realism right away; instead, focus on flow and rhythm. Once you feel how the forms connect, adding details becomes much easier.
Course Navigation
Previous Lesson: Ear Drawing for Beginners
Next Lesson: Ear Drawing Part 3 – Light, Shadow, and Stylization
Head Drawing Hub: Complete Head Drawing Course
Continue Learning
If you enjoyed this hand drawing course, explore even more lessons on our Free Drawing Tutorials & Courses Hub — including the complete How to Draw – Beginner’s Course.
Want new tutorials delivered to your inbox? Subscribe here and get free lessons, tips, and inspiration sent directly to you.