Ear Drawing Part 3: Back View, Thickness, and Volume
Learn to draw the ear from the back and front views. Understand ear thickness, bowl structure, and form for realistic head drawings.

Now that you understand the ear’s main structure and inner folds, it’s time to look at it from new angles. In this lesson, I’ll show how to draw the ear from the back and front views—and how to think about its thickness and volume so it looks attached, not pasted on.
This lesson is part of How to Draw the Head Course.
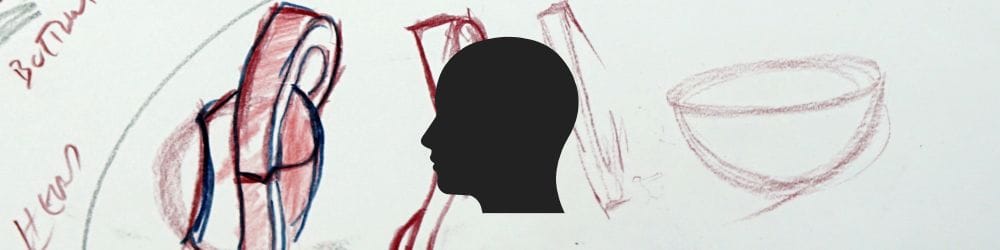
The Bowl Concept
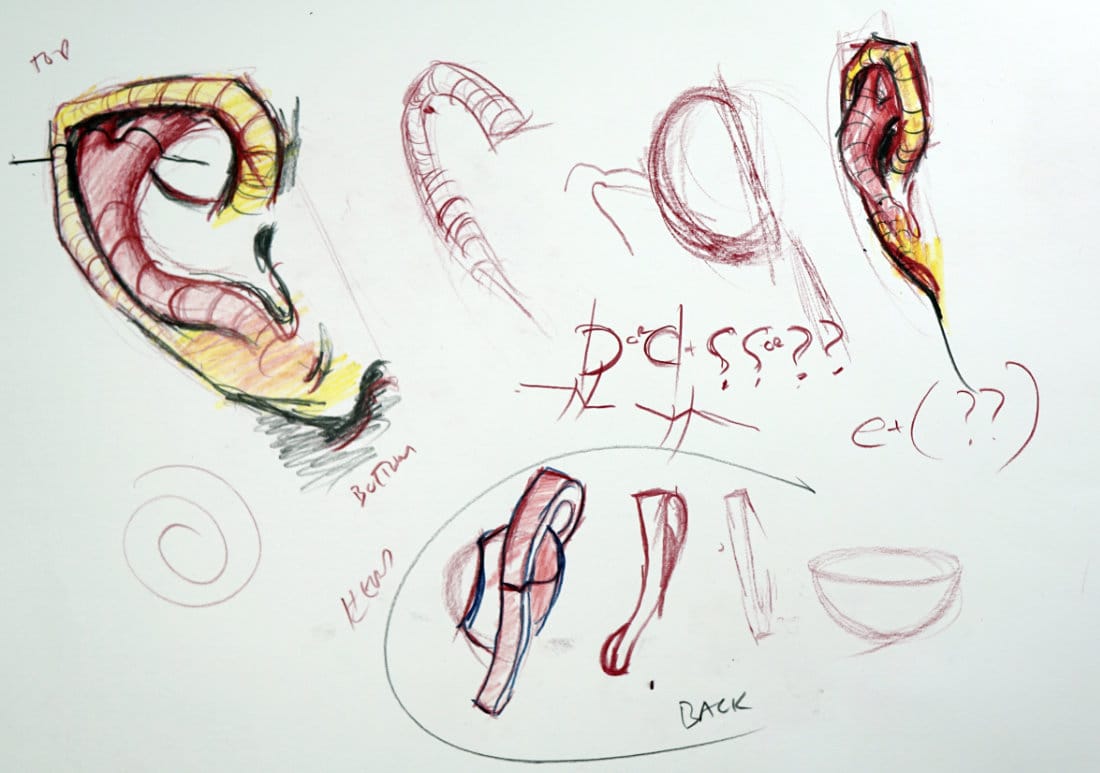
When drawing the ear from behind, imagine it as a vertical bowl that connects to the side of the head. This “bowl” represents the main mass that cups outward before curving back toward the skull.
You’ll see a small notch where the ear meets the skull—this is where light usually catches and helps define that attachment point. From there, the form flares out near the top, tapers toward the bottom, and tucks in again where the lobe meets the cheek.
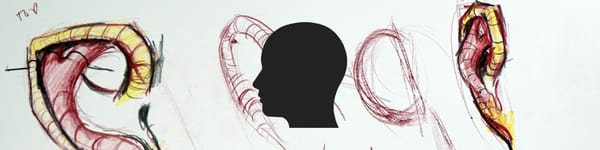
Capturing Thickness
From any angle, remember the ear’s thickness is visible. It’s not a paper-thin flap.
When sketching the back view, draw two edges: one for the outer contour and one for the inner edge that rolls back in toward the head.
As you move to the front view, let that same contour curl and fade. The outer edge should wrap slightly around the head, while the inner ridge softens into the cheek area. These subtle turns give the ear a solid, believable form.
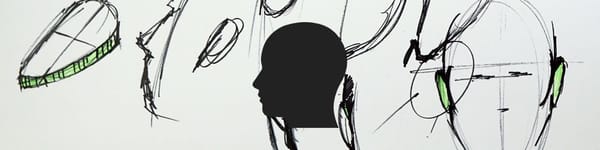
Variations and Overlaps
Every ear is different—some flare outward, others tuck in tight. The key is to build your drawing with simple overlapping shapes. Think of one part curling over another, almost like a ribbon.
Add soft, curved contour lines to show how each surface transitions. Even a few light volumetric lines can suggest that rolling, three-dimensional quality.
Lighting and Shadows
The folds of the ear naturally create small cast shadows. The inner bowl (or concha) tends to be darker, while the rim catches more light.
When the ear overlaps the face, there’s often a small, subtle shadow underneath the connection point—this helps the ear feel anchored instead of floating.
Practice Tip
Try drawing the ear from memory using just simple shapes: a vertical oval for the main form, then a smaller inner oval for the bowl. From there, practice rotating it—side, back, and front views.
You’ll start to recognize how consistent that “bowl” structure really is, no matter how the head turns.
Course Navigation
Previous Lesson: Ear Drawing Part 2 – Inner Structure Breakdown
Next Lesson: Ear Drawing Part 4 – Master Studies and Stylization
Head Drawing Hub: Complete Head Drawing Course
Continue Learning
If you enjoyed this hand drawing course, explore even more lessons on our Free Drawing Tutorials & Courses Hub — including the complete How to Draw – Beginner’s Course.
Want new tutorials delivered to your inbox? Subscribe here and get free lessons, tips, and inspiration sent directly to you.