Drawing from Cropped Photos: Finding the Offset Vanishing Point
Most photos you find online have been cropped, which means the vanishing point isn't where you expect it to be. This creates a challenge: how do you draw accurately when the perspective point is offset?

In this tutorial we will learn how to draw from cropped photos. Most photos you find online have been cropped. The photographer takes a shot, then edits it down - cutting off the bottom, trimming the sides, reframing the composition. This creates a real problem: the vanishing point isn't where you expect it to be.
Let me show you how to find that offset vanishing point and use it to draw accurately from edited images.
Want drawing lessons? Visit the Free Drawing Tutorials & Courses hub →
Watch video: hit play and learn how to see and use cropped photos with offset vanishing points.
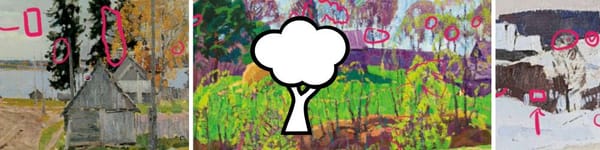
The Setup: A Cropped Street Scene
I purposely cropped this image to demonstrate the challenge. We've got a street view with houses on both sides, some cars, trees - a typical urban scene. But because it's cropped, the vanishing point isn't sitting nicely in the center of the frame.
First, establish your ground level and eye level. Eye level sits slightly above the ground plane, roughly where the horizon would be if you could see it.
Finding the Vanishing Point
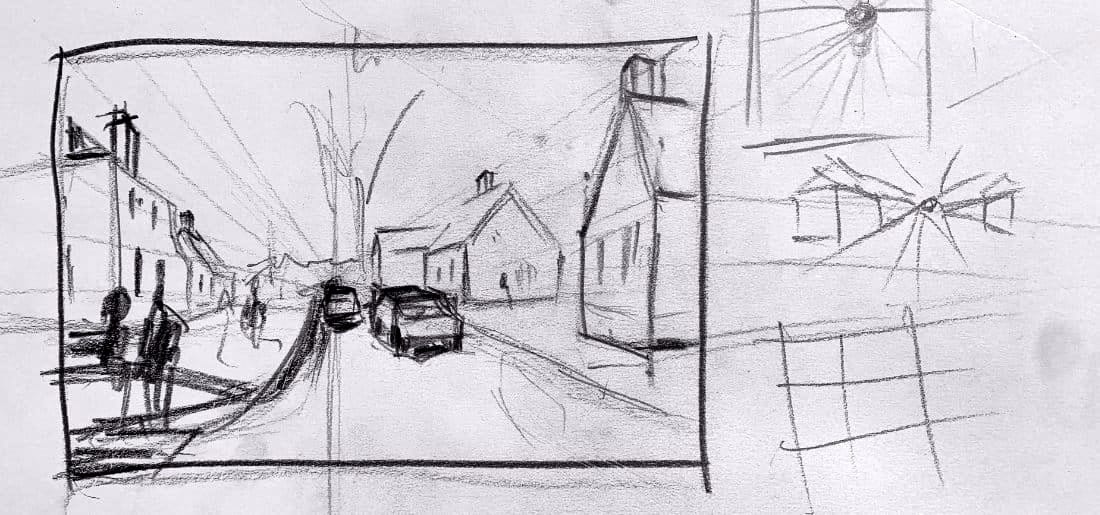
Here's the detective work: look at the road coming down the middle. The left side of that road is almost straight - nearly vertical in the frame. That tells you something important.
If that road edge were perfectly straight coming at you, the photographer would be standing exactly on that line. But since it has a slight angle, you know the photographer was standing just to the right of where that road edge is.
So your vantage point - where everything converges - is roughly right there, off to the right side of the frame. Not centered. Not where you'd naturally expect it.
Everything stems from that point.
Building from the Offset Point
Now you can use the starburst method from that offset location. The road sweeps down and curves out on one side, angles more dramatically on the other side - but both edges are heading toward that vanishing point.
Pick the corner of the first building - that's your anchor. It goes up to a certain height. One side works away from you back toward that vanishing point. The other side angles down toward the same point. The roofline follows those tracking lines.
Add another house. Find its closest corner. Both sides track back to that same offset point. Windows, porches, architectural details - they all follow those perspective lines radiating from your discovered vanishing point.
Cars and Foreground Objects
The car in the foreground starts with its basic box shape. Because you're looking at it relatively straight-on from this vantage point, you won't see much of the side. But what you do see tracks back toward that offset point.
Here's a useful check: if you added another car on the left side of the street, you'd see that side of it because you're positioned to the right of center. A car on the right side? You'd see the other side. Everything is consistent with that offset viewpoint.
Chimneys and Vertical Details
Chimneys are particularly useful for practicing this. The front face of the chimney sits on the front plane of the house, so it tracks with one set of perspective lines. The side of the chimney tracks with the other set. You get this rhythm: front tracking this way, side tracking that way.
Windows work the same way. Once you've established where that offset vanishing point is, everything clicks into place. Top edges of windows on one side of the street, bottom edges, foundation lines - they all radiate from that discovered point.
The Starburst from Anywhere
The key insight: you can do the starburst method from any location, not just the center of your frame. Find where the photographer was standing, mark that spot mentally or physically, and radiate your perspective lines from there.
Urban scenes make this easier because everything is built on a grid. Streets are perpendicular, buildings are squared up, it's all planned geometry. Rural landscapes are more organic, less predictable. But street scenes? They follow the rules consistently.
Why This Matters
When you search online for reference images, maybe one in ten photos is uncropped with a centered vanishing point. The rest have been edited. If you don't figure out where the actual vanishing point is, your drawing will feel off even if you're copying the photo accurately.
Look for clues: nearly vertical lines in the scene tell you you're looking straight at them. Dramatic angles tell you you're positioned to one side. The road is your best friend - it rarely lies about perspective.
Practical Application
You wouldn't draw all these construction lines for every piece of artwork - that would be tedious. But understanding where that vanishing point lives, even in a cropped image, means you can check your angles as you work.
Does this window align with that roofline? Should this car show more or less of its side given where I'm standing? Is this building's angle consistent with everything else in the scene?
Those questions only make sense if you know where the vanishing point is, even if it's sitting outside your frame.
Want More Foundation Training?
This builds on earlier perspective concepts:
Complex Scene Drawing - Combining multiple objects once you know where your vanishing point is.
Two-Point Perspective Method - Understanding tracking lines that make these offset calculations manageable.
Building Drawing Series - The same principles apply whether your vanishing point is centered or offset.
The Bottom Line
Cropped photos are the reality of working from online references. Don't assume the vanishing point is centered. Play detective with the angles - especially roads and straight architectural elements - to figure out where the photographer was actually standing.
Once you find that offset point, everything else works the same way. Starburst from there. Track your perspective lines. Build your objects consistently. The composition might be cropped, but the spatial logic is still there waiting for you to discover it.
Continue Learning
If you enjoyed this hand drawing course, explore even more lessons on our Free Drawing Tutorials & Courses Hub — including the complete How to Draw – Beginner’s Course.
Want new tutorials delivered to your inbox? Subscribe here and get free lessons, tips, and inspiration sent directly to you.