The Connecting Line: Don't Lose Your Gesture in the Details
Gesture has another name: the Fundamental Design Line. It's also the Connecting Line. Here's why you need to protect it like your life depends on it - and how to maintain flow through all the details.

This lesson is part of the Figure Drawing Course - a complete free course teaching you to draw the human body from scratch.
Gesture has another name: the Fundamental Design Line. It's also the Connecting Line.
Here's why you need to protect it like your life depends on it.
Watch the full lesson: smash that play button and learn the connecting line, another cog in the wheel for figure drawing.
The Problem
You start with a beautiful flowing gesture line. Perfect. You feel the rhythm, you've got the curve.
Then you add the deltoid. The bicep. The tricep. Details, shading, rendering.
Suddenly the gesture is gone. Lost in the details. The flow disappeared.
This happens to everyone. It's the single biggest mistake in figure drawing.

The Connecting Line Concept
Think of the gesture line as home base. Everything can break away from it temporarily, but must come back and touch it.
Ocean wave analogy: Water flows around Earth's curve. A wave might crest high, but it still follows the curve underneath. It breaks away, comes back, breaks away, comes back.
Your details should do the same.
The Face Example
If you've taken my head drawing course, you know the face has a basic oval gesture.
The forehead might bulge out slightly. It comes back in at the eyes. The nose projects forward. The lips are beyond the line. The chin comes back.
But everything connects back to that main curve. Out, touch, out, touch, out, touch.
That's the connecting line in action.
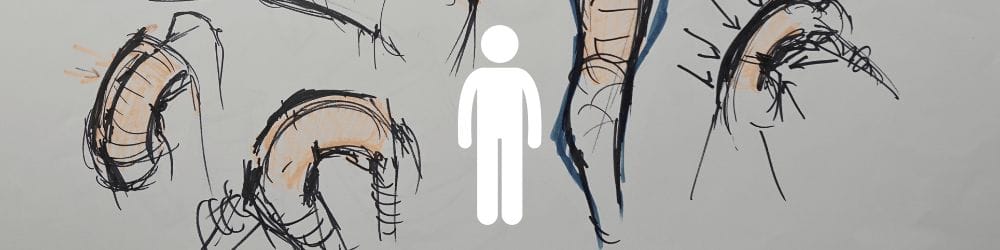
The Arm Example
Draw a flowing gesture for an arm from shoulder to elbow.
Add the shoulder muscle - it bulges out, but comes back to touch the gesture line. The tricep breaks away slightly, touches back. The bicep breaks away, touches back.
The gesture line is your anchor. Details orbit around it but stay connected.
The Leg Example
Profile view leg. Beautiful curved gesture from hip to knee.
Front muscles bulge forward, come back in at the knee. Hamstring bulges back, straightens near the knee. Calf muscle bulges out, tapers down.
Everything breaks away, comes back, breaks away, comes back. The connecting line holds it together.
The Longest Sustained Curve
Your main gesture line should follow the LONGEST curve.
For the arm: Shoulder to elbow on the OUTSIDE is longer than shoulder to inside of elbow. Use the outside.
For the torso: Stretched side (longer) not pinched side (shorter). Find the longest point-to-point distance.
This gives you the primary flow. Everything else is secondary.
Stretch Side vs Pinch Side
When the body rotates, one side stretches (longer curve), one side pinches (shorter, with creases).
Always find your main gesture on the stretch side. That's your longest sustained curve.
The pinch side? Average it out. Find the happy medium between all the bumps and creases.
Profile View
Figure bending backward in profile. Front of body has the longest curve - that's your main gesture line.
Back of body? Bunching up, creasing. Average those out to find the secondary curve.
Measure from the stretch side. That's your primary information.
The Golden Rule
Details break away, but must reconnect.
Muscles bulge? Fine. But they come back to the gesture line. Fat deposits? They break away and touch back.
The connecting line is non-negotiable. Lose it, and you lose the drawing.
Course Navigation
Part of: Figure Drawing Course > Module 1: Foundation
← Previous Lesson: Facing, Leaning, Tilting & Rotating
Next Lesson → Longest Sustained Curve
Continue Learning
If you enjoyed this hand drawing course, explore even more lessons on our Free Drawing Tutorials & Courses Hub — including the complete How to Draw – Beginner’s Course.
Want new tutorials delivered to your inbox? Subscribe here and get free lessons, tips, and inspiration sent directly to you.


