Box Construction Part 4: Jawline and Chin Structure
Master jawline construction to avoid the amateur mask look. Learn bilateral symmetry, finding jaw angle landmarks, the digastric plane, and why squaring off beats the horseshoe shape.

Here's where a lot of head drawings start looking amateurish: the jawline. People draw it wrong, and suddenly the whole face looks like a mask floating on a stick. Let's fix that.
Did you know? This lesson is part of a complete step-by-step head drawing course. If you haven't watched from the beginning I highly recommend you do so to get the most out of this lesson.
Watch video: hit play to advance your head drawing skills.
The Common Mistake: The Harsh Angle
You're drawing an underneath view. Figure looking up. You plot out the mouth, chin, ears, cheeks, eyes, nose. Looking good.
Then you get to the jawline.
What most people do: Come down from the ear, then BAM - harsh angle straight to the chin. Like this sharp corner.
The problem: It looks like a mask. It's detached. It's too thin. It screams "beginner."
Why it happens: Technically, that's kind of what's there - low jaw, high chin, low jaw, high chin. But there's a much better way to plot it out.
What Actually Happens: The Profile View
Look at a profile. The ear sits behind the face. The jawline comes down, then goes over.
Some faces are more curved. Some are more square. But most of the time, you get this shape: down, then over.
From different angles, you can still see that line dropping down from the jaw, then going to the chin area.
The tricky part: In underneath views where the figure is looking up, that beautiful jawline shape gets lost. You can't see it as clearly.
So how do you construct it correctly?
Bilateral Symmetry (But Not Perfect)
The human body has bilateral symmetry. Split it in half: eye here, eye there. Eyebrow, eyebrow. Shoulder, shoulder. Nipple, nipple.
But here's the key: it's never perfect symmetry.
If you covered up one side of a face and photocopied the other side to mirror it, it would look weird. Might not even look like the person.
It's CLOSE to symmetrical. But the imperfections and irregularities? Those are what capture likeness.
For construction purposes: Understanding that A-side and B-side relationship helps you plot things out no matter what the perspective is.
Finding the Jaw Landmarks
The chin has corners just like the eyes and mouth.
Mark where the jawline comes down. Let's say it's right here below the ear.
That's your landmark. Use the bilateral symmetry - what happens on one side mirrors on the other side.
No matter the perspective - head looking down, head tilted, whatever - you can follow that line around the shape.
Plot out:
- Where the jaw changes direction (the angle point below the ear)
- Where the tip of the chin is
Those are your two key landmarks.
Lining Things Up
You've done this with eyes. You've done this with the nose, mouth, and ears.
Now do it with the jaw.
Find the jaw angle point - that spot just below the ears where the jaw changes direction.
Find the chin tip - the bottom point.
Line them up relative to other landmarks.
For an underneath view:
- The jaw angle might be at a certain height
- The chin tip might be slightly above it (because perspective)
Critical point: It's not always going to be "below the chin" or "above the jaw." The head angle changes everything.
Head slightly tilted? The jaw angle point might not line up the same way. You have to consider the pose.
Everything changes pose to pose. And model to model.
Drawing It Out: The Better Way
Instead of that harsh angle (the mask look), think of it like this:
The jaw comes down, curves slightly, then goes over to the chin. Not a sharp corner. A transitional curve.
Schematic view:
- Chin here
- Jaw coming out, going up
- Lower section, then higher section
- But interpret it as a CURVE, not a harsh angle
Think in terms of the smooth transition, not the sharp corner.
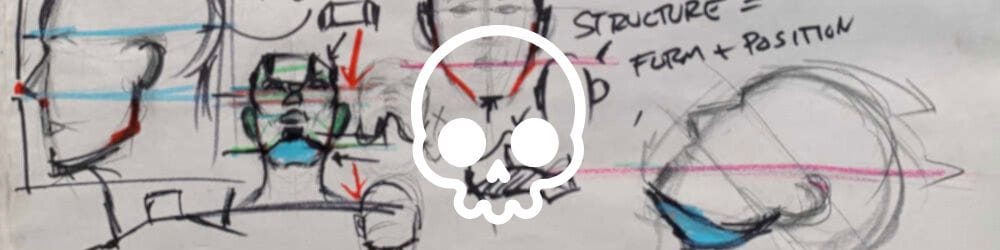
Adding the Digastric Plane
Remember that digastric plane we talked about? It wraps underneath the chin.
From an underneath view:
- It wraps down
- Goes over the throat
- Curves back
If you were connecting this to a body, the neck would flow from there.
Also remember: In underneath views, ears get pushed low. The chin gets pushed high.
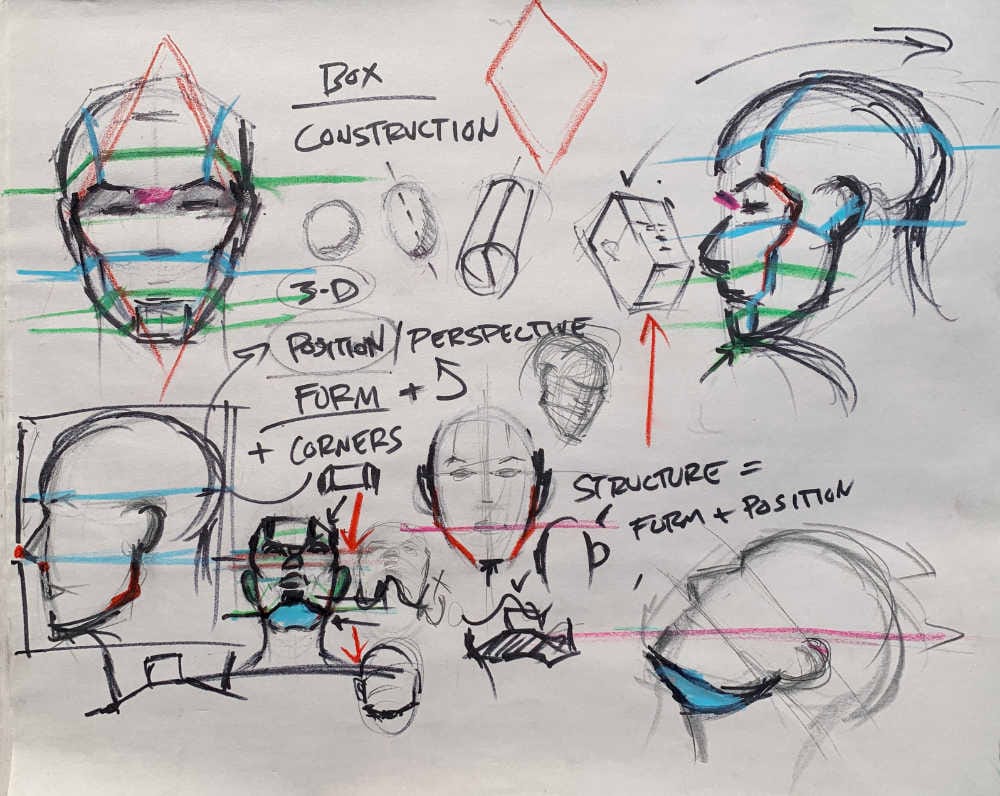
The Boxy Construction: Square It Off
Back to the core idea: more corners = more information.
Instead of that horseshoe shape people default to, square it off.
You can always come back and round it later. But for construction? Think squares. Think corners.
Why? Because it forces you to see:
- What's on the side
- What's on the front
- What's slightly above
- What's slightly below
Everything plotted out correctly.
Multiple Planes on the Forehead
You can even break the forehead into multiple planes:
Front plane: The main forehead
Side planes: Left and right sides
Top plane: A little sliver where the skull curves back
That's five planes just on the forehead alone.
The more planes you identify, the better you understand the structure.
You're breaking down:
- The front plane
- The underneath plane of the forehead
- The side planes
- How they all connect
Why This Matters
When you square things off and identify multiple planes, you avoid that flat, mask-like look.
Flat construction = flat drawing.
Dimensional construction = dimensional drawing.
The jawline is one of those make-or-break areas. Get it wrong, and the whole head looks amateurish. Get it right, and suddenly your drawings feel solid and believable.
Practice Assignment
Find reference photos with underneath views (looking up at the face).
Mark:
- The jaw angle point (where it changes direction)
- The chin tip
- How those two landmarks relate to each other
- The curve between them (not harsh angle)
- The digastric plane wrapping underneath
- How the jawline squares off vs curves
Don't draw the whole face. Just analyze the jawline construction.
Train your eye to see the planes, the landmarks, and the transitions.
Course Navigation
- Previous: Box Construction Part 3
- Next: Head Box Construction Part 5
- Course Hub: Complete Head Drawing Course
Continue Learning
If you enjoyed this hand drawing course, explore even more lessons on our Free Drawing Tutorials & Courses Hub — including the complete How to Draw – Beginner’s Course.
Want new tutorials delivered to your inbox? Subscribe here and get free lessons, tips, and inspiration sent directly to you.


