Box Construction Part 3: Nose and Foreshortening
Master nose construction using box method. Learn how the nose protrudes in its own direction, how foreshortening compresses distances, and why ear placement shifts dramatically when the head tilts back.

Now things get interesting. We're dealing with the nose - easily one of the most complex architectural shapes on the face. Plus, we're going to see what happens when perspective kicks in.
Did you know? This lesson is part of a complete step-by-step head drawing course. If you haven't watched from the beginning I highly recommend you do so to get the most out of this lesson.
Watch video: hit play and learn tips for head drawing.
The Diamond Shape on the Face
Look at the front of the skull. A diamond shape is forming.
Start at the tip of the eyebrows, follow where the cheeks push out - you get this diamond pattern. Widest at the cheeks, narrows as you move up to the forehead, narrows as you move down to the chin.
From the front plane of the skull, you see where it transitions to the side. Then as you move down, it narrows that way too.
The pattern:
- Widest at cheeks
- Narrows toward forehead
- Narrows toward chin
- Front plane, side plane, moves out - repeat
Clarifying the Planes
Let me darken these lines to make it clearer:
Front, side, moves out.
Front, side, moves out.
Front, side, drops, moves out.
The chin? Same thing. Front, side, side, moves out.
The front plane comes this way, moves back. The ear moves out, goes down, then back. Those planes are constantly shifting.
The Ear Overlap Problem
Here's what people get wrong with ears: they draw a really full ear sticking straight out from the side of the head.
But remember - the face is in front of the ears.
The cheeks come in, the ears move back. You get overlapping. The face sits in front, then the ear, then it moves back.
Don't let ears sit flat on the side of the face. Show that overlapping depth.
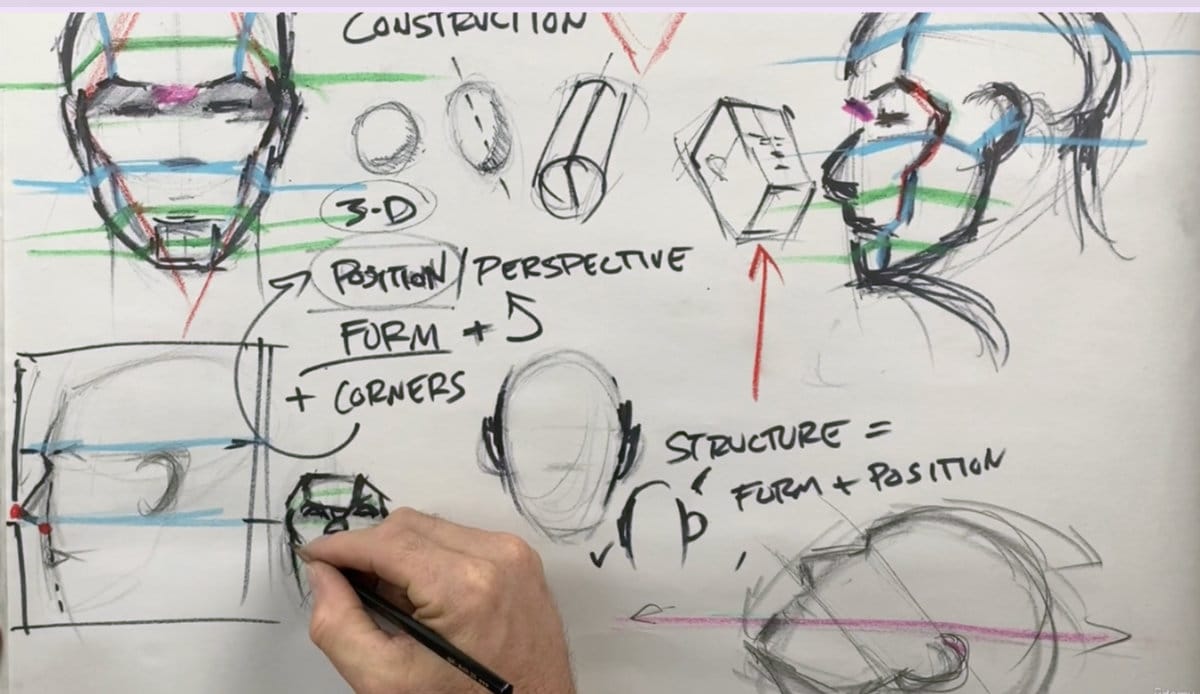
The Nose: A Separate Direction
Time to deal with the nose. Complex shape. Up until now, we've just marked it - maybe a quick triangle on the profile.
But here's the key: the nose moves out in its own direction.
Look at a profile. The mask of the face is moving down, skull moving back. The nose? It breaks from that and pushes out in its own angle.
From the front view, you can't see that protrusion as clearly because of foreshortening. The front of the nose is closer to you than where it meets between the eyebrows.
Understanding Nose Protrusion
The nose has two key points:
- Tip of the nose - the point
- Root of the nose - where it meets the upper lip
When you're looking underneath a face (figure looking up), this becomes critical.
The Looking-Up View (Foreshortening)
Here's where most people mess up.
You're looking up at someone. They're tilting their head back. What do you see?
What people draw: They mark where the nose starts, place the eyes, then draw the full length of the nose like they know it.
The problem: That's not the right perspective.
What actually happens:
- The chin is closest to you
- The eyes are toward the top of the head
- The nose gets foreshortened
So instead of the nose being this long shape, you're seeing:
- Where the tip is (up high)
- Where the root meets the upper lip (much closer to the tip than you'd think)
The distance between tip and root shrinks dramatically in this view.
Mapping the Underneath View
Start with where the tip of the nose sits. Then where it meets the upper lip (the root). That distance is SHORT.
Eyes? They're shaped differently - more arced because you're seeing them from below.
Top lip, center, bottom lip - mark those distances.
The chin curves this way. Bottom of the chin.
Remember the eye distance. The plane goes back. Cheeks, skull, overlapping.
Add the eyebrows. They come up, push down. Front plane of the forehead narrows. Widens at the cheeks. Comes back down. Narrows at the chin.
The Ear Placement Shift
Normal head position:
- Top of ear lines up with eyebrow
- Bottom of ear lines up with bottom of nose
Now tilt the head back.
Your ears don't move just because you're looking up. But the ALIGNMENT changes.
Draw a line straight across. The top of the ears might now line up with the bottom of the top lip. Not the eyebrows anymore - the perspective shifted everything.
This is why you can't just memorize "ears go here." You have to understand the perspective and angle.
If you put the ears at eyebrow level when someone's looking up, it'll look wrong. Because the perspective changed the alignment.
The Planes on an Underneath View
When looking up at a face, you see:
- Bottom plane of the forehead (you're looking UP at it)
- The digastric plane under the chin (super visible now)
- The underside of the nose
- Ear placement way lower than you'd expect
All those front-to-side plane transitions? Still there. They just look different from this angle.
Why This Is Hard (And Why It Matters)
The nose protrudes. The ears don't move, but alignments change. Foreshortening compresses distances.
You can't rely on memorized proportions. You have to understand the 3D structure and how perspective affects what you see.
That's what box construction gives you - the ability to rotate the head in your mind and understand what happens to every plane and landmark.
Practice Assignment
Find reference photos of people looking up (underneath view).
Mark:
- Where the nose tip is
- Where the nose root meets the upper lip
- How short that distance is compared to normal view
- Where the ears actually align (not where you think they should)
- The diamond shape of the face
- Front vs side plane transitions
Don't draw the whole face. Just analyze the structure and perspective shifts.
Course Navigation
- Previous: Box Construction Part 2
- Next: Head Box Construction Part 4
- Course Hub: Complete Head Drawing Course
Continue Learning
If you enjoyed this hand drawing course, explore even more lessons on our Free Drawing Tutorials & Courses Hub — including the complete How to Draw – Beginner’s Course.
Want new tutorials delivered to your inbox? Subscribe here and get free lessons, tips, and inspiration sent directly to you.


