Back of Head Construction: Avoiding the Lollipop Look
Master back of head construction to avoid the common lollipop-on-a-stick look. Learn how the neck and trapezius connect to the skull, proper ear placement using thirds, and overlapping layers from back view. Essential anatomy for complete portrait drawing.


The back of the head lacks the facial features that make front views interesting. Without understanding its construction, you'll end up with a dull lollipop-on-a-stick look. This lesson covers the dynamics that make back views believable and interesting.
What You'll Learn
- How the neck connects to the skull from back view
- Trapezius muscle placement and shape
- The overlapping order of head, neck, and shoulders
- Ear placement using the thirds method
- Male vs female trapezius differences
Want drawing lessons? Visit the Free Drawing Tutorials & Courses hub →
Video Lesson
Why the Back View Matters
Rarely will you draw a floating head. It connects to shoulders, trapezius muscles, and other features that ground it. Understanding these connections prevents the disconnected, lollipop appearance beginners often create.
The Neck Connection from Back View
From the front view, we divide the head into thirds. If we add another third below the chin, we reach the pit of the neck (suprasternal notch) - located between the medial ends of the clavicles.
The back of the neck joins the skull higher than the front. Where the bottom of the neck sits is roughly where the shoulder line is located, though this varies by pose and posture.
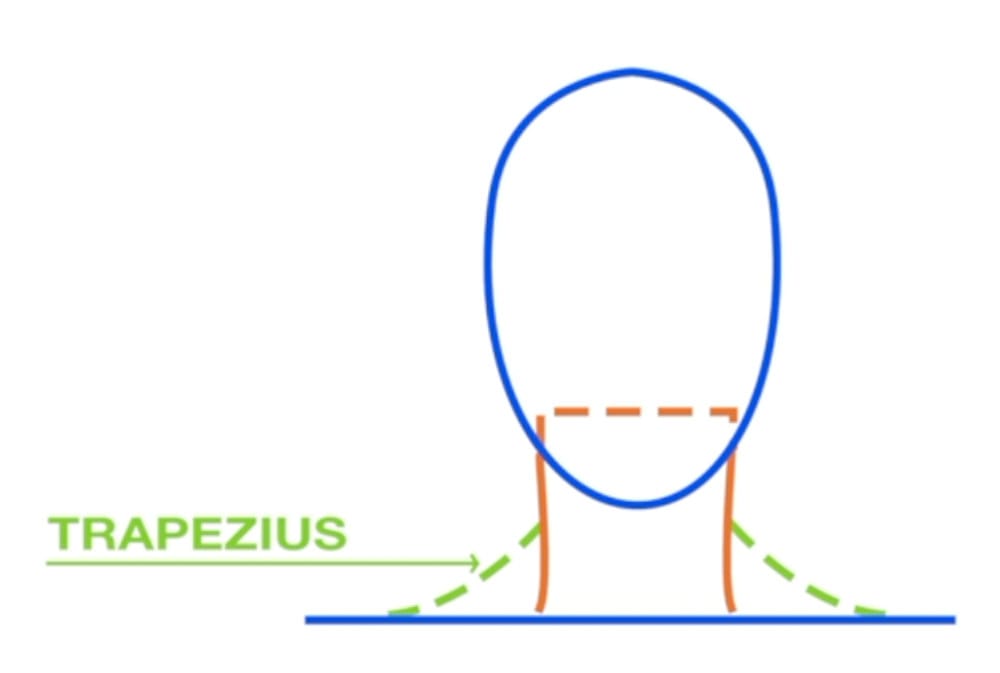
The Trapezius Muscles
Although part of the back, the trapezius muscles are clearly visible from the front view as well. They're critical for back view construction.
Female trapezius: Slightly lower and more arcing
Male trapezius: Higher, tends toward flat or angular shape (especially in muscular or "bull neck" builds)
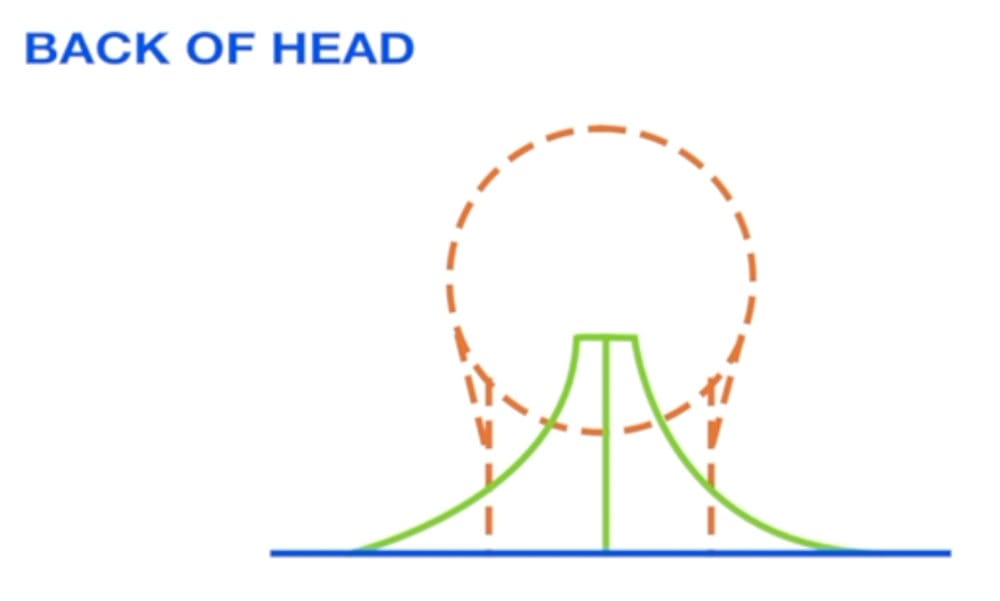
The Overlapping Order
Understanding what's in front of what matters:
From front view: Face → Neck → Trapezius
From back view: Hair → Trapezius → Head → Neck → Face (barely visible)
The trapezius muscles are closer to you than the neck and head when viewing from behind.
Ear Placement Using Thirds
The ears are visible from back view (depending on hairstyle). Using thirds method:
Top of ear: Aligns with bottom third line
Bottom of ear: Extends toward top of the bottom third
Important: The ear has thickness. Use two lines to indicate this depth, not a single line.
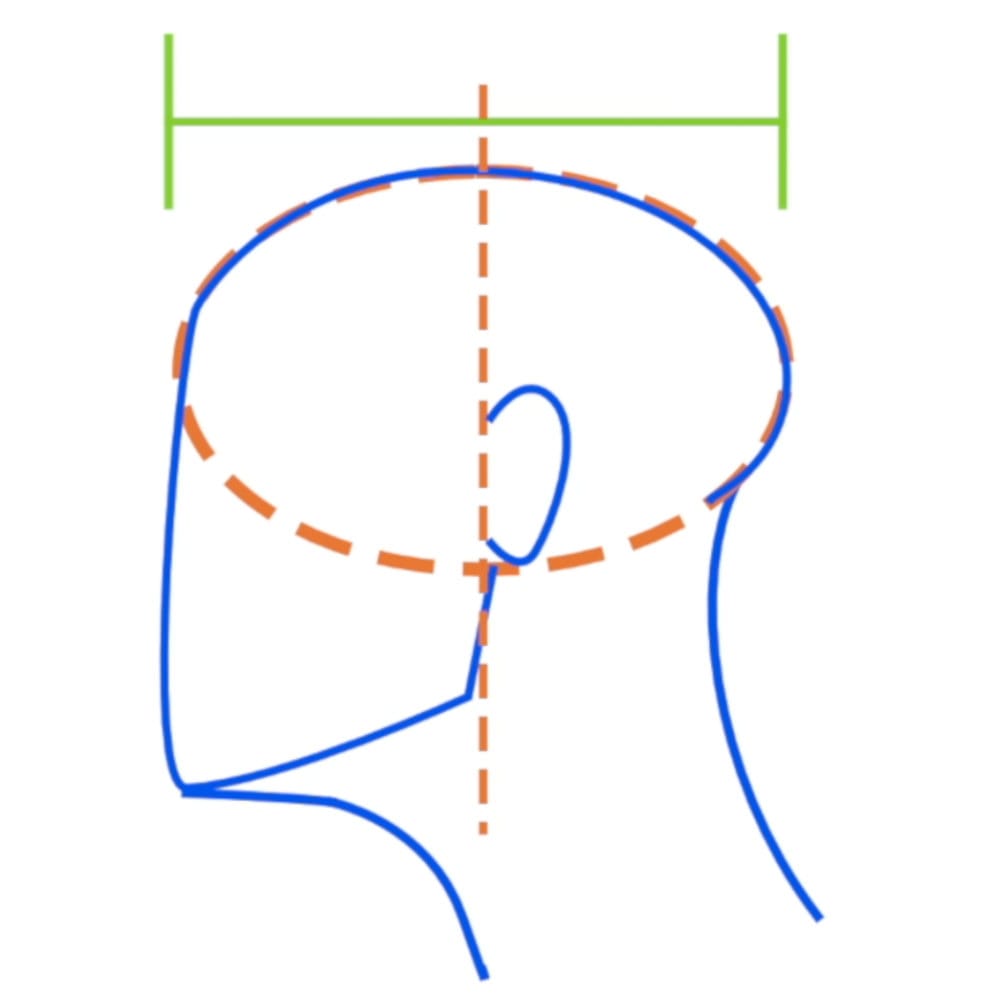
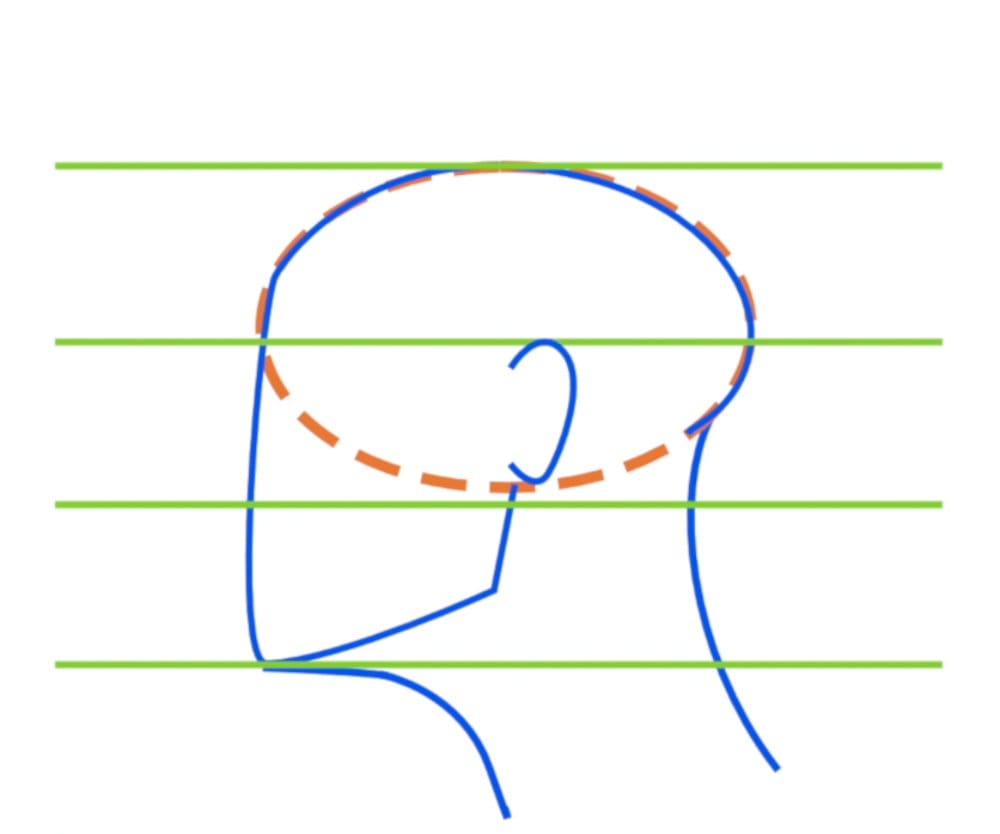
Ear Placement from Profile
Here's a bonus proportion tip for profile view:
Take the width of the skull from the side and divide in half - this gives you where the front of the ear joins the head. Then divide the ear area into two-thirds for proper ear proportion.
This varies by individual but provides a solid guideline.
The Visible Face Portion
From back view, only a small portion of the face mask is visible - usually just the edges. Understanding this helps you avoid over-drawing facial features that wouldn't actually be seen.
Study Assignment
Before the next lesson (drawing demonstration), study back-view photos:
- Identify the trapezius shape (arcing or flat)
- Locate where neck meets skull
- Find the ear placement using thirds
- Notice the overlapping order
- Observe male vs female differences
Don't draw yet - just analyze the construction.
Next Lesson: We'll apply this in a back of head drawing demonstration.
Continue Learning
- Previous: Neck Drawing Demonstration
- Next: Back of Head Drawing Demo
- Course Hub: Complete Head Drawing Course
Continue Learning
If you enjoyed this hand drawing course, explore even more lessons on our Free Drawing Tutorials & Courses Hub — including the complete How to Draw – Beginner’s Course.
Want new tutorials delivered to your inbox? Subscribe here and get free lessons, tips, and inspiration sent directly to you.