Light & Shadow Drawing - Define Your Landscape Masses
Take your landscape masses to the next level by adding light and shadow. Learn how light can join or separate shapes, and make creative decisions that improve your paintings.

You've simplified your landscape into masses. Now it's time to add light and shadow. This is where your painting starts to feel three-dimensional.
This lesson is part of the Acrylic Landscape Painting Fundamentals Course - learn to paint expressive landscapes from scratch.
Taking Masses to the Next Level
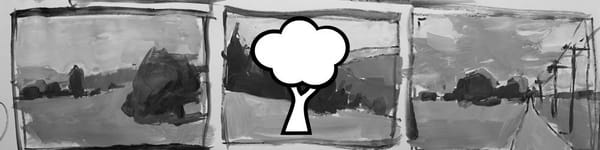
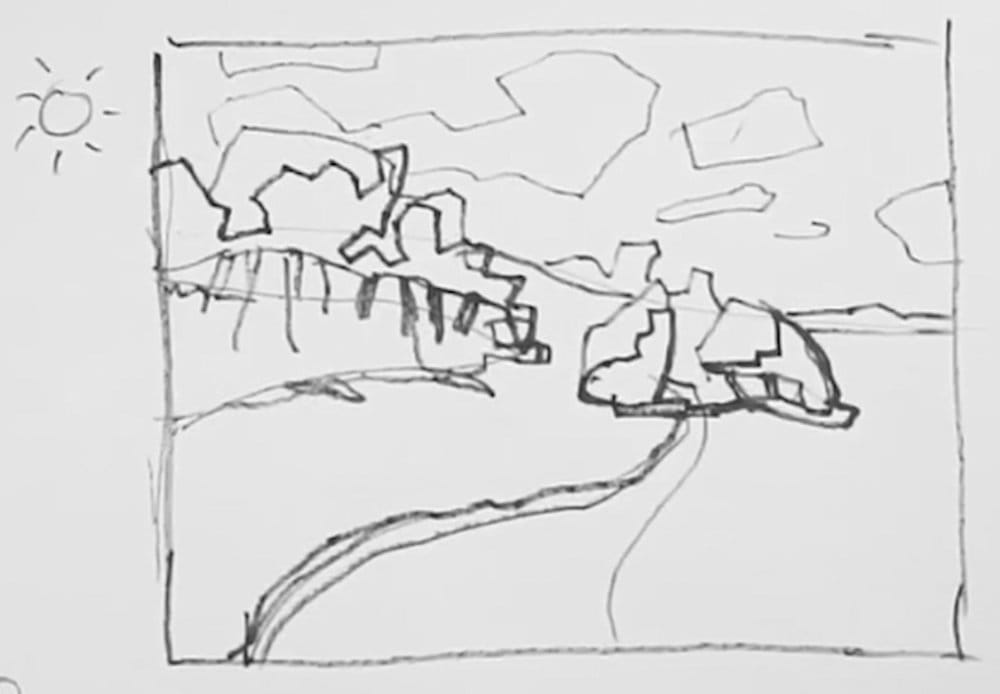
Look at the drawing above. Notice the sun symbol in the top left? That defines where light is coming from.
Everything else flows from that decision.
Light source = top left means:
- Shadows fall to the bottom right
- Trees cast shadows on the path
- Some masses merge together in shadow
- Others separate in light
How Light Changes Your Masses
Here's the thing most beginners miss: Light and shadow can join shapes together OR break them apart.
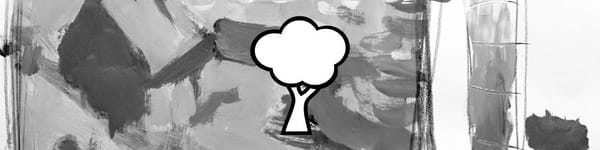
Look at those trees on the left. In bright light, they might read as separate trees. But in shadow? They become one unified dark mass.
Same with the bushes flanking the path. The shadow side reads as one shape with the trunk.
The Process
Step 1: Draw your simplified masses (from Lesson 2)
Step 2: Mark your light source
Step 3: Add shadows - starting simple:
- Shadows under trees on the path
- Shadow sides of bushes and foliage
- Cast shadows on the ground
- Cloud shadows in the sky
Don't worry about every subtle gradation. Just define where light hits and where shadow falls.
Making Creative Decisions
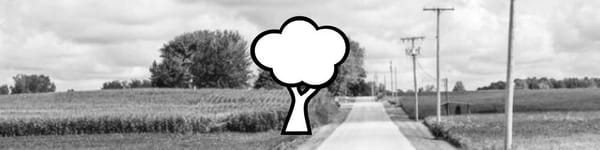
Sometimes the reference photo gives you boring light patterns. Too geometric. Too predictable.
You can change it.
If a shadow shape looks dull, adjust it. Make it more interesting. More dynamic.
Your job isn't to copy the photo exactly. It's to interpret the light in a way that makes a better painting.
What to Ignore
See that dark strip of grass running along the path in the reference? I'm ignoring it.
Why? Because adding another separate mass complicates things. It doesn't serve the painting.
Not everything in the reference needs to be in your painting.
The Reality Check
Before you start painting, look at your light and shadow study.
Does it work?
If the shapes aren't interesting here, they won't magically become interesting with color. Fix it now, not later.
This simple value study saves you hours of frustration.
Course Navigation
Next Lesson: Adding Local Color to Masses - Bring your landscape to life with color
Previous Lesson: Abstract Masses 101 - Simplify any landscape
Course Hub: Acrylic Landscape Fundamentals
Learn & Improve Your Acrylic Skills
- Acrylic Hub– Your go-to guide for tutorials, tips, and resources.
- Ultimate Beginner Acrylic Course - Start painting with confidence.
- Subscribe for More Great Content - Get tutorials, tips, and updates straight to your inbox.
- Follow Me on Pinterest - Daily inspiration, tips, and fresh ideas.
Recommended Acrylic Painting Materials
-
Princeton Catalyst Brushes – Flats (#6, #12), Rounds (#4, #8), Fan (#4), Liner Brush
Durable synthetic bristles for versatile acrylic techniques -
Liquitex Heavy Body Acrylic Paint – Essential Colors
Cadmium Yellow, Yellow Ochre, Alizarin Crimson, Cadmium Red Light, Ultramarine Blue, Cobalt Blue, Burnt Sienna, Titanium White -
Winsor & Newton Cotton Canvas
Reliable stretched canvas for studio and plein air work -
Strathmore 400 Series Mixed Media Paper
Heavyweight, acid-free paper for acrylic and mixed media -
Fabriano Artistico 140lb Cold Press Paper
Excellent for acrylic, mixed media, and textured effects -
Blick Multi-Colored Painting Knife Set
Variety of shapes for texture, scraping, and bold strokes - Miscellaneous: Two pint-sized water containers, paper towels (from Home Depot or Walmart)
- Note: I use canvas or sturdy cardboard as my palette — no store-bought palettes needed.