How to Paint a Back-Lit Landscape in Acrylic
Learn how to paint back-lit landscapes in acrylic. See how to create glowing edges, light contrast, and soft atmospheric skies.


Back-lit scenes are where landscape painting starts to get really fun. In this demo, we’ll take a look at how to handle a scene when the sun is in front of you — high in the sky, maybe around two or three o’clock — casting shadows toward you and lighting up the edges of trees, clouds, and rooftops.
This setup is a favorite for many painters because it gives you a natural sense of drama and depth. You get rich contrast between light and shadow, glowing skies, and edges that sparkle.
This lesson is part of the Acrylic Landscape Painting Fundamentals Course.
Understanding Back Lighting
When the light source is in front of you, almost every vertical object — trees, houses, figures — falls into shadow. The trick is learning how to paint shadow shapes without losing interest or form.
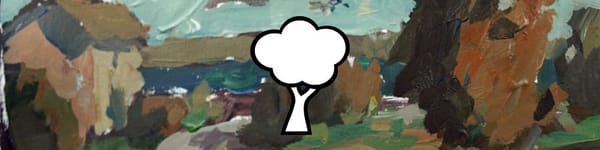
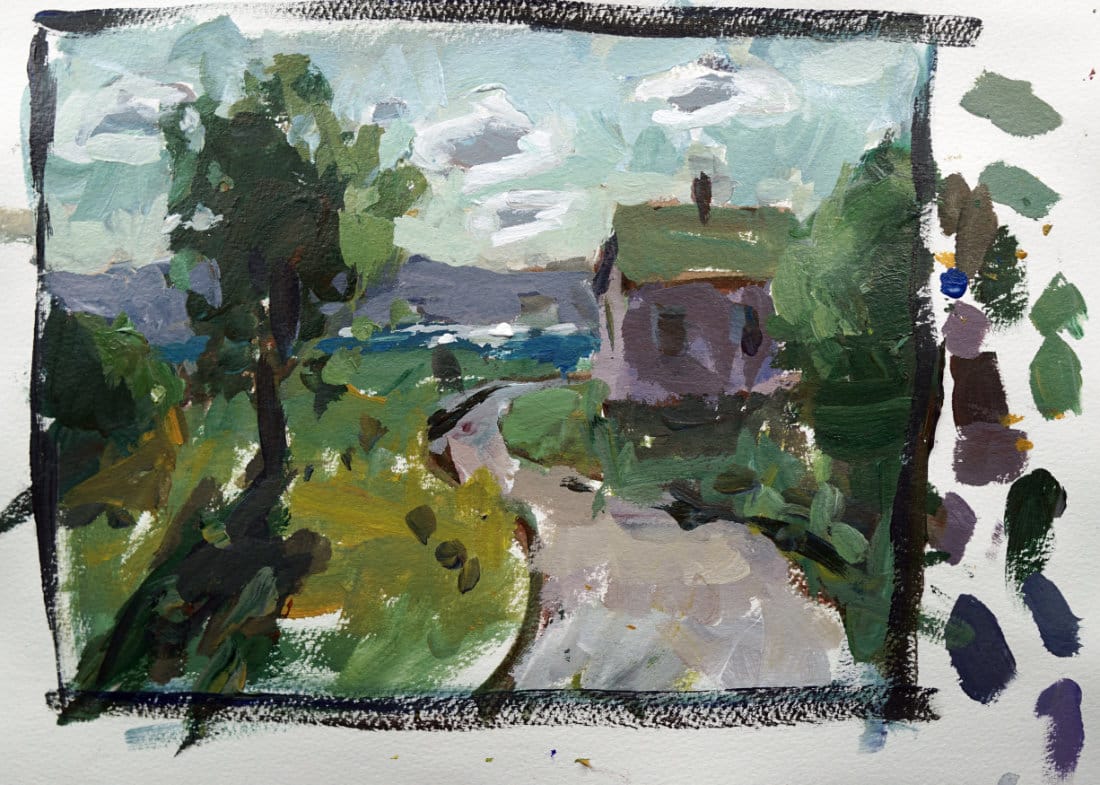
The first big difference from the previous front-lit demo is the sky value. Looking into the sun makes the sky appear lighter and more atmospheric. I like to start with a pale blue mixed with a little yellow ochre or green near the horizon — this warms the color and gives that hazy glow that often appears in afternoon light.
From there, I begin blocking in large shadow shapes. The house and trees are mostly in cool violets and browns, while the lighter areas on roofs or paths pick up just a hint of warmth.
Building Form and Light
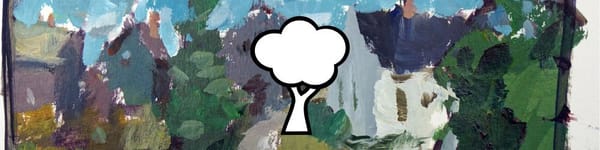
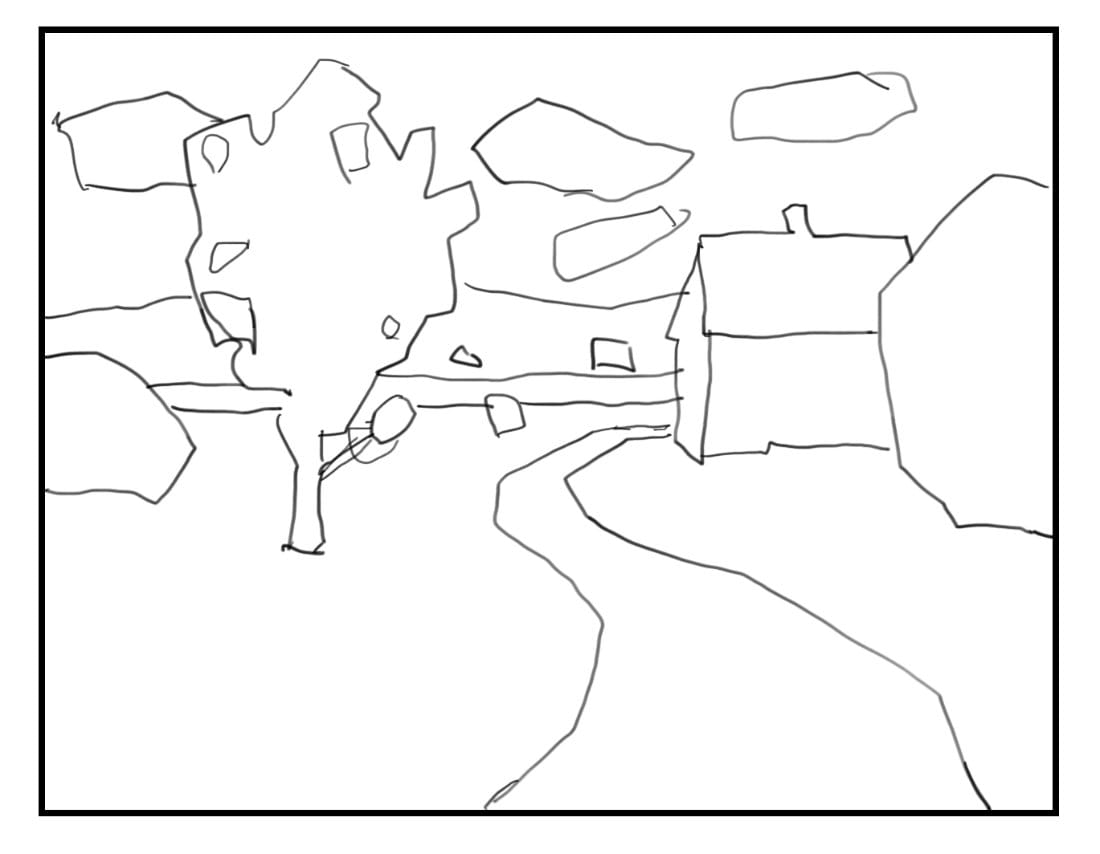
In this demo, I built a composition with a tall tree, a winding road, and a small building. The verticals (trees, house walls) stay darker and cooler — think violet, umber, and touches of viridian — while the ground plane gradually warms toward the foreground. I added little pops of yellow ochre and green to suggest warm sunlight filtering across the grass.
For the clouds, back lighting creates a “ring effect”: the centers are slightly darker, surrounded by a bright rim of light. I used a soft gray-violet for the center, then added near-white edges to capture that glowing outline.
When adding detail, it’s tempting to overdo the shadows, but less is more. Too much texture inside shadow shapes can kill the illusion of strong light. Keep the shadow areas calm and focused on value unity.
Adding Sparkle and Final Touches
The fun of a back-lit scene is in the reflections and glow. I used lighter blue-greens and a few dabs of pure white to make the water shimmer, like the sun catching ripples from a soft breeze. The tops of the trees and clouds get the same treatment — a quick highlight along one side to suggest light wrapping around the form.
It’s a simple technique that instantly adds realism and atmosphere. Keep your edges soft, your values close together in the shadows, and your highlights clean and deliberate.
Course Navigation
Next Lesson: Golden Hour Effects
Previous Lesson: Front-Lit Landscape Painting
Landscape Hub: View All Acrylic Landscape Lessons
Learn & Improve Your Acrylic Skills
- Acrylic Hub– Your go-to guide for tutorials, tips, and resources.
- Ultimate Beginner Acrylic Course - Start painting with confidence.
- Subscribe for More Great Content - Get tutorials, tips, and updates straight to your inbox.
- Follow Me on Pinterest - Daily inspiration, tips, and fresh ideas.
Recommended Acrylic Painting Materials
-
Princeton Catalyst Brushes – Flats (#6, #12), Rounds (#4, #8), Fan (#4), Liner Brush
Durable synthetic bristles for versatile acrylic techniques -
Liquitex Heavy Body Acrylic Paint – Essential Colors
Cadmium Yellow, Yellow Ochre, Alizarin Crimson, Cadmium Red Light, Ultramarine Blue, Cobalt Blue, Burnt Sienna, Titanium White -
Winsor & Newton Cotton Canvas
Reliable stretched canvas for studio and plein air work -
Strathmore 400 Series Mixed Media Paper
Heavyweight, acid-free paper for acrylic and mixed media -
Fabriano Artistico 140lb Cold Press Paper
Excellent for acrylic, mixed media, and textured effects -
Blick Multi-Colored Painting Knife Set
Variety of shapes for texture, scraping, and bold strokes - Miscellaneous: Two pint-sized water containers, paper towels (from Home Depot or Walmart)
- Note: I use canvas or sturdy cardboard as my palette — no store-bought palettes needed.