Beginner's Guide for Watercolor Landscape Painting
A comprehensive beginner's guide to watercolor landscape painting. Essential steps to get started with painting watercolor scenery.
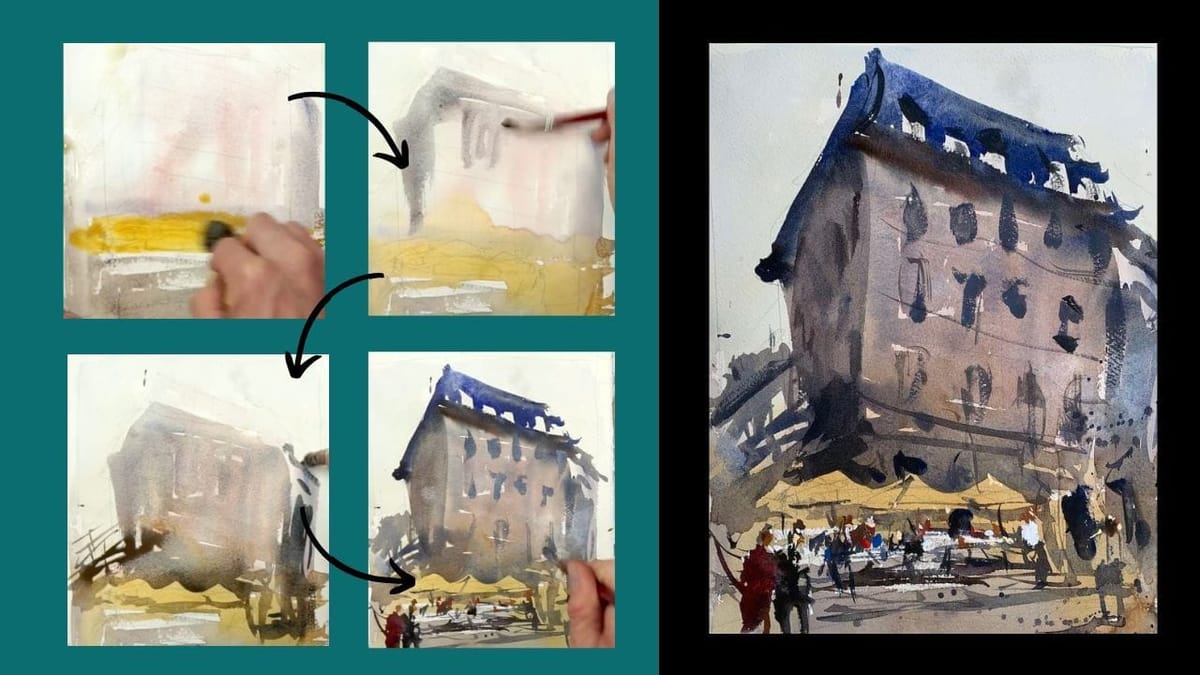
Embarking on the journey of painting watercolor landscapes is an exciting and rewarding endeavor that can be pursued by artists at any skill level. In this comprehensive article, we will guide you through the essential steps to get started with watercolor landscape painting.
We’ll begin by discussing the process of developing ideas and creating a well-composed landscape. Understanding the fundamentals of composition is crucial in capturing the essence and beauty of a scene. You’ll learn how to plan your composition, consider elements such as focal points, balance, and perspective, and create a strong foundation for your artwork.
BTW, here’s an excellent watercolor beginner’s guide that covers many ideas and techniques.
Next, we’ll delve into the effective use of color in watercolor landscapes. Discover how to mix and apply colors to depict different elements of nature, from vibrant foliage to serene skies. We’ll explore techniques for achieving realistic and harmonious color schemes, as well as creating visual depth and atmosphere in your paintings.
Additionally, we’ll demonstrate the light to dark techniques that bring your landscapes to life. By understanding the interplay of light and shadows, you’ll be able to add depth, dimension, and a sense of realism to your artwork. We’ll cover various techniques for depicting different textures and surfaces, from lush grass to rugged mountains.
By following the techniques and principles outlined in this guide, you’ll gain the skills and confidence to create stunning watercolor landscapes that captivate and inspire. So, grab your brushes, prepare your paints, and let’s embark on a journey of artistic expression through the beauty of watercolor landscapes!
Painting a beautiful watercolor landscape starts with a why!
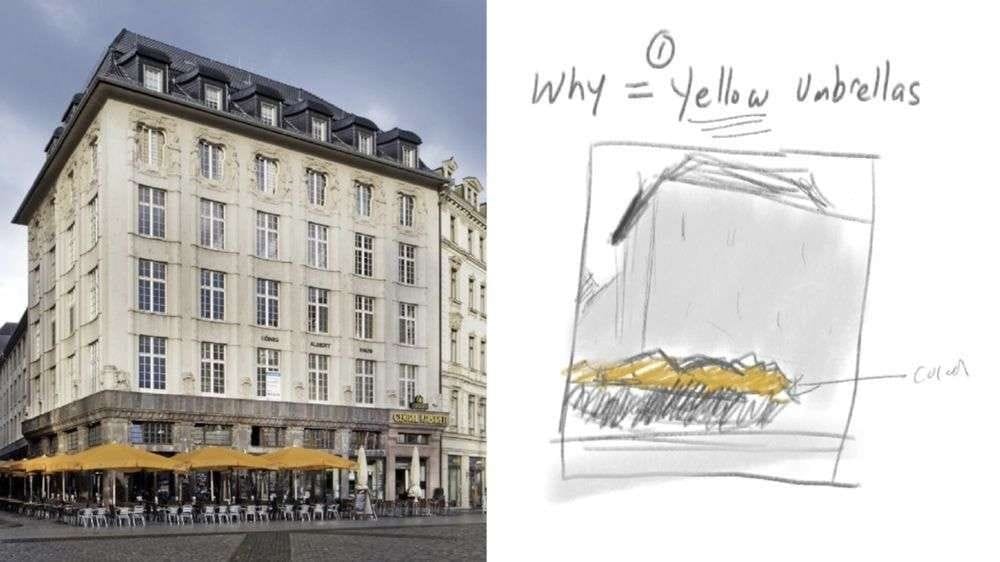
The journey of painting a beautiful watercolor landscape begins with finding your inspiration and understanding the “why” behind your artwork. In this article, we will explore the process of creating captivating watercolor landscapes, starting with the development of a strong focal point.
To demonstrate this concept, we will begin by examining a photo reference that served as the inspiration for the landscape painting. While the photo shows potential, it requires some enhancements to truly capture the viewer’s attention. By strategically incorporating a point of interest, such as a striking tree, an intriguing rock formation, or in this case, yellow umbrellas and figures leaving a café, we can create a focal point that draws the viewer into the scene.
As you continue scrolling through this article, you will discover the progression of the painting and observe how the figures are skillfully added to the landscape, enhancing the overall composition and creating a sense of narrative. The figures serve as an engaging element that adds depth and visual interest to the artwork.
By understanding the importance of developing a point of interest in your watercolor landscapes, you will gain valuable insights into creating compelling compositions that resonate with viewers. So, join us as we delve into the step-by-step process of painting a watercolor landscape and discover how to effectively establish a focal point that captivates the imagination.
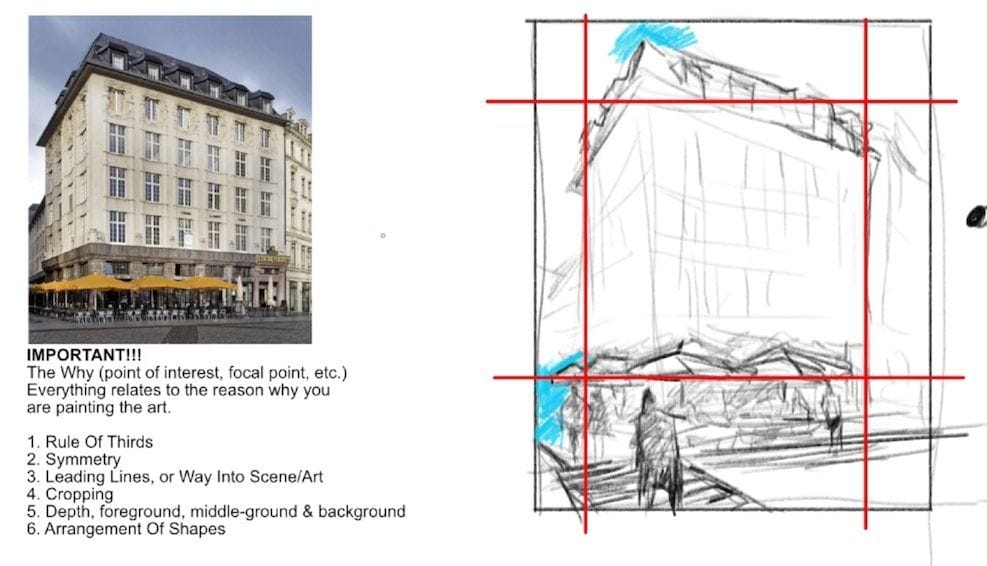
Now it’s time to introduce a point of interest into your watercolor landscape
In this step, we will focus on refining the composition and design of your artwork. For this particular painting, the goal is to create a more abstract landscape with gentle and soft edges.
To achieve this effect, strategically place the main figures towards the left-hand side of the composition. Additionally, include another figure on the right side, which will guide the viewer’s gaze back into the painting and maintain a sense of balance.
When positioning your focal points, it’s advisable to avoid placing them directly in the center of the composition. This symmetrical arrangement tends to divide the design in half, which may not be visually appealing. Instead, strive for an asymmetrical composition to create a more dynamic and engaging artwork.
By considering these composition and design principles, you can enhance the visual impact of your watercolor landscape and create a more captivating and harmonious piece of art.
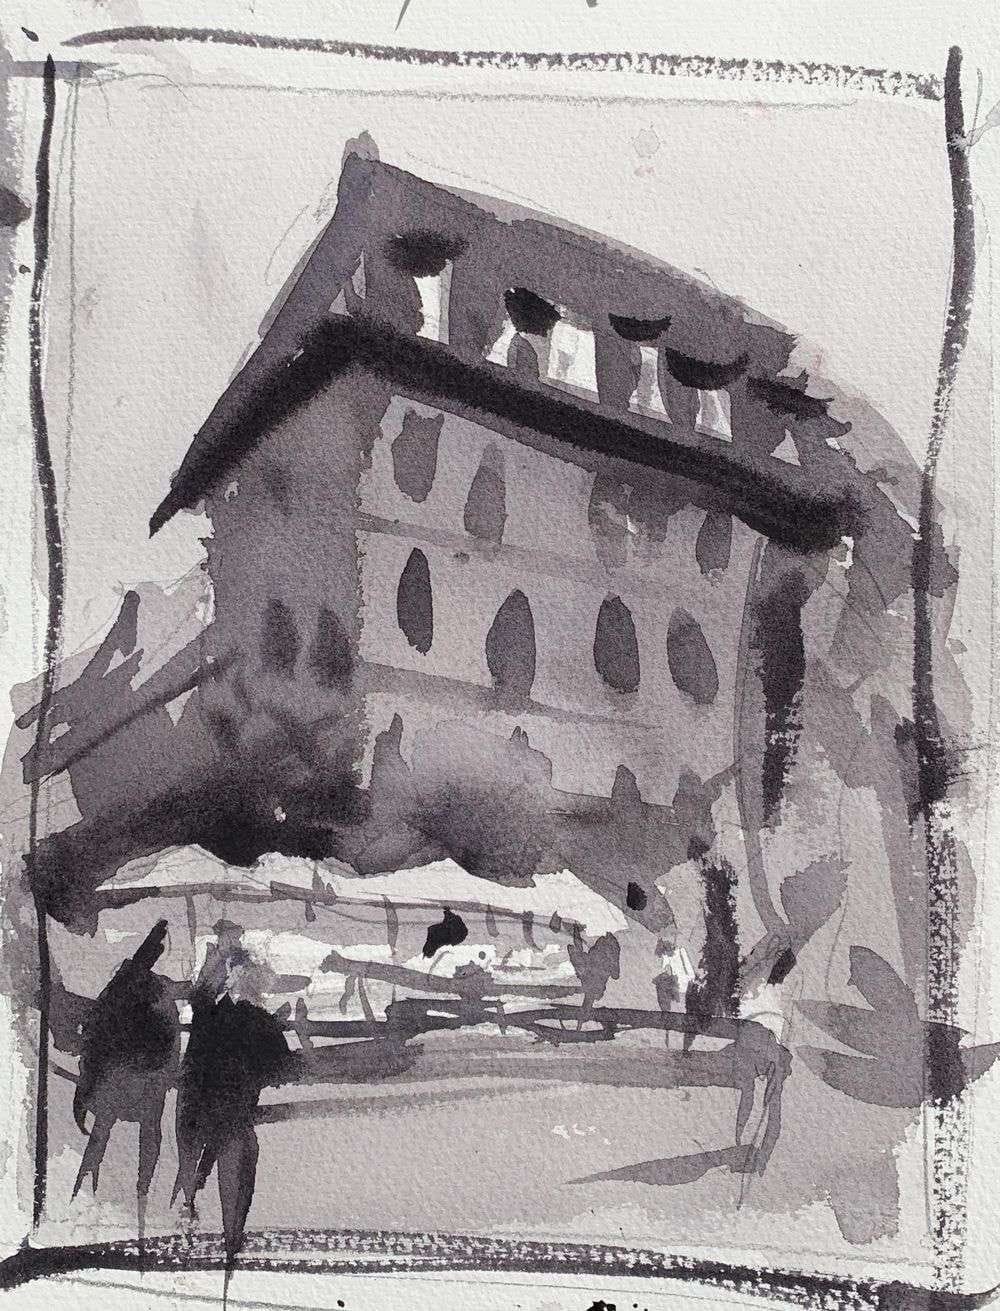
Create a Small Value Study
Before diving into the painting process of your watercolor landscape, it’s essential to create a quick value study. This step will help you plan and establish the values, or the range of lightness and darkness, in your artwork. By doing so, you’ll have a valuable guide that informs your color mixing decisions as you progress.
Take a moment to observe the value study provided below, which was created for the example. It’s worth noting that beginners often overlook the importance of value hierarchy and, as a result, may find themselves struggling to accurately replicate colors in their subjects. To avoid this common pitfall, investing time in understanding and mapping out the values beforehand is crucial.
By paying attention to the values in your composition and using the value study as a reference, you’ll be equipped with a solid foundation for mixing the appropriate hues and achieving a visually striking watercolor landscape.
Here’s a wonderful article below for learning more about colors and how to setup your watercolor palette!
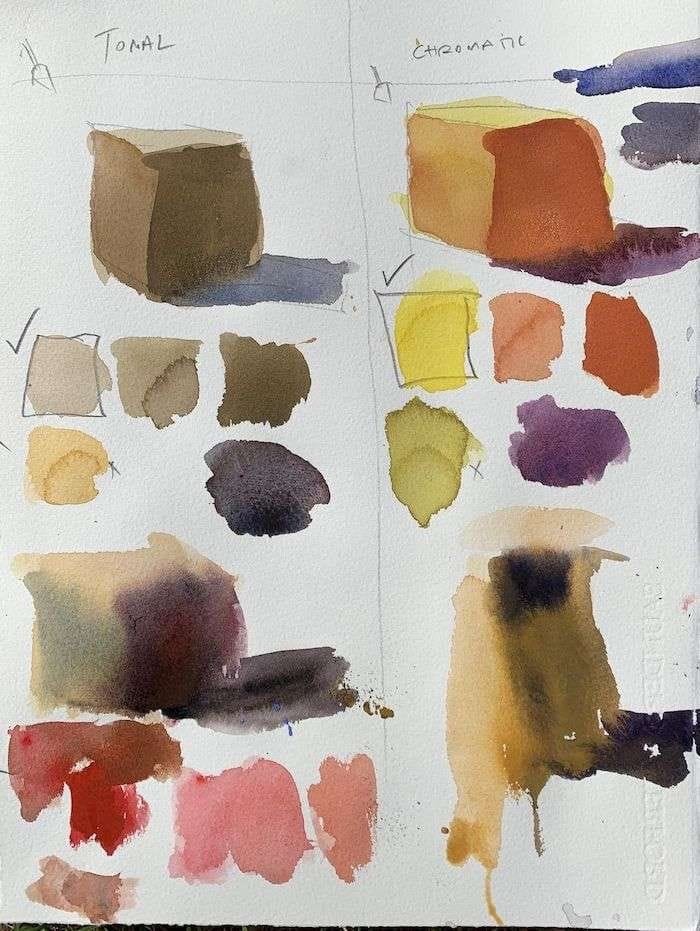
Choose a Harmonious Color Palette
Now it’s time to move on to the exciting step of adding color to your watercolor landscape! The first task is to determine a harmonious palette that will bring your painting to life. To achieve this, start by creating several swatches for the major shapes in your composition. This exercise will assist you in deciding the desired level of contrast between colors and the appropriate darkness or lightness needed to achieve a realistic landscape effect.
Here’s a valuable tip: Instead of striving for exact color matching, prioritize capturing the values accurately. Values play a crucial role in creating the illusion of depth and form in your painting. Remember, nature’s colors are diverse and constantly changing, making it impractical to replicate them precisely. I recommend focusing on either a tonal or chromatic palette. The tonal palette leans more towards neutral colors, while the chromatic palette embraces a vibrant range of hues. For this particular landscape, a chromatic palette is the preferred choice.
Take a moment to explore the color palettes showcased below. This visual representation will help you grasp the differences between tonal and chromatic palettes, aiding your understanding of how they can be employed in your watercolor landscape.
Step-by-Step Landscape Painting Guide
With the point of interest, design & composition, and color palette established, it’s finally time to bring your vision to life and paint that stunning watercolor landscape. So, gather your watercolor supplies and get ready to dive into the creative process by following along with the steps provided. Let’s unleash our artistic skills and create an awe-inspiring watercolor landscape together!
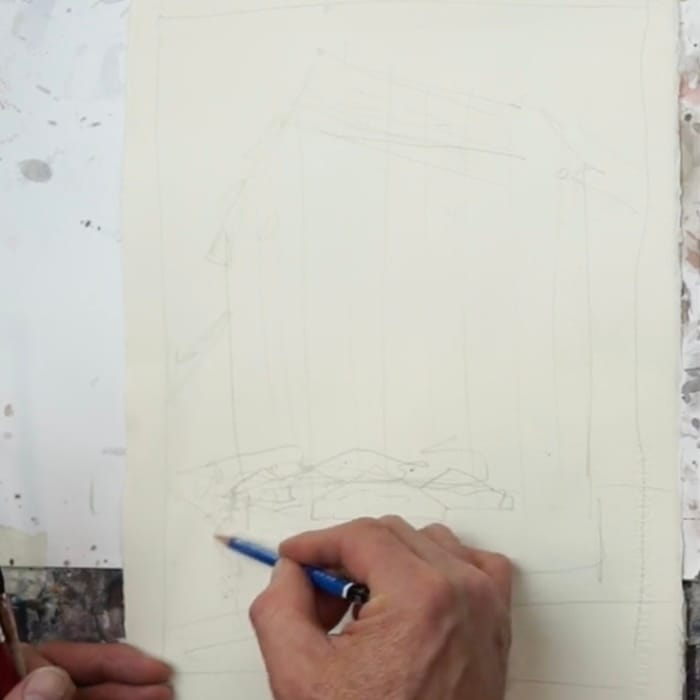
Step 1: Draw Simple Contours
Begin the watercolor landscape by taking the first step: creating a light contour drawing using a #2 pencil. Focus on capturing the basic shapes and forms, avoiding excessive detailing at this stage. Remember, keeping the drawing loose will contribute to a more expressive and dynamic final artwork. Save the finer details for later stages of the painting process.
Step 2: Add Variegated Wash
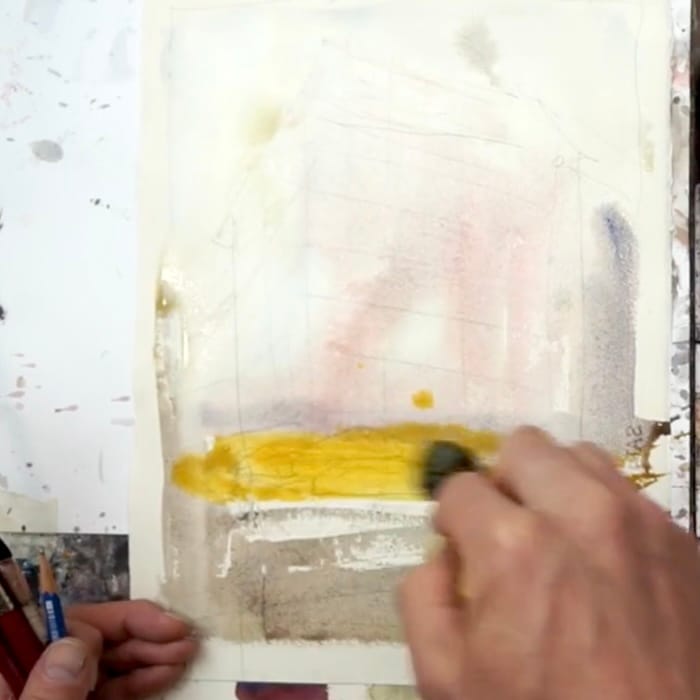
Next, mix your paint on the palette and begin applying the first wash to your watercolor landscape. Begin with the sky, as it holds significant importance in any landscape composition. For this particular painting, a pale gray was chosen for the sky. Moving on, introduce warm neutrals to the ground plane, and add a touch of pale red for the building. Applying these initial washes will establish the foundation of your artwork.
Step 3: Add Darker Values
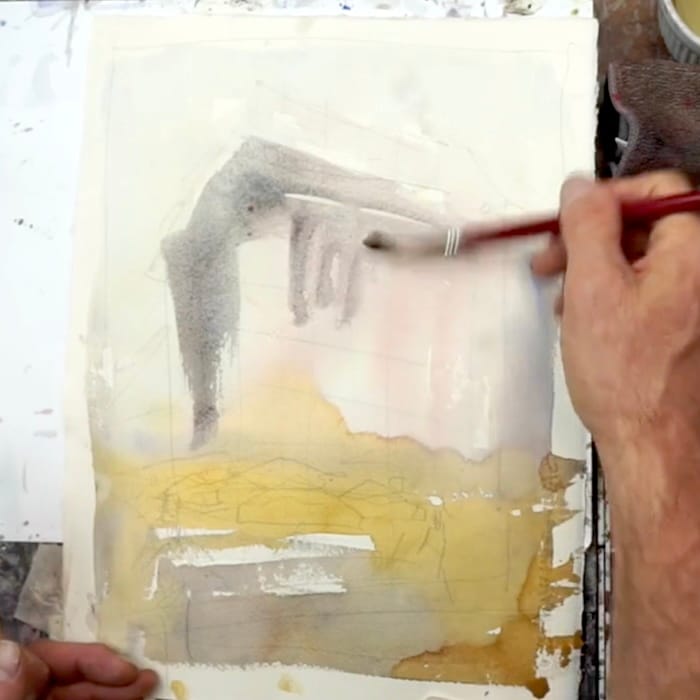
Moving on to Step #3, ensure that everything is allowed to dry completely. Once dry, mix a darker hue for the building and proceed to paint around the tops of the yellow umbrellas with great care. As the point of interest in the painting, it is crucial to maintain crisp and defined edges for the umbrellas. Pay close attention to the details during this step to achieve the desired effect.
Step 4: Paint Sides of Buildings
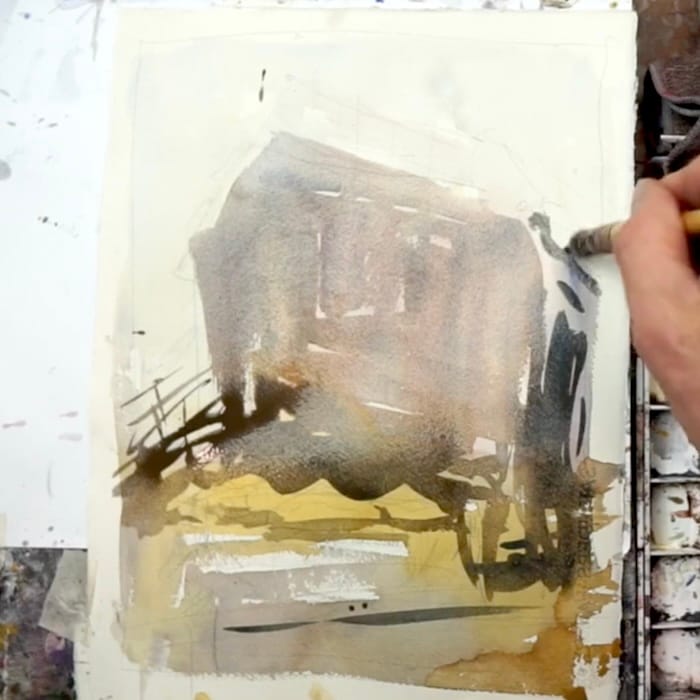
Next, mix a darker hue and apply it to the sides of the building. Using the same hue, but slightly darker, apply a charged wash above the umbrellas. This technique will help to make the focal point stand out and draw attention to it. Remember to carefully control the values and maintain a consistent tonal range throughout the painting.
Step 5: Paint Some Figures
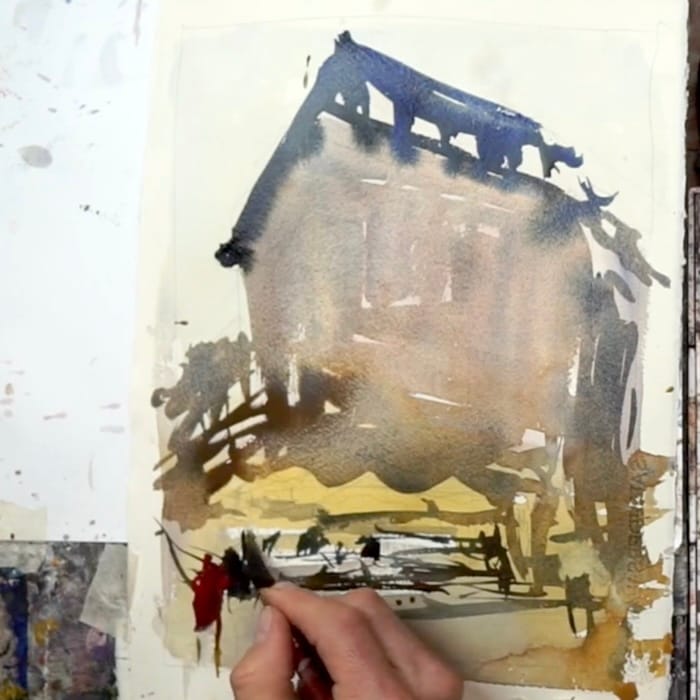
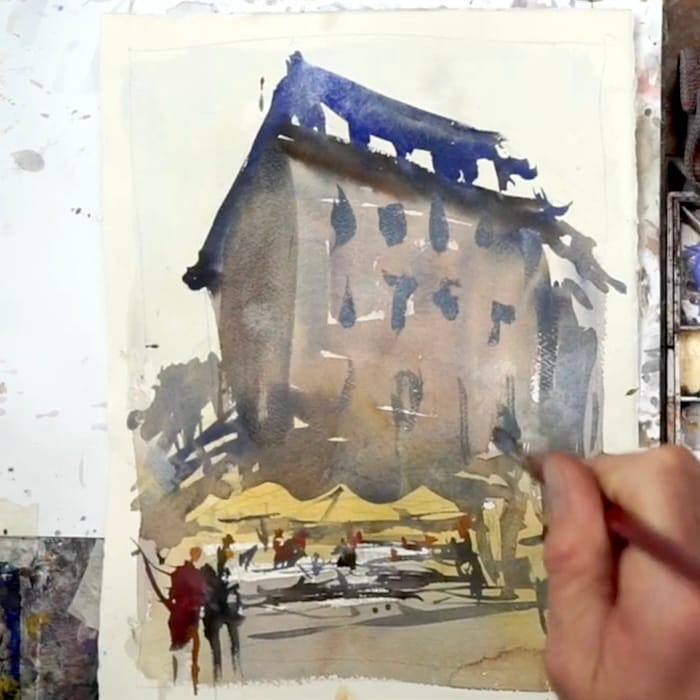
Moving on to the top of the building, you can use a darker cool hue. Remember to go darker than you think because watercolor tends to dry about 20% lighter in value. Allow the cool hues to bleed into the building, creating a natural and organic effect. Don’t worry about controlling it too much, as some unpredictability can add visual interest.
When painting the figures, use bold and saturated hues. This will help guide the viewer’s eye into the painting and add a sense of liveliness. Keep the figures under the umbrellas as simple dots and slashes, avoiding excessive details as they are not the focal point of the artwork.
Step 7: Paint Finishing Details
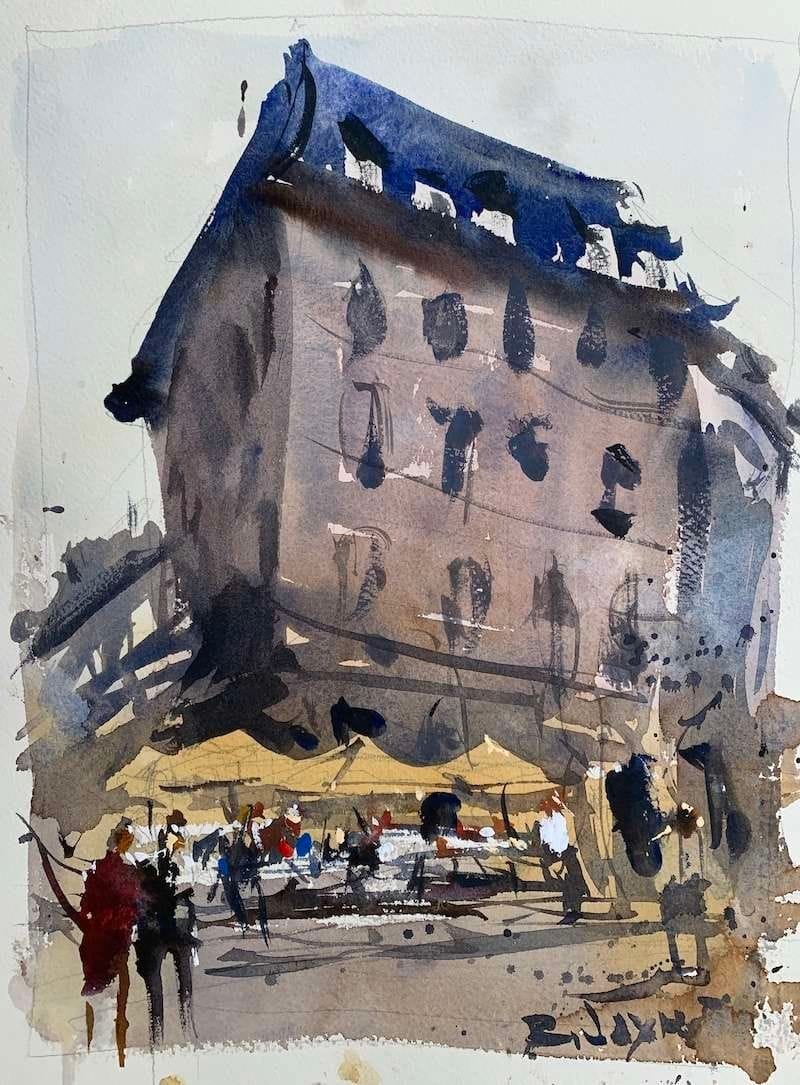
Complete the landscape by adding final details such as windows, accent colors, and cast shadows. Keep in mind that the point of interest is not the entire building, so avoid overpainting the windows. Use simple shapes and hues that are not too dark to maintain a harmonious balance.
The goal is to enhance the overall composition and create visual interest without detracting from the focal point. Pay attention to the interplay of light and shadow to add depth and dimension to your watercolor landscape.
Final Thoughts
In conclusion, I hope you found this guide on how to paint watercolor landscapes enjoyable and informative. As you have seen, the key is to approach the process with the right mindset. Take your time, plan your composition, and consider your techniques before applying paint to paper. By following these steps, you will be able to achieve remarkable results that are truly worth the effort. Happy painting!

