How to Paint Loose & Expressive: The Ultimate Beginner's Guide
I chased abstract art, but this site’s real story is loose & expressive painting. In this beginner’s guide, I’ll share how that shift began—and show you simple, lively techniques for watercolor, acrylic, and mixed media.


I know you are here for loose and expressive painting. And I'm confident you have chosen wisely, because painting loose is what I do best, and this website is loaded with helpful tutorials that will get you where you want to go.
BUT, I wanted to share with you exactly how the 'loose & expressive' journey began for this website. The extended story is a doozy and I will be posting that as soon as get this abstract mess cleared out of here! After ignoring my website for a year to focus on painting and selling art, I logged into my SEO dashboard to discover my domain authority had dropped to 2.
Even worse? I'd been targeting "abstract art" when I actually teach loose painting techniques for recognizable subjects like landscapes, still life, and cityscapes. No wonder no one was finding my stuff, but you're proof that the refresh is working.
In this loose painting tutorial, I'll show you how to create expressive studies that capture the essence of loose, gestural brushwork. Whether you're working in watercolor, acrylics, or mixed media, these loose painting techniques will help you move beyond tight, controlled work to expressive art that feels alive and spontaneous. Spoiler alert, we are going to start simple.
Learning to Paint Loose: The 4-Step Garage Studio Method
Why I teach tight-to-loose progression instead of "just let go and paint"
After decades of teaching loose painting techniques in my garage studio, I've learned one thing: you can't just tell someone to "paint loose" and expect magic to happen. It's like telling someone to "just relax" when they're stressed - sounds great in theory, but doesn't actually help.
That's why I developed this 4-step progression that takes you from tight, controlled work to truly expressive loose painting mentality. Each step builds on the last, and by the end, you'll understand why loose painting isn't about being sloppy - it's about being intentionally expressive.

Step 1: Start with Simple Shapes - Easy Wins!
Here's where most loose painting advice gets it backwards. They tell you to paint elaborate subjects like landscapes. But here's the garage studio truth: you need to understand shapes before you can loosen them up. And, you need to develop range of motion which is a physical thing and requires practice.
What you'll do:
- Pick a simple two-dimensional shapes (square, circle, triangle, rectangle)
- Paint it loosely, go outside the edges, this is where you have to trust the process
- Add gestural marks with charcoal, graphite, crayons or markers, keep it loose
- No perfection here, allow the shapes to be imperfect!
Why this matters: In my video demo, see link below, I show exactly how simple shapes can kickstart the journey. It's a physical and mental challenge to loosen up, and starting here is more approachable than an elaborate landscape.
Garage studio reality check: If your loose paintings look stiff then grab pencil and paper and draw basic shapes. Cover two or three sheets front and back until you have good range o motion and finally letting go of perfectionism.
See full video demo on painting loose simple shapes
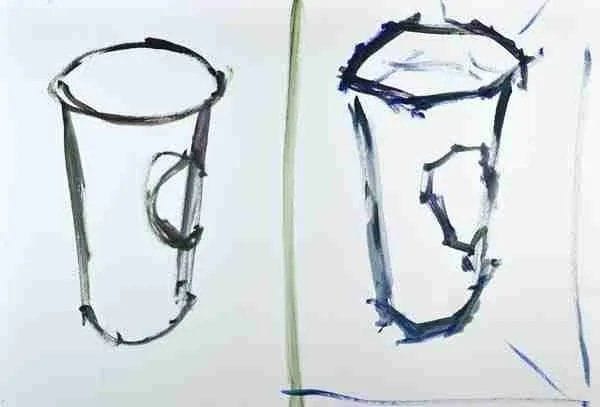
Step 2: Edge Quality
Experiment with angles and break away from smooth, curved lines. The angled edges interact with the sized o the paper in a more dynamic way, while curves read softer. Again, it's a technique to broaden your range of movement and to think differently.
Your assignment:
- Divide your paper in half
- Decide on simple subject, coffee cup, ketchup bottle and such
- Left side: Paint your subject with curved, circular lines
- Right side: Paint the same subject, but interpret curves with a series of angles
- Compare the results
What you'll discover:
- Angles play better with the our edges of the paper
- What was once a long curved line is now a series of short, choppy marks
- The rigid THINKING of drawing curves with one line is getting replaced with new ideas
From my garage studio: I've done this exercise hundreds of times with different subjects. The before/after comparison teaches you more about loose painting in one session than months of "just paint loose" advice.
See full video demo on turning curves into short, choppy angles (note this demo is in the second half of the video)
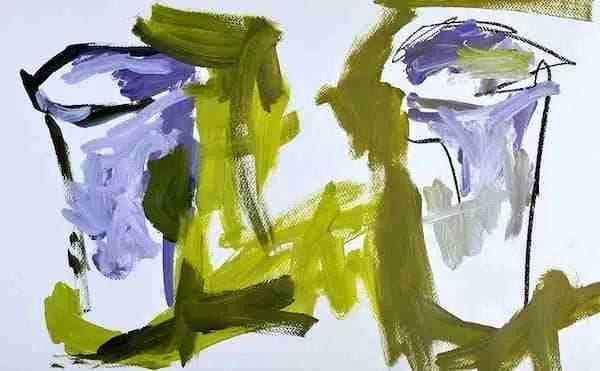
Step 3: Discover the Three Main Areas
This is a great way to experiment with the previous steps and add some complexity to it. It will have you thinking differently about how you can paint objects.
Time to experiment with:
- Different ways to see & paint objects - most artists only focus on the object itself, which is the inside, and unaware o the other two areas
- Negative spaces - use negative space to suggest edges that loosely painted and undefined
- Add gestural mark making - Adding expressive lines using graphite, charcoal, markers, or crayons can loosen up tight edges
- Combine all three ideas - using all three techniques will make painting 'abstract style' art more interesting and the results are visually more sophisticated.
Key mindset shift: Avoid only seeing and painting inside the object. Focus instead on capturing a likeness using different painting techniques and mediums.
Garage studio confession: My best loose paintings happen when I stop painting the subject and start painting my reaction to the subject. Big difference.
What to expect:
- Some marks will work, others won't - that's the point
- You'll start seeing happy accidents that are better than planned moves
- Your confidence with the brush will grow dramatically
See the full video demo for Two Simple Ways to Loosen Up Your Art
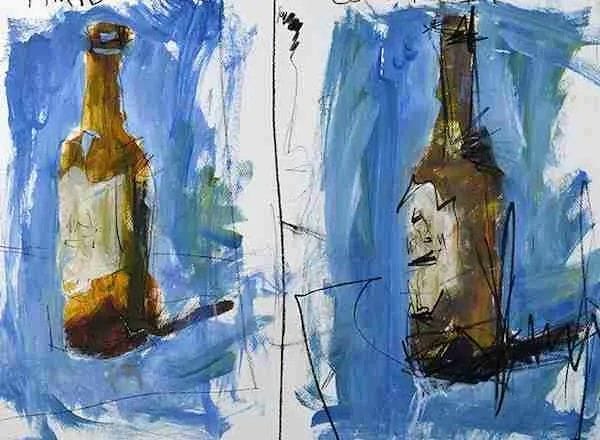
Step 4: Go Bigger with Confidence
This is where everything clicks together. You've built the skills in steps 1-3, now it's time to apply them with intentional boldness.
How to expand:
- Larger brushes - force yourself to work bigger brushes and surface area, maybe 11"x15"
- More complex subjects - like a bottle with a label and add form & cast shadows
- Bolder, arbitrary color choices - push beyond "realistic" colors and focus on the right values, not color matching
- Faster working pace - don't overthink every stroke, this is a great way to loosen up!
The garage studio approach: I teach my students to work in 5 and 10-minute sessions at this stage. Why? Because loose painting is about capturing energy, and energy fades if you overwork it.
What success looks like:
- Your paintings have life and movement
- Colors stay fresh (not muddy from overworking)
- You can feel the gesture in every brushstroke
- The painting captures the essence of your subject, not just its appearance
Why This Progression Actually Works
Most loose painting instruction fails because it skips the foundation work. They show you the end result - beautiful, expressive paintings - but don't show you the systematic approach to get there.
This 4-step method works because:
- Step 1 builds your structural understanding
- Step 2 teaches controlled risk-taking
- Step 3 develops your personal mark-making vocabulary
- Step 4 gives you the confidence to paint with real freedom
From 20+ years of teaching: Students who follow this progression develop sustainable loose painting skills. They're not just copying techniques - they're building their own expressive voice.
Want to see these techniques in action? Check out my full video demonstrations where I walk through each step with multiple subjects and mediums.
- Develop the right attitude to paint loose
- Don't focus on finished art, do this instead
- How to develop loose brushwork
- Garage Artist Color Theory for Painting Loose
Final Thoughts from the Garage Studio
Loose painting isn't about being sloppy or careless. It's about being selectively loose in service of expression. You tighten up where the painting needs control, and you loosen up where it needs energy.
That's the difference between loose painting and just making a mess with paint.
Ready to start your tight-to-loose journey? Pick up a brush, find a simple subject, and let's see what happens when you approach loose painting with a plan.
Keep painting loose,
Robert