18 Watercolor Drills That Free Up Your Brush
Watercolor isn’t about tricks — it’s about drills. These 18 techniques are your layups and free throws. Nail the fundamentals, then you’re free to hit the threes.


The story I’m about to share is exactly why you should crush these 18 watercolor drills before moving on. Here’s the drill — pun intended.
My son Jack fell in love with basketball this past summer. At first, he’d hit the gym and fire off half-court shots, fadeaways, and three-pointers. The problem? His form was off, his dribbling shaky, his balance inconsistent.
After a couple of weeks, I asked him, “Jack, is this just something to pass the time, or do you really want to be good at this?” He said, “I love basketball. I want to be great.”
That was the turning point. We started working on the drills: dribbling, shooting form, balance. It wasn’t glamorous, but those fundamentals transformed his game. My boy’s out there popping strings like a mini-Curry.
Watercolor is the same. You can’t skip the drills. These 18 techniques are the foundation that free you up later to paint loosely, expressively, and in your own style. Master these, and the game opens up.
🎥 Watch the video: I put together a 45-minute deep dive with all the essentials — no fluff, just the exact fundamentals you need to know.
18 watercolor techniques video
18 Watercolor Techniques
Washes & Foundations
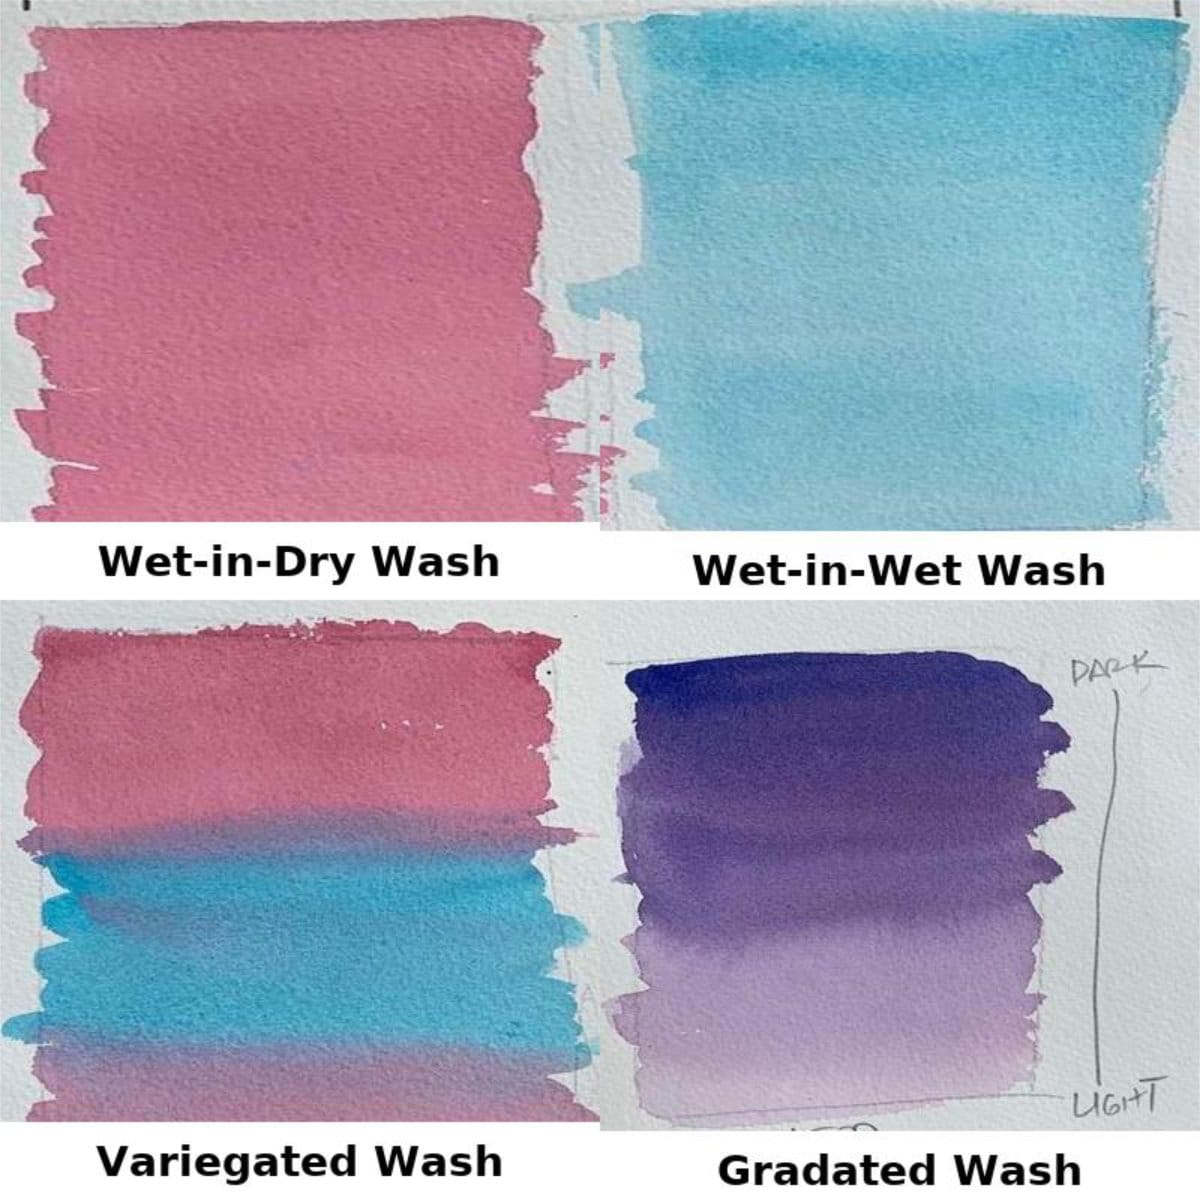
- Flat Wash (Wet-on-Dry) – Load your brush, tilt your board, and pull a consistent wash across dry paper.
- Flat Wash (Wet-on-Wet) – Pre-wet the surface first, then add color for softer, more fluid coverage.
- Graded Wash – Start dark and add water as you move downward to fade smoothly.
- Variegated Wash – Blend two or more colors into each other for a lively, shifting effect.
Here's a nugget for you! Check out the ultimate guide to wet-in-wet watercolor wash series, and the step-by-step wet-on-dry watercolor series. Seriously!!! You need to check this out if you want to master watercolor washes!
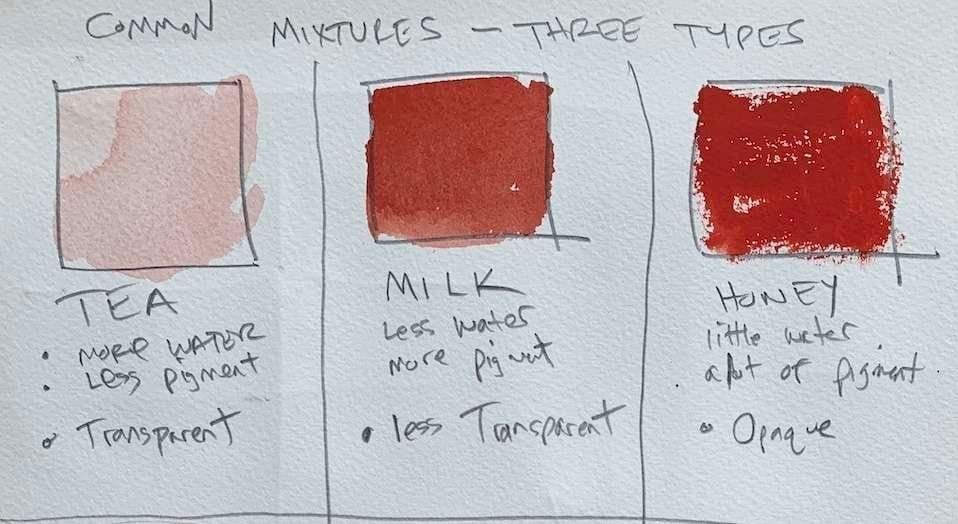
Paint Consistency (Tea, Milk, Honey)
- Tea Mixture – Thin, watery, transparent. Perfect for skies and light passages.
- Milk Mixture – Balanced water and pigment. Mid-value strokes with body.
- Honey Mixture – Thick, pigment-rich, opaque. Holds texture and leaves strong marks.
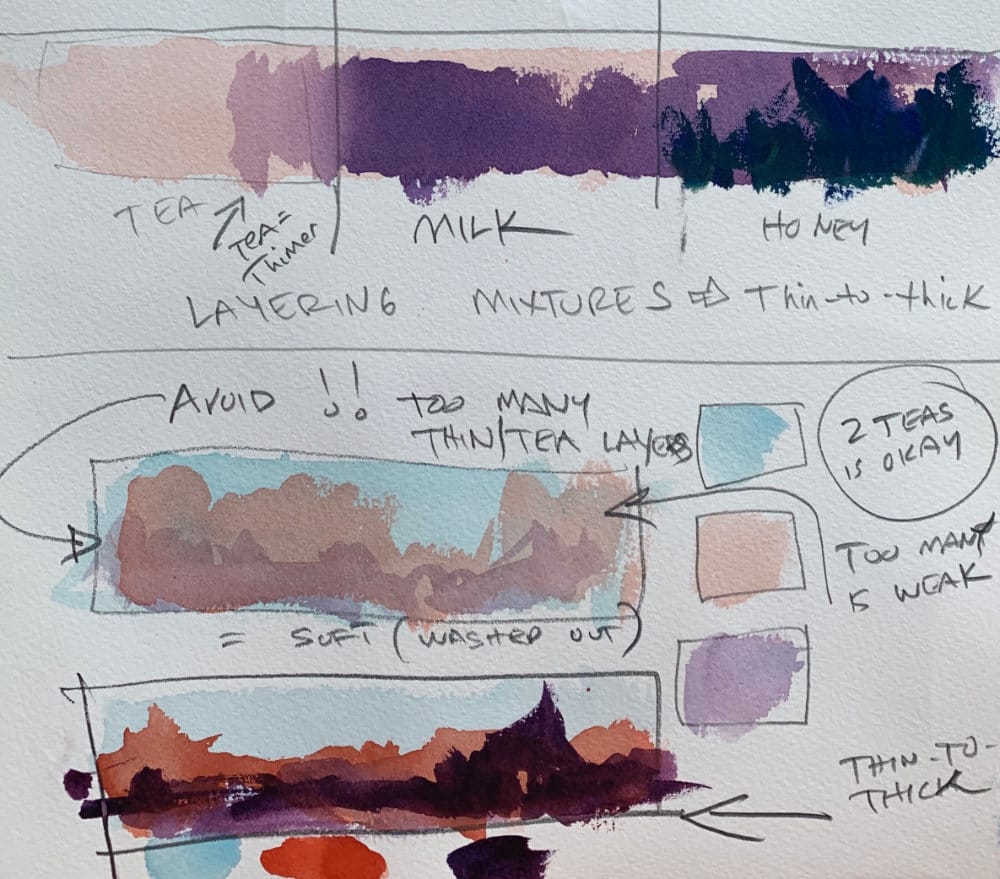
Building Layers & Values
- Light to Dark Progression – Always start light so you have room to add deeper values later.
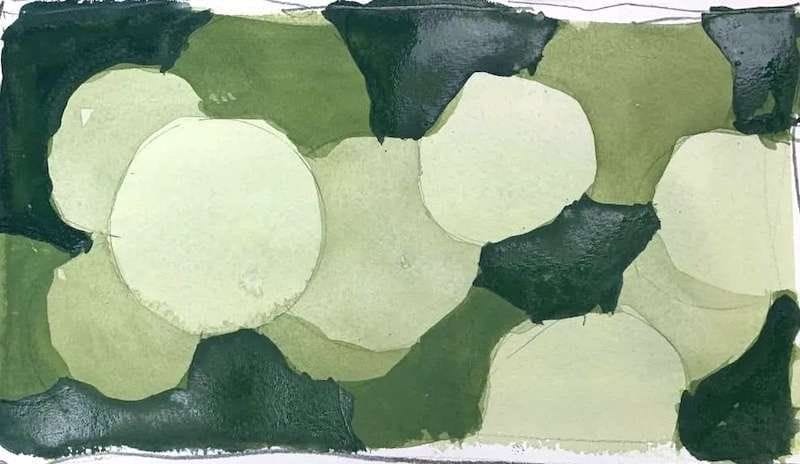
- Transparent Glazing – Stack multiple washes to build depth while keeping luminosity.
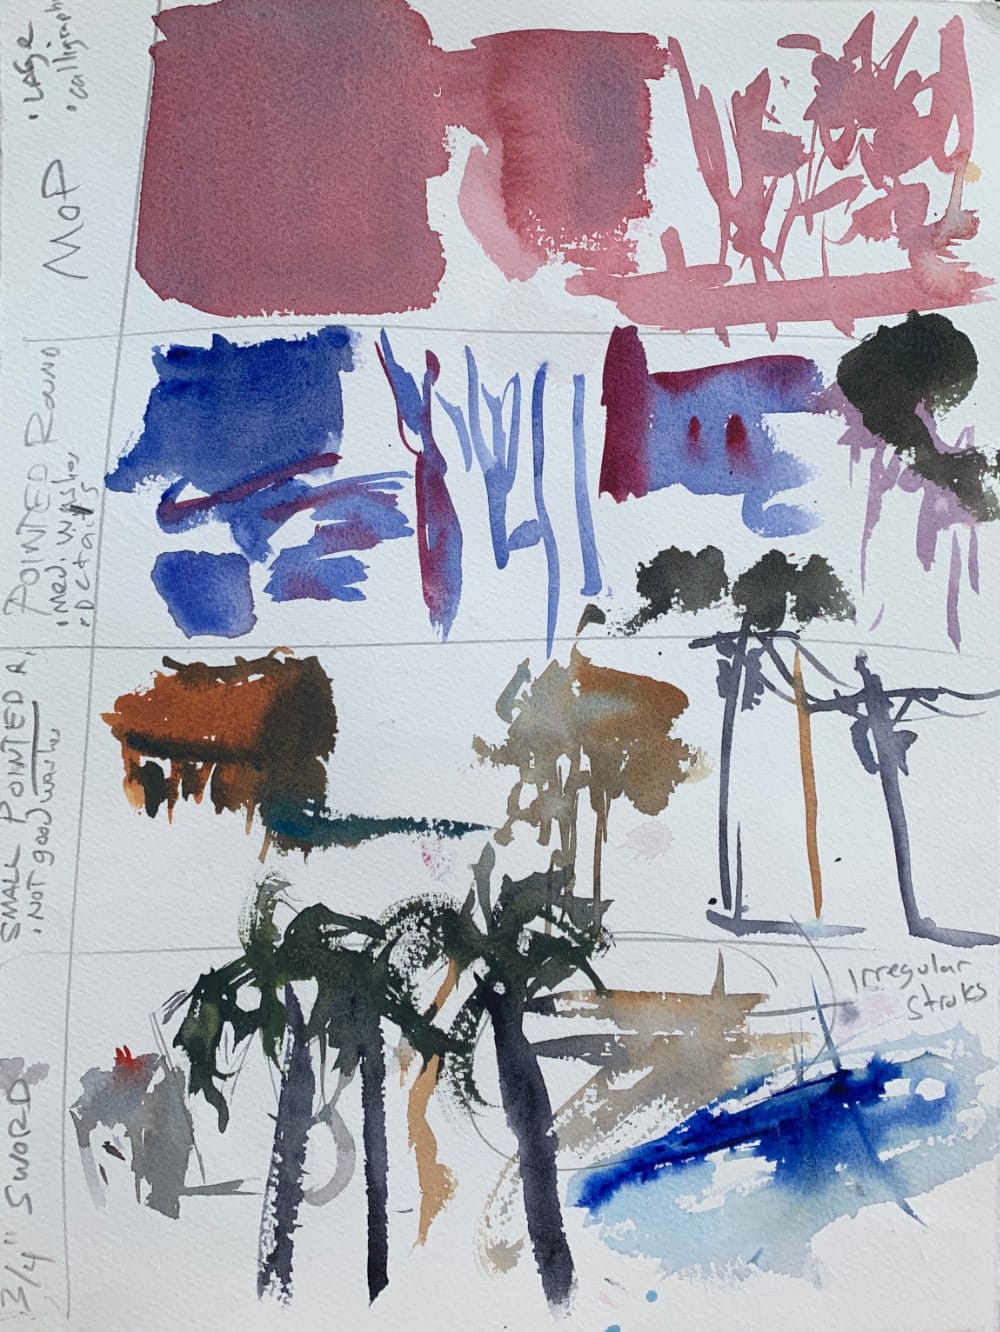
Brushwork & Control
- Large Mop Brush – Holds water, great for skies, but also versatile for textures and calligraphic marks.
- Round Brushes (#10, #4) – From broad strokes to fine detail — one brush can do more than you think.
- Sword Brush – Unpredictable lines and irregular strokes for energy and spontaneity.
Water Timing & Control
- Wet-on-Wet Timing – Adding paint while paper is wet leads to soft blends. Thinner mixtures dissolve more, thicker mixtures hold.
- Semi-Dry Timing – If a wash is 50% dry, thin paint risks blooms, but thicker mixes work fine.
- Dry Timing – On almost dry paper, expect hard edges and visible paper texture.
Odds & Ends
- Lifting – Remove paint with a damp brush or towel. Avoid overly wet brushes to prevent blooms.
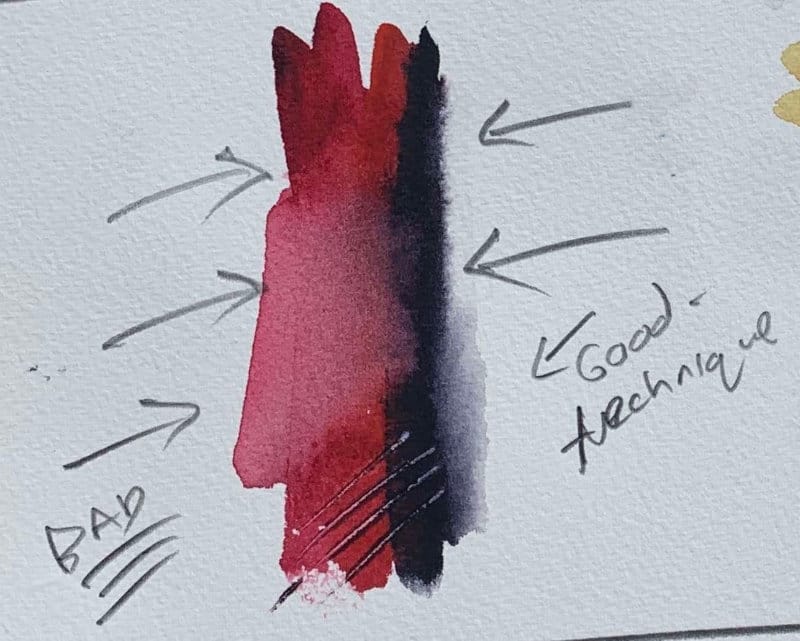
- Softening Edges – Touch a hard edge with a damp brush to transition smoothly.
- Scraping & Negative Space – Scratch lines for texture, or paint around an object (like tree trunks) so the subject emerges from the untouched paper.
Final Thoughts
Jack didn’t fall in love with drills — he fell in love with the game. But the drills gave him the freedom to play it well.
Watercolor techniques are the same. They may feel like practice, but each one is a stepping stone. Master these 18, and suddenly watercolor isn’t frustrating anymore — it’s expressive, loose, and alive.
Continue Learning
👉 Next stop: check out my Free Watercolor Painting Course or browse the Watercolor Tutorials Hub to keep building your skills.
👉 Follow me on Pinterest for daily watercolor inspiration!
If you enjoy these kinds of raw insights and loose watercolor demos, you’ll feel right at home here. Subscribe to Crafted by Robert and follow along as I share painting inspiration, tips, and behind-the-scenes stories straight from my garage studio. 👉 Subscribe to Crafted by Robert


