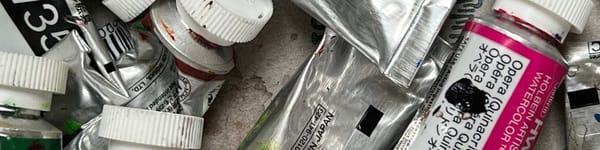
9 Practical Tips for Working with Watercolor Paint Tubes
Tube watercolors pack more punch than pans, but they’ll test your patience if you don’t know the tricks. Here are 9 real-world tips for opening, mixing, and storing them without the frustration.

Tube watercolors pack way more punch than pans — stronger color, better control, but they’ll also drive you nuts if you don’t know a few tricks. Here’s what I’ve learned the hard way in the garage studio.
1. Opening Tubes Without the Drama
New tubes fight back. Twist counterclockwise. If the cap’s locked on like Fort Knox, grab needle-nose pliers with a rag around the metal. Some brands seal the tops with foil or plastic — scrape that off first. Don’t force it or you’ll strip the threads.
2. Getting Paint Out Cleanly
Squeeze from the bottom like toothpaste. Roll it up as you go. Keep a damp rag nearby to wipe the nozzle every time — dried paint around the threads = a cap you’ll never open again.
3. How Much Paint to Squeeze
More than you think. Running out mid-mix is a nightmare. I load up enough for the whole session plus a little extra. Watercolor stays workable longer than you’d guess.
4. Mixing Technique
Always start with clean water on the brush, then grab color from your palette. Don’t stab your brush into the tube — you’ll waste paint and wreck the tip. Palette first, paper second.
5. Straight from the Tube?
Only for heavy texture or bold accents. Squeeze it onto the palette, then go for it. Never dip into the tube — that’s how you contaminate colors and shred brushes.
6. Keep Paint Workable
Spray bottle = lifesaver. A light mist over the palette keeps things from turning into cement, especially in dry studios or under hot lights.
7. Storage Reality
Upright in a box, caps tight, room temp. In the garage, bring them inside in winter — frozen tubes split and leak everywhere. Ask me how I know.
8. Reviving Dried Paint
Drop in water slowly and stir it back. Sometimes it works, sometimes it’s trash. Depends on the pigment and how long it’s been dead.
9. Cap Maintenance
Scrape dried paint off threads before it builds up. Fingernail, stiff brush — whatever works. Skip this step and you’ll be sawing the cap off with a hacksaw later.
👉 Bottom line: watercolor tubes are amazing once you figure out the quirks. Treat them right and they’ll keep you painting instead of fighting dried-up caps and busted tubes.
Continue Learning
👉 Next stop: the Watercolor Tutorials Hub to keep building your skills.
👉 Follow me on Pinterest for daily watercolor inspiration!
If you enjoy these kinds of raw insights and loose watercolor demos, you’ll feel right at home here. Subscribe to Crafted by Robert and follow along as I share painting inspiration, tips, and behind-the-scenes stories straight from my garage studio. 👉 Subscribe to Crafted by Robert
Here are the materials I use all the time and have for decades. I only buy from Blick Art but feel free to shop where you prefer.
Recommended Watercolor Materials
-
Holbein Professional Watercolor Paints – 8 Essential Hues
Yellow Ochre, Cadmium Lemon Yellow, Ultramarine Blue, Cerulean Blue, Alizarin Crimson, Cadmium Red Light, Neutral Tint, Burnt Sienna -
Fabriano Artistico Watercolor Paper – 140lb Cold Press
Buy full sheets and cut into quarter sheets for best value -
Silver Jumbo Wash Brush
Great coverage, excellent quality for the price -
Princeton Neptune Point Rounds (No. 12 & 6)
Reliable and affordable detail & wash brushes -
Princeton Neptune Dagger (1/2")
Versatile size for lines, edges, and detail work -
Masterson Aqua Pro Palette
Durable, with deep wells for generous mixing space -
Gator Board
Lightweight, long-lasting painting support board -
Holbein White Gouache
Optional for highlights and fine details - Miscellaneous: plastic water containers, paper towels, masking tape