Master Acrylic Painting with these 12 Beginner Techniques

Discover 12 beginner-friendly acrylic painting techniques in this tutorial. Explore the versatility of acrylics and unleash your creativity.

Master Acrylic Painting with these 12 Beginner Techniques

Discover 12 beginner-friendly acrylic painting techniques in this tutorial. Explore the versatility of acrylics and unleash your creativity. From basic to advanced methods, you’ll gain the skills to create stunning paintings of your own.

Discover 12 Essential Acrylic Techniques to Enhance Your Artwork

Acrylic painting techniques encompass a range of methods that allow you to unleash your creativity. While this article covers some fundamental techniques, it provides a solid foundation for you to explore and expand your skills in acrylic painting.

Applying acrylic with wet brush
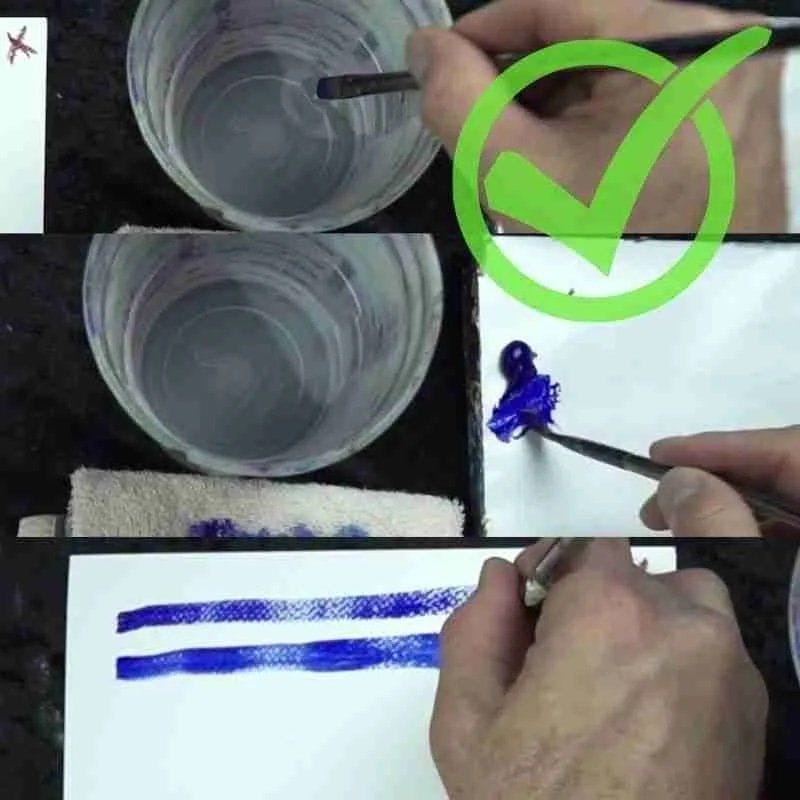
Always use water to thin paints

1: Embrace the Power of Water

The first technique, which is paramount when using artist-grade heavy body acrylics, involves utilizing water. Water serves multiple purposes, such as enhancing paint flow, preventing quick drying, and preserving color vibrancy.

Begin by adding water to your palette before adding paint. Acrylic paints dry rapidly, necessitating a swift working pace. To keep your colors clean and prevent them from drying out, keep a small cup of water on your palette for brush dipping during painting.

If your paint starts to dry out excessively, you can mist it with a spray bottle or add more water to your palette.

While water can be used to thin acrylics, be aware that it may diminish their opacity. To maintain opacity, consider incorporating an acrylic medium.

Acrylic mediums are additives that modify the paint’s properties when mixed with it. They include options for thinning paint without compromising opacity, as well as altering consistency, sheen, or drying time. Personally, I prefer the efficacy and cost-effectiveness of using water without additives.


Acrylic painting technique - blended gradation
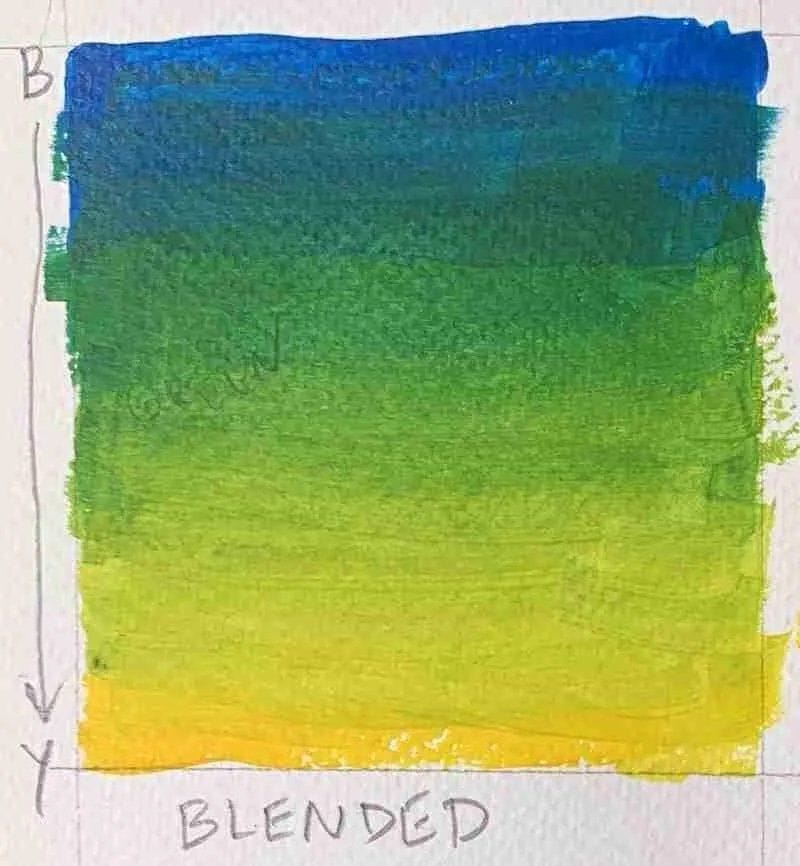
Blended gradations

2: Mastering Blended Gradations

Achieving a blended gradation involves applying two colors side by side and skillfully blending them with a brush.

To create a blended gradation, begin by applying one color to your canvas. Then, adjacent to it, apply another color. Utilize a wet brush to blend the two colors together until you achieve the desired effect.

Alternatively, you can apply both colors directly to your brush and blend them directly on the canvas. This method is slightly more advanced but entirely feasible.

As depicted in the illustration, the two colors seamlessly blend, resulting in smooth transitions. This technique is excellent for achieving harmonious color gradations.


Non-blended gradations acrylic technique
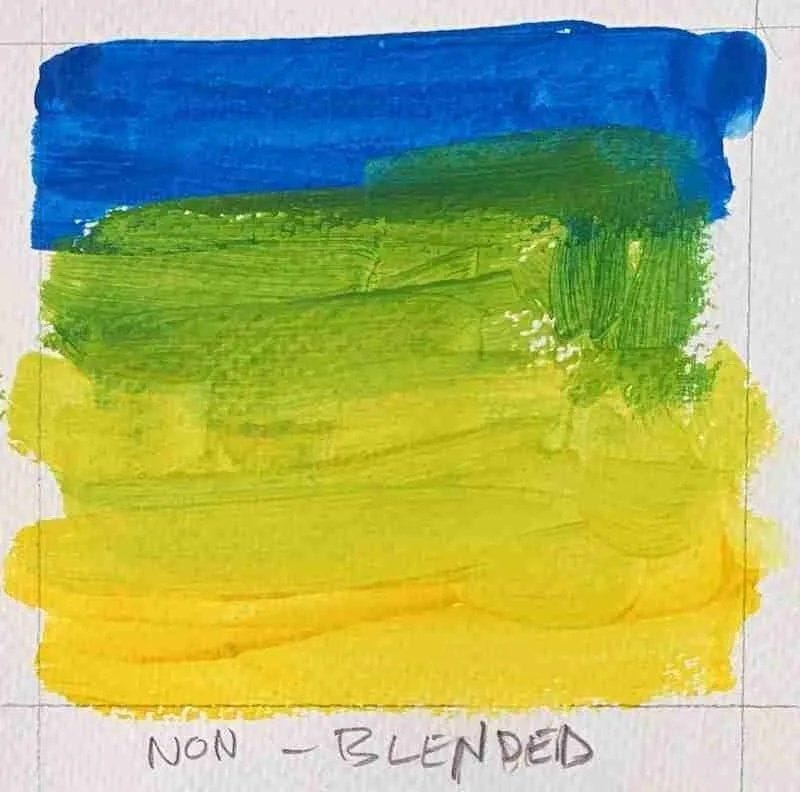
Non-blended gradations

3: Mastering Non-Blended Gradations

A non-blended gradation is achieved by applying two colors side by side and subtly blending them with a brush or palette knife.

To create a non-blended gradation, begin by applying one color to your canvas. Then, next to it, apply another color. Using a brush or palette knife, blend the two colors with only a few deliberate strokes.

Alternatively, you can apply both colors directly to your brush and blend them directly on the canvas. However, ensure you use only a few brushstrokes to avoid excessive blending.

As demonstrated, the two colors blend together while maintaining distinct areas. This technique is ideal for creating bold transitions between colors with a chunky appearance.


Mix on paper gradation acrylic technique
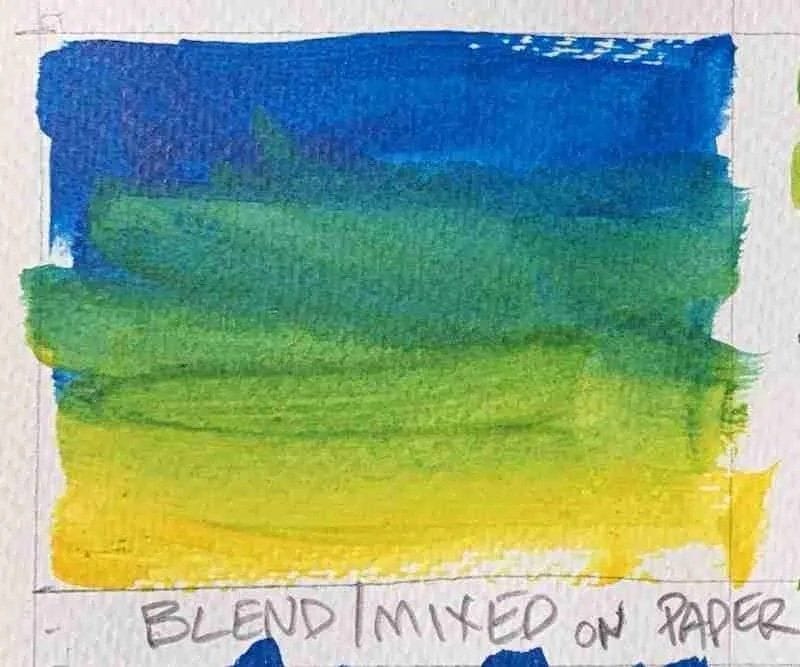
Mix on paper

3: Exploring Mix on Paper Gradations

A mix on paper gradation refers to the technique of blending colors directly on the canvas or paper surface, without pre-mixing them on the palette. This technique allows for spontaneous color blending and can be done using a wet or dry brush.

To achieve a mix on paper gradation, begin by applying one color to your canvas. Then, alongside it, apply another color. Using either a wet or dry brush, blend the two colors together until you achieve the desired effect. Experiment with different brush techniques and pressures to create unique gradations.

This technique offers a sense of immediacy and allows for intuitive color mixing directly on the painting surface. It can result in dynamic and unpredictable blends, adding an expressive quality to your artwork.


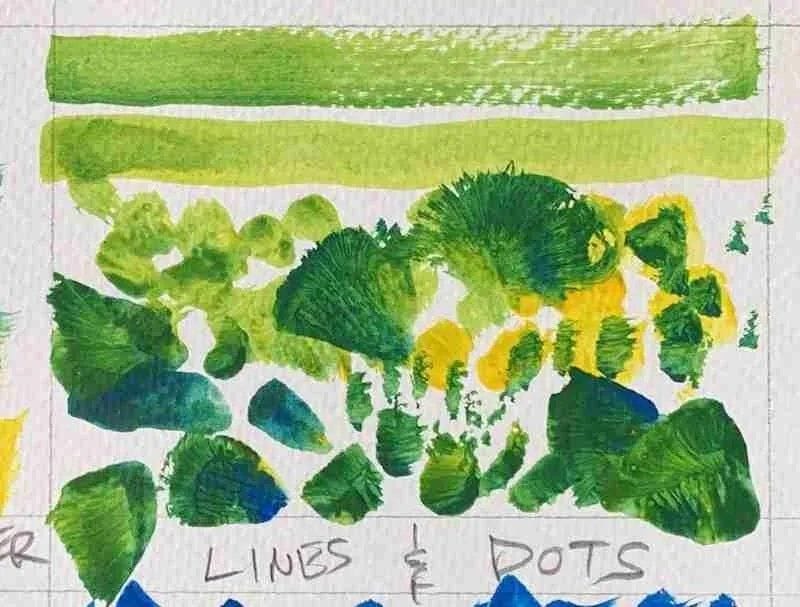
Lines and dots acrylic technique
Explore lines and dots

4: Exploring Lines and Dots

When it comes to making marks in your acrylic paintings, there are two fundamental options: lines and dots. These two simple techniques form the basis of every artwork you create.

Dots are made by lightly touching the paint to the surface and immediately lifting it. The size of the dots can vary, depending on the brush or palette knife size and the amount of paint loaded onto it. Experiment with different pressures and tools to achieve various dot sizes and textures.

Lines, on the other hand, are created by placing the brush onto the canvas and smoothly drawing it across the surface. The majority of your artwork will be composed of lines. Vary the thickness, direction, and length of your lines to add depth and movement to your compositions.

By mastering the art of creating lines and dots, you unlock a world of possibilities for expressing your creativity and bringing your acrylic paintings to life.


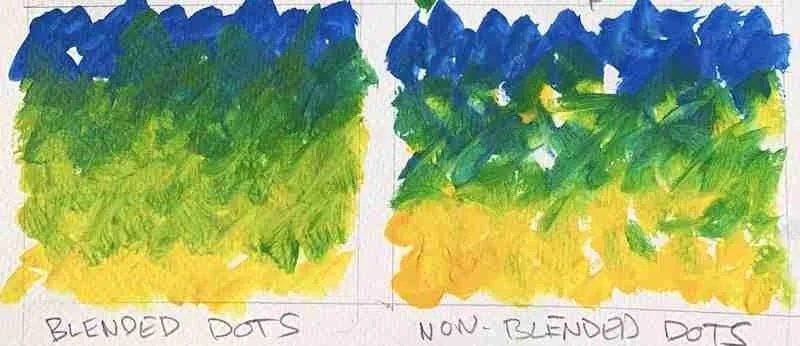
Blending with dots gradation acrylic technique
Explore line and dot gradations

5: Gradations with Lines and Dots

Building upon the techniques of lines and dots, we can create beautiful gradations by blending them together. This method is often associated with Impressionist art and continues to be a widely used technique in painting. The illustration demonstrates both types of gradations achieved through lines and dots.

To create a gradation using lines, start with a brush loaded with paint and make a series of parallel lines. Gradually decrease the pressure or paint intensity as you move across the canvas, resulting in a smooth transition of colors.

For dot gradations, begin by applying dots of different colors close to each other. Use a brush or palette knife to blend them together, gently overlapping and mixing the dots. This technique creates a soft and gradual shift in colors.

Experiment with these techniques to add depth, dimension, and visual interest to your acrylic paintings. Gradations achieved with lines and dots offer a unique and expressive approach to capturing light and form in your artwork.


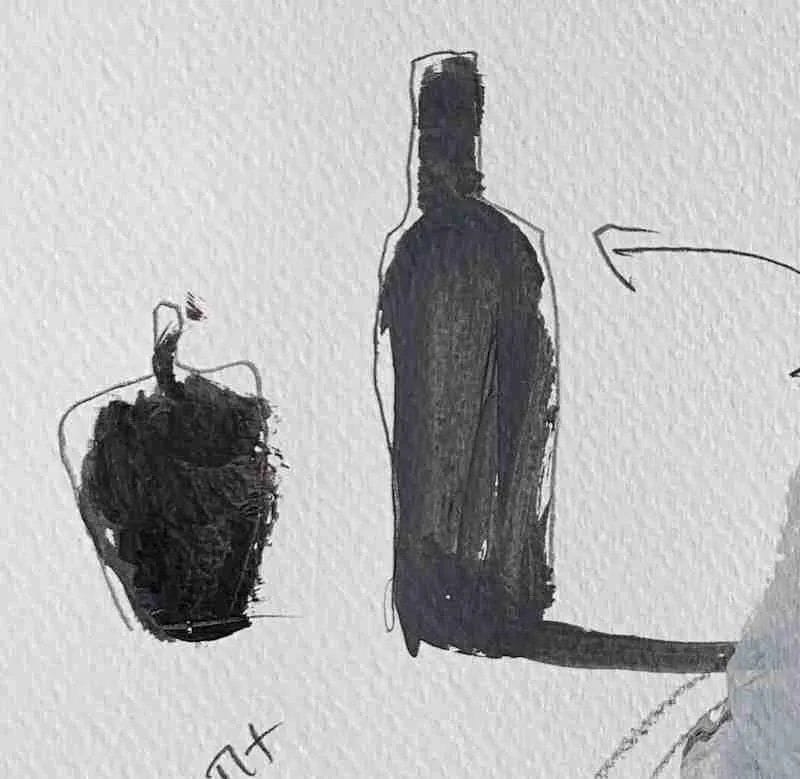
Positive space painting technique
Positive space example

6: Positive Space Painting

Positive space painting involves directing your focus on the subject matter itself, while leaving the surrounding space as the negative space, typically the background.

To create a positive space painting, select your subject, such as an apple and a bottle, and make them the main focus of your artwork. Leave the background untouched or minimally detailed to create a contrast between the subject and its surroundings.

Feel free to explore various color choices for your positive space painting. Starting with simple subjects is a great way to begin, gradually progressing to more complex ideas as you gain confidence and skill in this technique. Positive space painting allows you to emphasize the main elements of your artwork and create a visually striking composition.


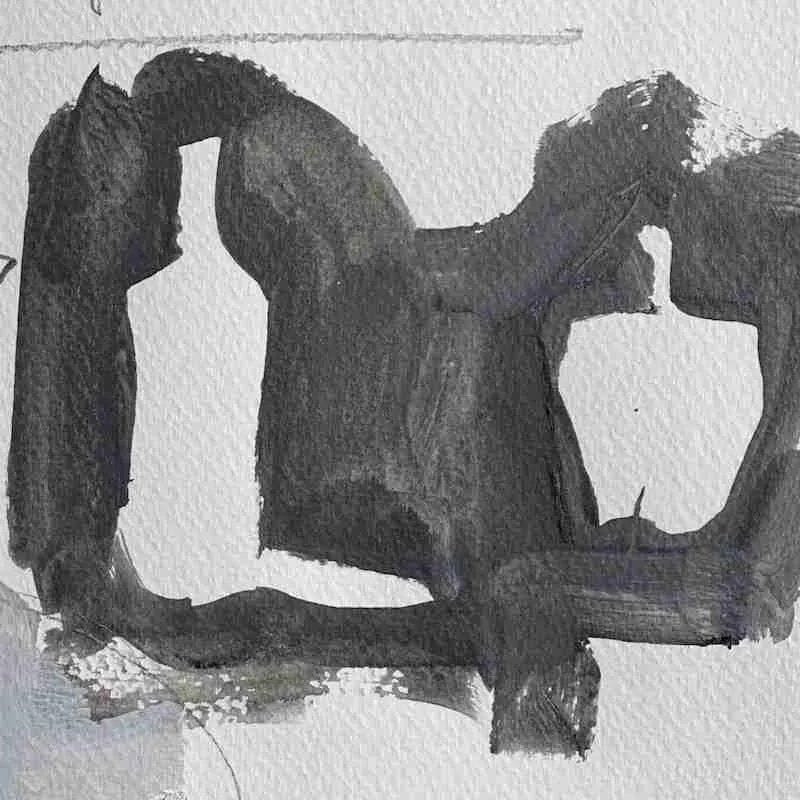
Negative space painting technique
Negative space example

7: Negative Space Painting

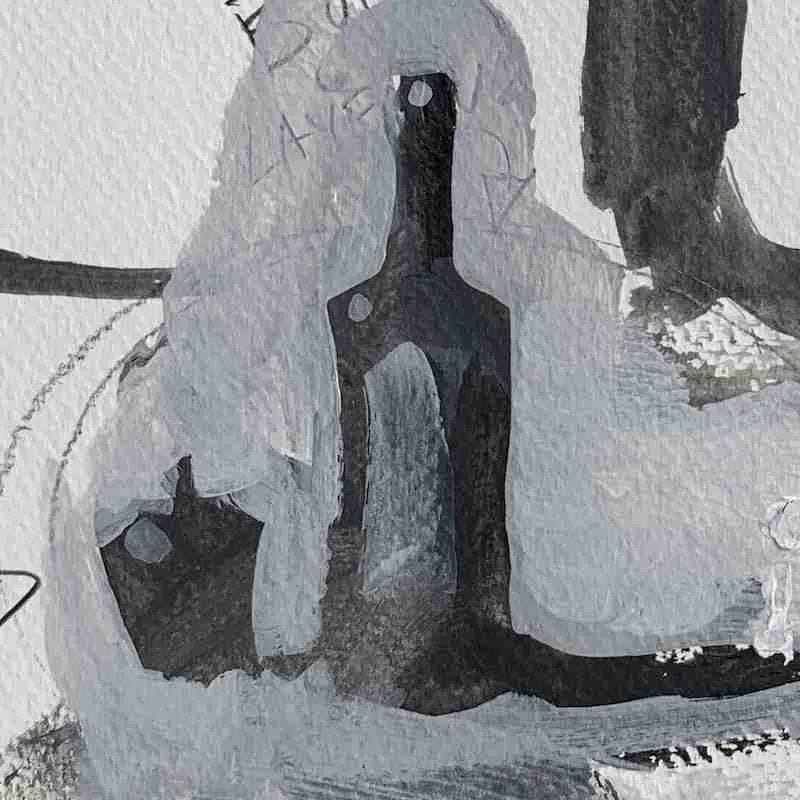
Negative space painting involves directing your focus on the background surrounding the subject matter, while leaving the subject as the positive space.

To create a negative space painting, shift your attention to the background and paint around the subject matter, leaving it unpainted or minimally detailed. In this technique, the subject becomes defined by the absence of paint, allowing the background to take center stage.

In the example painting, the background was emphasized, while the same apple and bottle were painted in black. This deliberate contrast between the subject matter and the background creates visual impact and adds intrigue to the artwork.

Exploring negative space painting provides an opportunity to experiment with different approaches and compositions. It allows you to play with the relationship between positive and negative spaces, creating unique and captivating artworks.


Layering acrylic technique
Layering example

8: Layering

Layering in acrylic painting involves applying one color layer over another to create depth and dimension in your artwork.

To begin layering, start with the lightest color and apply it to your canvas. Allow it to dry before adding the next layer. Apply the next darkest color over the previous layer, and continue this process until you achieve the desired effect.

When layering, it’s important to choose colors that complement each other to create harmonious blends. Experiment with different color combinations to achieve unique results.

In the provided example, a layered study was created by applying light colors over dark colors, showcasing the potential of this complex technique. Layering allows you to explore a wide range of subjects and add complexity to your paintings.


Separate light and shadow technique
Separate light and shadow

9: Light and Shadow Separation

Separating light and shadow is a technique that involves using different colors to distinguish between illuminated areas and shaded areas. This method adds depth and dimension to your painting and is sometimes referred to as “Notan.”

To apply this technique, begin by using your lightest color to paint the areas you want to appear illuminated. Next, use your darkest color to paint the areas you want to be in shadow. Blend the two colors together using a wet or dry brush until you achieve the desired effect.

When separating light and shadow, feel free to experiment with various color combinations that harmonize well together. In the provided example, pencil and paper were used, providing an accessible and easy way to explore this technique without the need for extensive cleanup.


Complex blended value gradation
Blend light and shadow

10: Blending Light and Shadow

Blending light and shadow is a technique that involves combining the previously discussed gradation techniques with the separation of light and shadows. The objective is to create a more natural and realistic transition of values, avoiding a rigid or stiff appearance seen in the separate light and shadow example.

By studying the image, you can observe the smooth blending of light and shadow separations, resulting in a seamless and harmonious transition. This technique adds depth and realism to your painting, enhancing its overall visual appeal.


Local color technique
Use local color

11: Capturing Local Colors

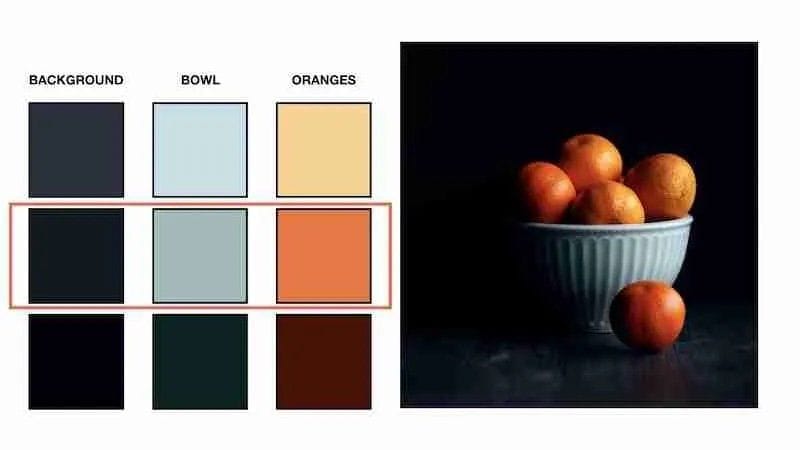
The technique of using local colors involves painting an object with the colors that naturally occur on that object. For instance, when painting an orange, you would use orange paint, and when painting an apple, you would use red paint.

To determine the local colors of an object, begin by observing the colors present in the well-lit areas. Select a hue that falls between the lightest and darkest tones, typically a middle value, to establish the local color.

Next, examine the mid-tones and apply the same approach. Similarly, consider the darker areas and apply the technique accordingly to capture the local colors accurately. By observing and replicating these colors, you can achieve a faithful representation of the object in your painting.


Local color gradation technique
Gradations with local colors

12: Gradations of Local Colors

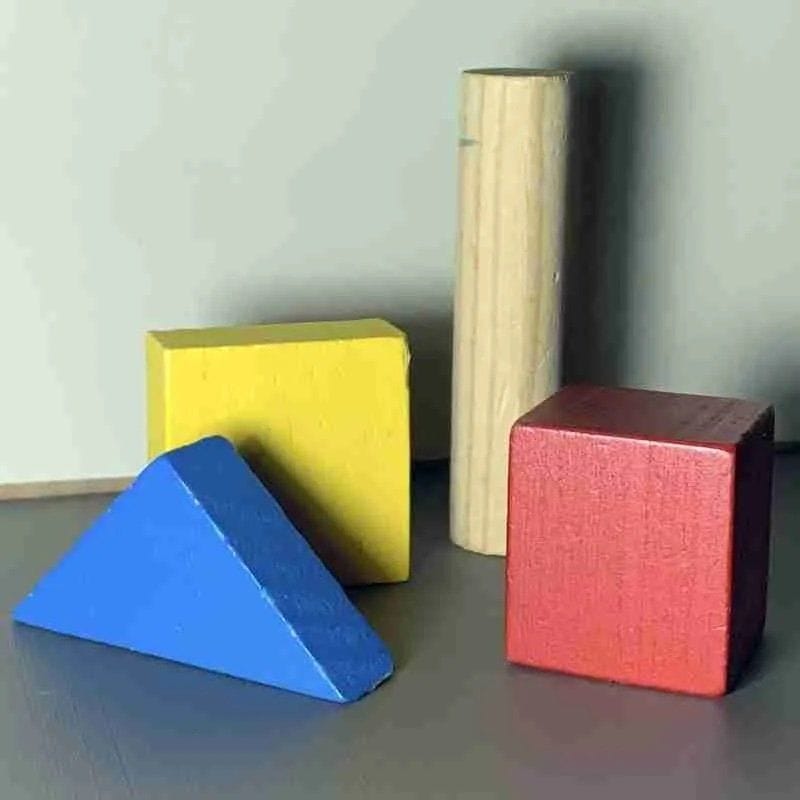
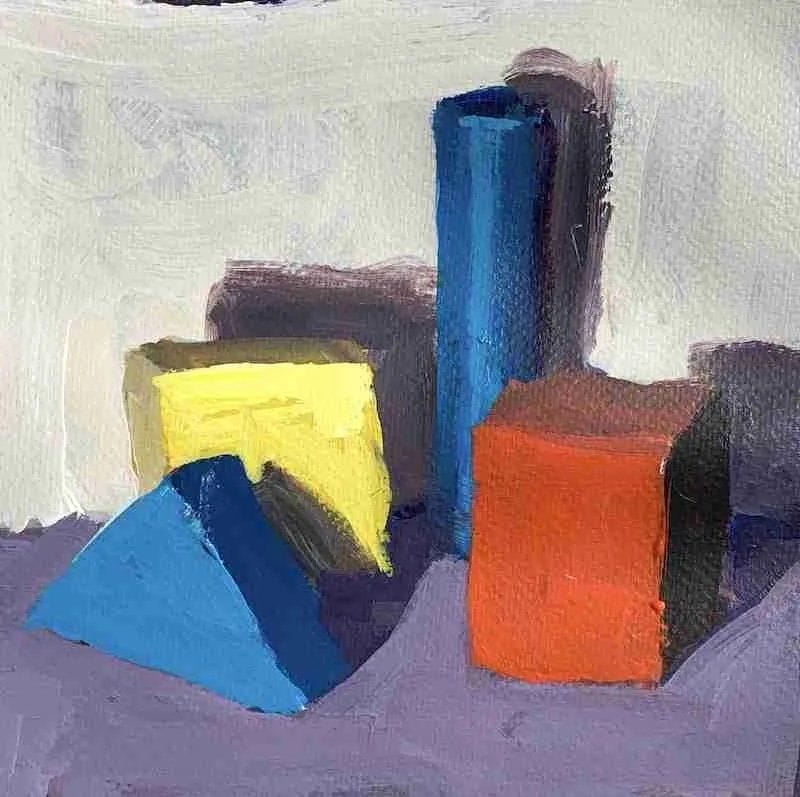
In this final technique, you bring together values, local colors, and gradations, incorporating everything we’ve discussed so far. The approach you take in blending the colors is up to you, as long as you maintain consistency. For a more realistic style, a blended gradation may be suitable, while a looser approach may involve using dots.

In the provided example, I utilized blended gradations, local colors, and other techniques to paint a simple block study, showcasing the effective combination of these elements in creating a cohesive and visually appealing artwork.

Let’s Explore Techniques Using Some Examples

Below are three paintings for you to observe closely. Take a moment to see if you can identify any acrylic techniques that have been discussed in this article. Hopefully, you can spot numerous techniques! Visual examples can be the perfect complement to understanding how to apply these techniques. Remember, recognizing them in action doesn’t imply mastery; it takes dedication and practice to truly excel.

💡
Painting with acrylics can be rewarding, easy and fun. It’s one of my favorite types of paint, because it is so versatile. Acrylics can be used in many different ways to create many different styles of art. – Source Art is Fun
Acrylic painting created with non-blended techniques
Non-blended gradations

Non-blended gradations in abstract still life

This abstract-style still life predominantly features non-blended gradations, resulting in a distinct “chunky” appearance. Pay attention to the subtle or possibly nonexistent separation of light and shadows, which contributes to the overall aesthetic of the painting. Despite this, the artwork is successful due to its strong composition and harmonious color scheme.

Lines and dots techniques
Explore lines and dots

Lines & dots technique

This painting serves as a wonderful illustration of how blending can be achieved through the use of lines and dots. Pay close attention to the sky, where you’ll notice the seamless blending achieved through linear strokes. Additionally, observe the middle ground, where the artwork showcases the deliberate use of dots.

Moreover, this painting demonstrates the effective application of separating light and shadows, along with some blended elements for added visual interest.

Five minute acrylic portrait
5 minute portraits

Expressive 5-minute abstract portrait

In this rapid portrait study, an abundance of local colors is employed alongside both blended and non-blended techniques. The emphasis is primarily on using lines, with minimal or no dots incorporated.

Sufficient separation of light and shadow is achieved, particularly noticeable in the eye sockets where a subtle transition to a darker hue is observed. The jacket, on the other hand, is rendered using just four or five bold lines, adding to the dynamic nature of the artwork.

Final Thoughts

In conclusion, I trust that this article has ignited your creativity and provided you with valuable insights into acrylic painting techniques. Remember, acrylics offer endless possibilities for artistic expression. Don’t hesitate to explore and discover your own unique style. With practice, your skills will continue to grow and flourish.

Wishing you joy and success in your painting endeavors!