Loose Rural Landscape in Watercolor - Let the Paint Do the Work
Control kills most watercolor landscapes. This red barn tutorial teaches the opposite - backing off and letting watercolor breathe. From Suffolk countryside experience.


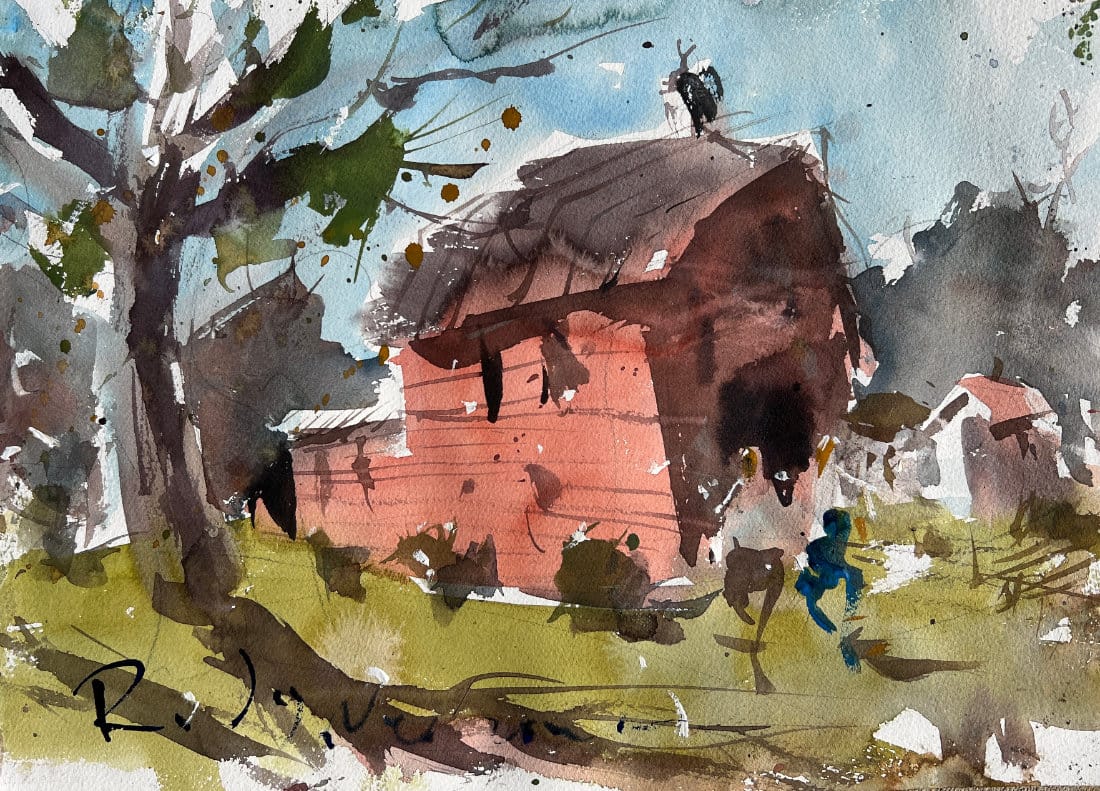
You know what kills most watercolor landscapes? Control. We get so hung up on making everything perfect that we squeeze the life right out of the watercolor. This red barn scene is about the opposite—backing off, letting the medium breathe, and seeing where it wants to take you.
My connection to rural art goes back to my years living in Suffolk, Virginia, where it seemed like there was a cow pasture and red barn at every stop sign. I even tried my hand at plein air painting there—burned through ten tanks of gas for two sketches and about a hundred mosquito bites. (That story’s for another post!)
👉 Want more step-by-step lessons? Visit the Watercolor Hub for tutorials and free courses.
🎥 Watch the video: Dive into the step-by-step tutorial below, then scroll down for the finished artwork and a full supply list.
Video demo
Start Simple, Stay Simple
I kick things off with a basic horizon line and rough in the barn structure. Nothing fancy - just a simple box that suggests perspective. The key here is not getting precious about proportions or copying every detail from your reference. Extract what matters, ditch what doesn't.
The barn goes in as a basic rectangle. Add a big tree for vertical interest, some background foliage, maybe a little path winding through. Toss in a couple of figures for scale. Simple as that.
First Wash Magic
Here's where the real watercolor happens. I grab my Princeton Neptune #8 and start laying in that first wash, leaving strategic white gaps for sparkle. Yellow ochre mixed with green covers most of the ground plane. Then I add some reds to break up all that green monotony.
This is the moment that separates tight painters from loose ones. You put the paint down, let it mingle and run and do its thing. Fight the urge to control every edge and blend. Watercolor wants to give you those happy accidents - let it.
The barn gets its first hit of color while everything's still damp. Colors bleed into each other, creating soft transitions you could never get by carefully painting up to edges. This is the magic hour of watercolor painting.
Bring Back Control Gradually
Once I hit everything with the hair dryer, I've got control back. Now I can start refining without destroying that loose foundation. The barn's sitting a bit too centered, so I'll balance it out with another building and maybe push some elements to create better composition.
Background trees go in with the Neptune dagger, dragging the brush sideways rather than using the point. This gives looser, more natural-looking foliage than trying to paint individual leaves.
Details That Don't Overwork
Shadows on the barn, some negative space painting around the figures, a few windows here and there. Each addition supports the whole without getting fussy. The figures get simple legs, basic shapes that suggest people without overpainting.
I'm using the "wrong" brush half the time and not bothering to change it. Sometimes the tool you've got is better than interrupting your flow to find the "perfect" one.
Finish with Restraint
Final touches are all about knowing when to stop. Few scratched highlights with the knife, some grass texture, basic shadows to ground everything. The goal isn't photorealism - it's capturing the feeling of a quiet rural moment.
The beauty of loose watercolor is in what you don't paint as much as what you do. Leave room for the viewer's imagination to fill in the gaps. That's where the real magic lives.
The Real Lesson
This isn't about copying my painting. It's about understanding the balance between control and letting go. Watercolor rewards the painter who can set things up well, then get out of the way and let the medium work.
Too much control kills spontaneity. Too little control creates mud. Finding that sweet spot - that's what makes loose watercolor sing.
Continue Learning
👉 Next stop: check out my Free Watercolor Painting Course or browse the Watercolor Tutorials Hub to keep building your skills.
👉 Follow me on Pinterest for daily watercolor inspiration!
If you enjoy these kinds of raw insights and loose watercolor demos, you’ll feel right at home here. Subscribe to Crafted by Robert and follow along as I share painting inspiration, tips, and behind-the-scenes stories straight from my garage studio. 👉 Subscribe to Crafted by Robert
Watercolor Toolbox
Here are the materials I use all the time and have for decades. I only buy from Blick Art but feel free to shop where you prefer.
Recommended Watercolor Materials
-
Holbein Professional Watercolor Paints – 8 Essential Hues
Yellow Ochre, Cadmium Lemon Yellow, Ultramarine Blue, Cerulean Blue, Alizarin Crimson, Cadmium Red Light, Neutral Tint, Burnt Sienna -
Fabriano Artistico Watercolor Paper – 140lb Cold Press
Buy full sheets and cut into quarter sheets for best value -
Silver Jumbo Wash Brush
Great coverage, excellent quality for the price -
Princeton Neptune Point Rounds (No. 12 & 6)
Reliable and affordable detail & wash brushes -
Princeton Neptune Dagger (1/2")
Versatile size for lines, edges, and detail work -
Masterson Aqua Pro Palette
Durable, with deep wells for generous mixing space -
Gator Board
Lightweight, long-lasting painting support board -
Holbein White Gouache
Optional for highlights and fine details - Miscellaneous: plastic water containers, paper towels, masking tape
This post contains affiliate links. If you make a purchase through these links, I may earn a commission at no extra cost to you.


