Beginner’s Guide to Linear and Atmospheric Perspective
Most beginner landscapes look flat because they ignore perspective. Here’s how I use linear and atmospheric perspective in the garage studio to add depth and space to every acrylic landscape.


Most beginner landscapes fall flat because they ignore perspective. If everything has the same intensity, size, and sharpness, it looks like cardboard cutouts. To fix that, you’ve got two tools: linear perspective and atmospheric perspective.
These are the foundational skills in landscape painting. They take time to understand, and even longer to master on canvas. Be patient, stay relentless, and don’t skip the hard stuff — it pays off.
If you’re brand new, you can start at the Acrylic Hub — it’s got all the free courses and guides in one place.
What They Are
- Atmospheric perspective → Things in the distance lose punch. Colors get lighter, edges soften, saturation drops. That’s why mountains look hazy and skies fade near the horizon.
- Linear perspective → Converging lines that lead the eye. Roads, barns, fences, clouds, even fields—they all line up and point you into the painting.
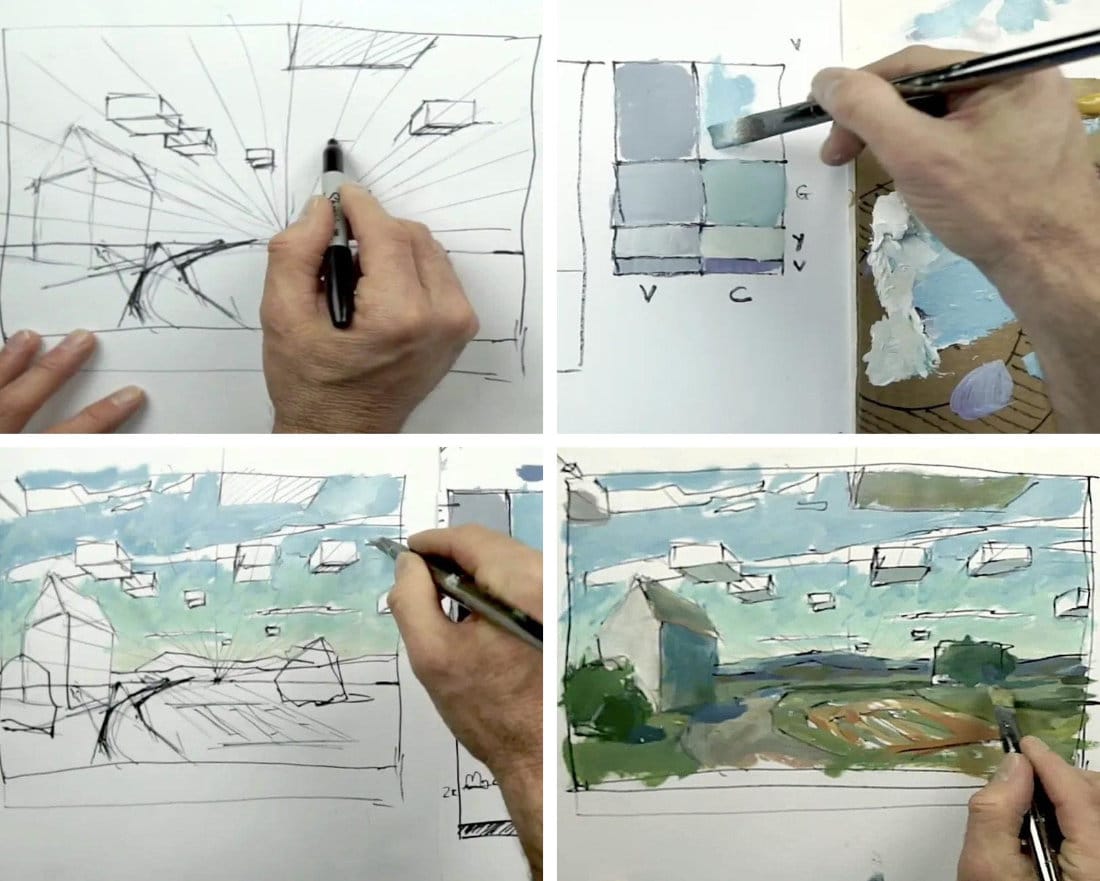
Step One: Set the Stage
Start with a horizon line. Mark a vanishing point. That’s your anchor. Every big element—roads, barns, powerlines—will angle back to that point. Even clouds can follow it.
Step Two: Sky Work
I block in skies with a quick gradation chart. Lighter near the horizon, darker up top. Sometimes I throw in a bit of yellow ochre near the base just to warm it up. Clouds follow the vanishing point—bigger and sharper up front, smaller and softer as they drift back.
Step Three: Ground and Structures
The same vanishing point that guides the clouds also drives the barn, the road, the fences. Don’t overthink it—just keep those angles consistent.
For atmosphere:
- Foreground = darker, richer color.
- Distance = lighter, washed-out tones.
Mix accordingly. Titanium white lightens, complements knock values down without muddying.

Step Four: Evaluate and Adjust
After blocking in, I step back and look. Something too sharp in the distance? Knock it down. Foreground needs more punch? Push the color. This back-and-forth is where the painting comes alive.
Final Thoughts
Perspective isn’t about rulers and perfect math. It’s about tricking the eye so your painting breathes depth and space. Linear perspective pulls the viewer in, atmospheric perspective keeps it believable. Together, they stop your landscapes from looking flat and lifeless.
Learn & Improve Your Acrylic Skills
- Acrylic Hub– Your go-to guide for tutorials, tips, and resources.
- Subscribe for More Great Content - Get tutorials, tips, and updates straight to your inbox.
- Follow Me on Pinterest - Daily inspiration, tips, and fresh ideas.