Beginner Guide to Negative Space Drawing Techniques
Negative space drawing is like pulling weeds — not glamorous, but essential. In this beginner guide, learn simple exercises that clear away clutter, sharpen observation, and keep your drawing skills fresh.

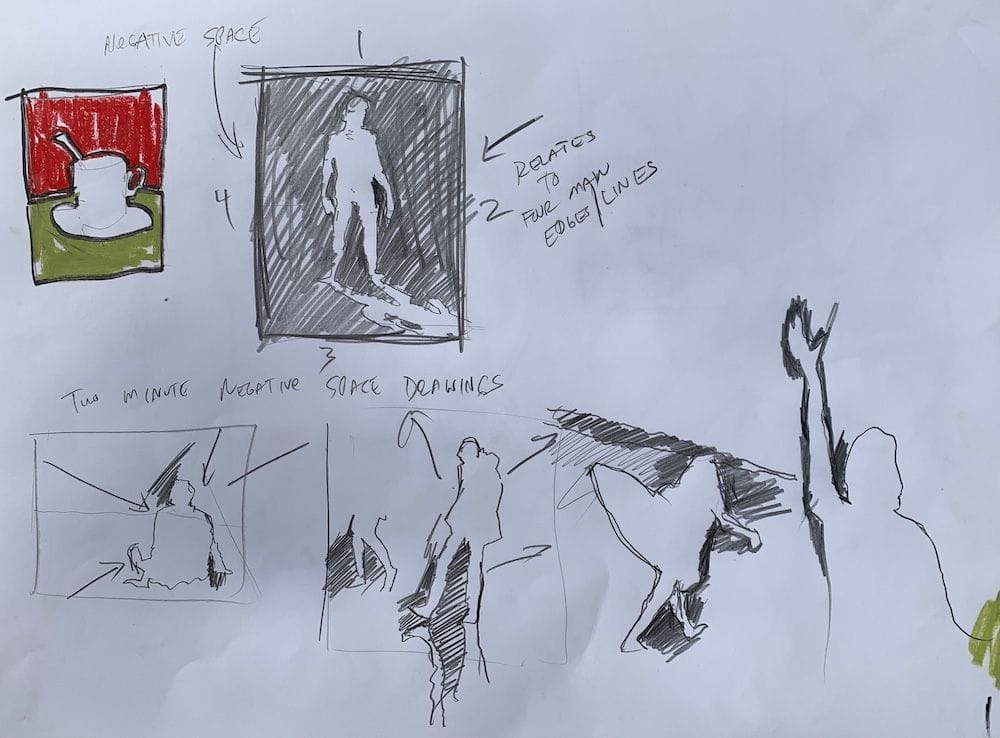
Negative space drawing is one of the best beginner exercises to improve your art. Think of it like pulling weeds. If you don’t maintain your flower beds, weeds creep in and cover the blooms. In drawing, the “weeds” show up as stiff lines, poor proportions, or symbol-like shortcuts. To keep your skills fresh and sharp, you have to tend them regularly.
That’s where drawing exercises come in. Contour, semi-blind contour, upside-down drawing, and especially negative space drawing — these drills are like grabbing a spade and clearing the bed. They might not look glamorous, but they keep your fundamentals solid and your creativity free to grow.
In this beginner guide, you’ll learn:
- What negative space drawing is (and why it works)
- Step-by-step exercises to sharpen observation
- How this practice improves accuracy and proportion
- Ways to keep your drawing skills “weed-free”
Want more drawing tips? Visit the Free Drawing Tutorials & Courses hub →
Step 1 – What Is Negative Space?
In drawing, positive space is the object itself. Negative space is everything around and between the object — the gaps, backgrounds, and silhouettes. By drawing those empty shapes, you bypass your brain’s habit of symbol-drawing and start to see reality more clearly.
👉 Benefit: Helps you capture what’s actually there instead of what you think you see.
Step 2 – Start with Simple Subjects
Choose an everyday object like a chair, bottle, or plant. Instead of sketching the object, focus on the air shapes around it. Outline the spaces between chair legs, the slice under a handle, or the silhouette gap beside a bottle.
👉 Benefit: Simplifies complex objects and makes proportion easier to judge.
Step 3 – Pay Attention to Gaps & Silhouettes
Negative space drawing shines in the in-between areas — the shapes you’d normally ignore. Study the cut-outs, overlaps, and background edges, and use them as anchors to build accuracy.
👉 Benefit: These overlooked shapes act as natural measuring guides.
Step 4 – Compare Positive vs. Negative Balance
Once your negative shapes are in place, step back and compare them to the object. If the negative space looks wrong, the positive space is wrong too. Use this comparison as a quick self-check.
👉 Benefit: Negative space is like a built-in correction tool that keeps your proportions honest.
Step 5 – Make It Part of Your Routine
Don’t treat this as a one-time trick. Mix it into your regular drawing warm-ups:
- 2–3 minute negative space sketches before longer studies
- Switch between drawing the object and the space around it
- Combine with contour exercises for even sharper observation
👉 Benefit: Builds long-term discipline and keeps your fundamentals sharp, just like regular weeding keeps a garden beautiful.

Why Negative Space Drawing Works
This simple exercise trains you to:
- See shapes abstractly, not symbolically
- Improve proportion and accuracy
- Strengthen observation skills
- Break down complex scenes into manageable forms
It’s one of the fastest ways to improve your drawing skills because it retrains your eye to notice what you normally overlook.
Motivational Reminder
Like pulling weeds, it’s never really “done.” Negative space drawing may feel odd at first, but every time you practice, you clear away the clutter. With consistent effort, your drawings become clearer, stronger, and more expressive.
Next Steps
Add negative space sketches to your practice routine, then explore more beginner-friendly lessons:
👉 Semi-Blind Contour Drawing →
👉 How to Draw a Coffee Cup →
👉 How to Draw a Hammer →
👉 Or return to the Free Beginner Drawing Course