Learn Contour Drawing: Tutorial + 3 Live Blind Contour Examples
I'm about to do something that seems completely backwards – draw three subjects without ever looking at my paper. The results will look 'messy,' but they'll teach you more about seeing and drawing than years of careful, controlled sketches.

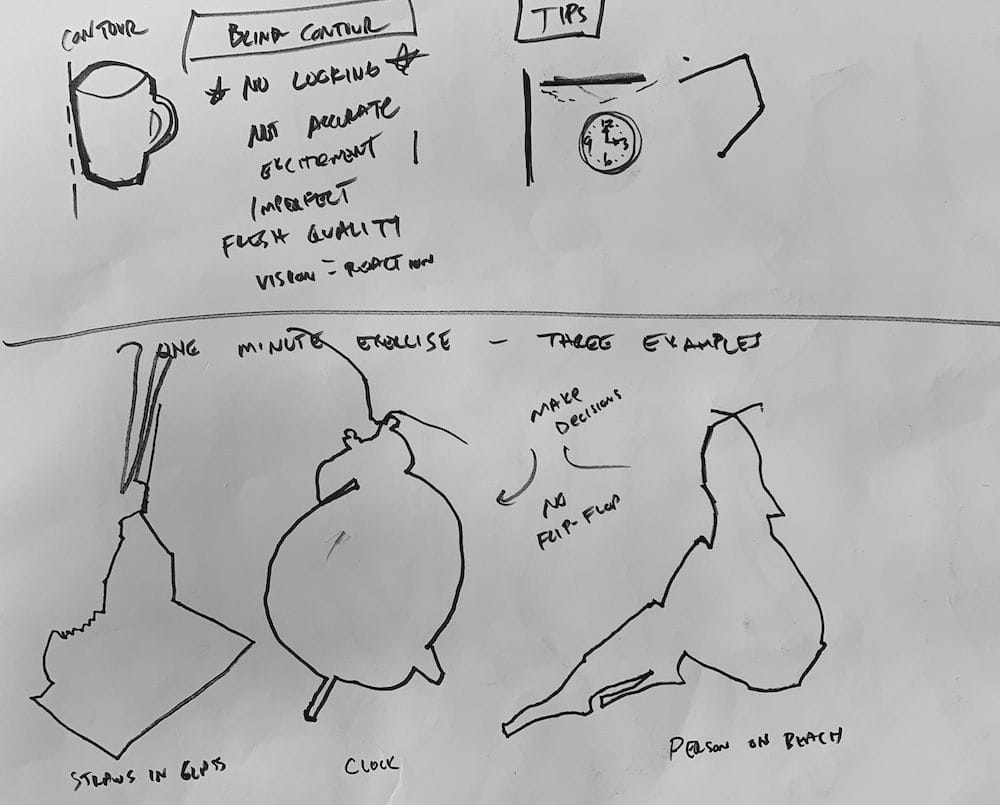
Drawing what you see instead of what you think you know – sounds simple, right? Yet it's one of the biggest challenges artists face. That's exactly why blind contour drawing is such a game-changing exercise, and today I'm going to show you exactly how it works with three live demonstrations.
What Is Contour Drawing?
Let me start with the basics. Contour drawing focuses only on the outer edge of your subject – think of it as the silhouette or outline. When I demonstrate this with a simple coffee cup, I take a Sharpie and trace around just the outside edges. The inside lip of the coffee cup? Not necessary. We only need what's on the outside.
This might seem overly simple, but here's where it gets interesting.
The Magic of Blind Contour Drawing
In blind contour drawing, you never look at your page. You're only focusing on looking at your subject. I know what you're thinking – "But it won't be accurate!" And you're absolutely right. However, there's some real excitement in the results, and that's exactly what we want to learn from.
Here's why this "backwards" approach works so well:
When you're looking at the artwork you're creating, your brain takes over and you miss all the subtle details. You end up drawing what you already know versus what you're actually seeing. The blind contour forces you to really observe and react to what's in front of you.
Three Essential Tips for Better Blind Contours
Tip 1: Compare Everything to Vertical and Horizontal Lines Look at that coffee cup again. If I draw a vertical line next to it, you can see the angle of the cup moves away slightly from top to bottom. If I draw a horizontal line across the bottom, notice how much the curve contrasts with that straight line. These comparisons give you reference points for accuracy.
Tip 2: Use the Clock Method Think of a clock hand pointing at different numbers. Is that line heading toward 12? Maybe 3? Or somewhere between 6 and 7? This simple visualization helps you nail those tricky angles.
Tip 3: Don't Peek – Ever I've done this exercise in live workshops countless times, and students always try to cheat. Don't do it! This needs to be an honest reaction to what you're seeing. You're training your eyes to see and trusting that your hand and brain can recreate curves and angles without looking.

Live Demo: Three One-Minute Blind Contours
Let me show you exactly how this works with three different subjects.
Demo 1: Simple Still Life My first subject is a glass with a straw, some parsley, and a napkin. As I draw (timer running), I'm asking myself: Is this horizontal? Is it moving toward 11 o'clock? Is there a curve or is it straight? What angle are the straws moving?
The result? I can see the jagged edges of the parsley, the angles of the jar – it has a fresh, honest quality that captures something essential about the subject.
Demo 2: Adding Complexity For the second drawing, I'm focusing on a small object with a handle. Again, I'm constantly asking: Is that handle perfectly horizontal or does it move at an angle? The key is following that same analytical thinking all the way through without ever looking down.
Demo 3: The Challenge – Drawing People The third demo gets challenging because many of us tighten up when drawing people. As I work, I'm thinking: Here's the knee – is it coming down toward 6 o'clock? Between 6 and 7? How does that compare to horizontal and vertical?
What You're Really Getting From This Exercise
The drawings themselves are only half of what you're gaining here. The real value is in taking time to truly see your subject. You're developing your observational skills and hand-eye coordination in ways that looking back and forth between subject and paper simply can't match.
Will your blind contours look like finished drawings? Absolutely not. But they'll have a truth and energy to them that's often more representational than careful, controlled drawings.
Why "Messy" Results Are Actually Progress
Here's something that might surprise you: when you really analyze the angles in your blind contour drawings, you'll probably notice they have a more accurate representational quality than if you were looking at the page while drawing.
That's because you're responding to what you actually see rather than what your brain thinks should be there.
Start Your Own Blind Contour Practice
Ready to try this yourself? Here's what you need:
- Any drawing tool (pencil, pen, marker)
- Paper
- A simple subject to start with
- A timer (1-3 minutes works great)
- The commitment to NOT look at your paper
Remember: compare everything to vertical and horizontal lines, use the clock method for angles, and trust the process even when it feels uncomfortable.
Your first attempts might feel awkward, but that discomfort means you're learning. You're training your eyes to see and your hand to respond honestly to what's in front of you.
That's the real magic of blind contour drawing – it's not about creating pretty pictures. It's about developing the fundamental skill that underlies all great drawing: the ability to truly see.
Continue Learning
If you enjoyed this hand drawing course, explore even more lessons on our Free Drawing Tutorials & Courses Hub — including the complete How to Draw – Beginner’s Course.
Want new tutorials delivered to your inbox? Subscribe here and get free lessons, tips, and inspiration sent directly to you.
Want to dive deeper into drawing fundamentals? Check out my free drawing resources and see how exercises like this can transform your entire approach to art.